Top Face Products Overall!

Hi lovelies!

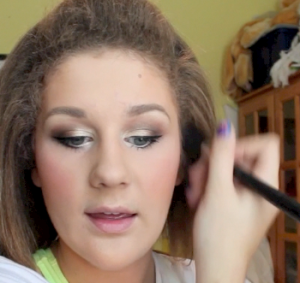
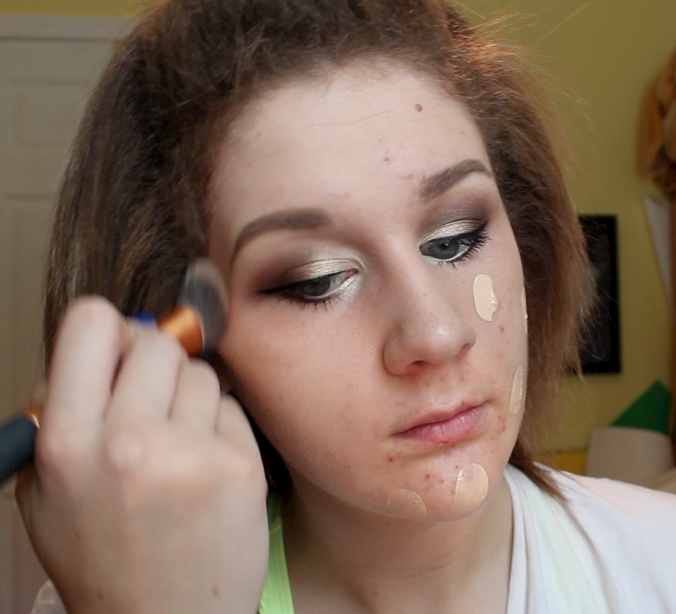
So today, as promised, I’m going to be comparing my High End and Drugstore favorite face products. These, again, are my most-used products. I hope this helps you out! Again, I’m not saying any of these products are bad if they’re not my top favorite, I use all of these products. I’m just telling you what I prefer. Let’s jump right in.

CORRESPONDING VIDEO:http://youtu.be/6vmPVGRD5Z0

First, I mentioned primer. From the drugstore, my favorite is the L’Oreal Magic Perfecting Base. From a high-end brand, my favorite is the Smashbox Photo Finish Light.

ImageImage

Both of these products are truly great, however, my absolute favorite has to be the Smashbox Primer. Not to mention they have a primer for every skin issue, but this primer feels lightweight and controls my oil a bit better. $36, Sephora

For BB Cream, from the drugstore I chose the Physicians Formula Super BB Cream. The High End one I chose is the Smashbox Photo Finish BB Cream.

ImageImage

My favorite in this case is definitely the Physicians Formula BB Cream. I feel like this product provides more coverage, is longer lasting, and doesn’t get splotchy as the smashbox one tends to. $13, Target

For Foundation, from the drugstore I chose the Revlon Colorstay Whipped. From a high end brand, I chose the Clinique Acne Solutions.

ImageImage

I actually could not choose between these foundations. They are very different, but I am in love with both. The Revlon one provides fuller coverage, is longer lasting, and completely controls my oil. The clinique one treats my Acne and gives me a flawless finish, as both do. They are both truly great products. AS: $27, Clinique.   CSW: $13, Revlon

For setting powder, from the drugstore I love the Rimmel Stay Matte Powder, and for a high end powder, I love the MAC Mineralize Skinfinish Natural.

ImageImage

Overall, these products are so SO SO SO SO similar. The MAC one may have a bit better staying power, but honestly, they’re basically the same. MAC Mineralize skinfinish Natural FINALLY has a dupe!  $30, MAC  .  $4, Target (Rimmel)

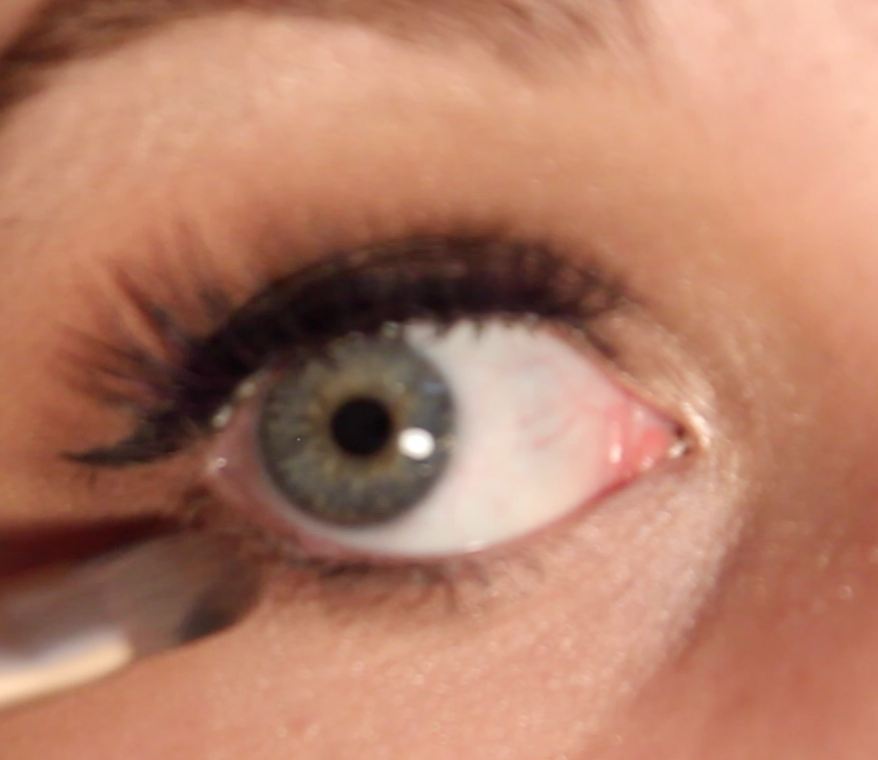
For Concealer, From the drugstore I love the Maybelline Dream Lumi Touche in Radiant, and a high end brand favorite of mine is the MAC ProLongwear concealer.ImageImage

If you have anything that needs coverage, I HIGHLY recommend the Mac concealer. It offers great coverage, doesn’t crease, and stays PUT! I love this product. The Maybelline concealer is great for highlighting dark areas, but not completely concealing everything.  $18, MAC.   $8, Target

For Bronzing and contouring: Drugstore: L’Oreal True Match Mahogany. High End: Clinique True Bronze and Benefit Hoolah Bronzer.

Image

ImageImage

I really can’t choose…. For a do-it-all, go with the L’Oreal. For strictly Bronzing, go with Clinique. For strictly contouring, go with the Benefit!

L:$10, Target       C:$25, Clinique      B:$28, Sephora

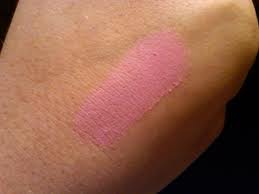
For cream blush, from the drugstpre I love the Maybelline Bouncy blushes, and from Sephora I love their cream blush (my favorite is the color poppy pink!)

ImageImage

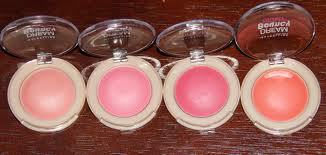
Honestly, I’m going to have to go with the maybelline solely because you can truly build the amount of product. These are both so great, but the mayebelline is a bit more dry, easier to apply, and offers build-able coverage. $6, Target

For powder blushes, from the drugstore I love the NYX blushes, and from a high end brand, I love the Stila Custom Color Blushes.

ImageImage

This really depends on color selection. Stila has both a very unique pink and coral blush in this formulation, but NYX has a WHOLE line of colors to choose from. These are both awesome products. NYX:$6, Ulta.     Stila: $20, Sephora

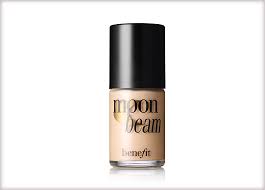
For Highlighters, from the drugstore I love the L’oreal magic lumi primer, and from a high end brand I love the Benefit Liquid highlighters.

ImageImageImageImage

Although I love both lines, My favorite are the Benefit highlighters. I feel like each color gives such a natural, pretty glow that lasts all day long. $26, Sephora

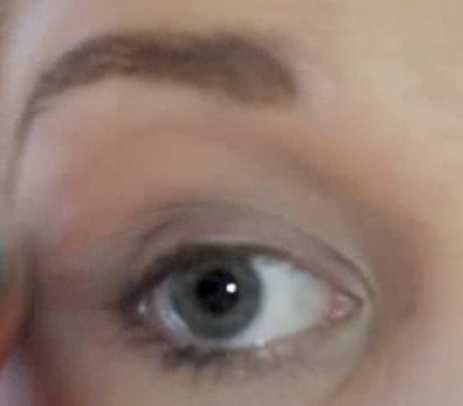
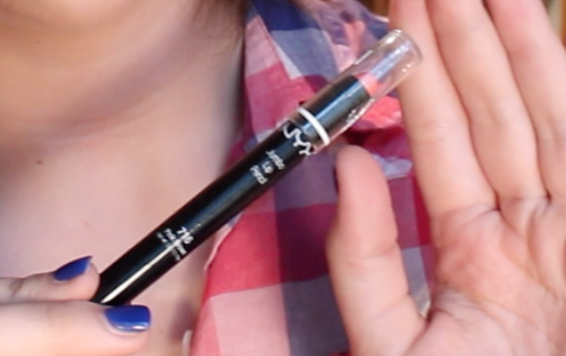
For eyebrows, from the drugstore, I love the NYX eyebrow pencil. From a high end brand, I love the Make Up For Ever Aqua Brow.

ImageImage

This really depends on which TYPE of product you are looking for. Obviously with a pencil, go with the NYX. For a gel-cream brush on formula, go with the MUFE Aqua Brow. Both are awesome!     NYX:$4, Ulta        MUFE$20, Sephora

And those are my favorite face products overall! I hope this helped you out if you are looking for some different products to try out! Don’t forget to watch the video linked at the beginning of this post and COMMENT any requests!! Watch the video linked at the beginning of this post!!

Thanks for reading!

xoxo

Pres

alovelyambition

Top High End Face Products!

Hi Lovelies!

This week, Celeb Saturday will be on hold due to these posts! Anyway, today I’m going to show you my top High-End face products. High End products and things that you would find at MAC or Sephora, etc. Let’s Jump Right In!

CORRESPONDING VIDEO: http://youtu.be/dm_NpAi44kQ

For Primer, I LOVE the Smashbox Photo Finish Light.

Image

This is a lightweight, translucent primer that controls my oily skin and helps my face makeup stay put throughout the day. Smashbox has a primer for just about any skin type depending on what issues you may have. I love the way this feels on my skin and the results are great. $36, Sephora

For BB Cream, I like the Smashbox Photo Finish BB Cream.

Image

This is a lightweight tinted-moisturizer type product that provides sheer coverage and is great for skin. I like the way this makes my skin look: Natural, healthy, and glowing. Great Product. $39, Sephora

For foundation, no surprise, is my Clinique Acne Solutions Foundation.

Image

As I’m sure you all know due to how much I talk about this, it is my FAVORITE high end foundation. It helps treat my acne, control my oil, and makes my skin look natural, healthy, and flawless. I can’t really ask for anything more. $27, Clinique

For Face Powder, my all-time favorite has to be the MAC Mineralize Skinfinish Natural.

ImageImage

This product is just the perfect lightweight setting powder. It sets any foundation beautifully and helps you achieve that “flawless” look on it’s own or over foundation. $30, MAC

Now for Bronzing and Contouring. My favorite Bronzer is the Clinique True Bronze in 02.

Image

Just the perfect bronzer to create a natural sunkissed glow! $25, Clinique

For Contouring, I love the Benefit Hoola Bronzer.

ImageImage

Although this is a bronzer, it is ashy enough to really carve out the “sculpted” cheekbone look. $28, Sephora

For Cream blush, I love Sephora’s line of cream blushes. My favorite color is Poppy Pink.

ImageImage

This applies very opaque for days that I really want a pop of pink on my cheeks. They are very creamy, long-wearing, and easy to apply. $16, Sephora

For Powder blush, I love the Stila Custom Color Blush in Pink.

ImageImage

Super Pretty Pink color payoff that adjusts to your skin tone. My most used blush…. EVER.

For Highlighter, I love the Benefit line of Highlighters.

ImageImageImageImage

These are liquid highlighters that add the perfect amount of light and shimmer to any look. Love, Love, LOVE these.  $26, Sephora

For brows, I love the Make Up For Ever Aqua Brow.

Image

I apply this with an angled brush and it makes my brows look polished and perfect all day long. $20, Sephora

And that is it for my Top High End Face Products! I hope this helped you out! Don’t forget to watch the corresponding video linked at the beginning of this post!

Comment any requests!

xoxo

Pres

alovelyamibition

Top Drugstore Face Products!

Hi Lovelies!

Today I’m starting a new set of videos showing you my favorite high end and drugstore products. Today I’ll be showing you my favorite drugstore face products, and on thursday I’ll show you my top high end face products. Then. I’ll do a video comparing the products. Next week, I’ll do the same for Eye, Lip, and Face products. Let’s jump right in!

CORRESPONDING VIDEO:Top Drugstore FACE Products!

Okay, so I’m going to start in the order that  I would put these things on in the morning, meaning I’ll start with face primer. My favorite Drugstore face primer is the L’Oreal Magic Perfecting Base.

images images-2 images-1

It feels almost like a creamy foam if that makes any sense, but I just apply this where I have problems with pores or redness. It works well with my oily skin. My aunt, who has drier skin, also loves this product. It just helps your face products, whether you apply foundation, bb cream, powder, or whatever your preference is, apply more smoothly. It looks to be a light pinkish color, but blends in translucently. It claims to minimize pores (IT DOES!), and reduce the look of fine lines and wrinkles. I’m a teenager, so I don’t have fine lines and wrinkles yet, however,  I’m definitely a fan of this primer.   $9.99, Target

For foundation, I’m loving the Revlon Colorstay Whipped foundation.

images-4 images-3 images-5

I bought this on a whim, but have been extremely impressed with it. It is a medium to full coverage foundation that doesn’t feel as heavy as some foundations do. It gives me a flawless finish and lasts for HOURS. It controls the oil in my skin, but has also been shown to work on dry skin as well. I really like the way this blends into my skin. Although it feels a bit heavy when you apply it, that feeling goes away after blending it in. Also, If you’ve tried the original revlon colorstay, this foundation gives you a LOT more time to blend the product in before drying. LOVE LOVE LOVE THIS!   $10.99, Target

I also chose to include a BB Cream from the drugstore along with a foundation. If you don’t know what a BB Cream is, it is basically a skin treatment and foundation/tinted moisturizer all in one. They originated in Asia, but American Cosmetic companies have come out with american versions of the product. BB cream stands for blemish balm, but the products also help hydrate the skin and keep it healthy overall. My favorite BB cream from the drugstore is the Physicians Formula Super BB Cream.

images Unknown

This BB Cream is, in one word, AWESOME. I absolutely love the light texture it has. It does, however, offer medium buildable coverage. I like the way it gives me a naturally flawless finish. They have two colors: Light medium, and Medium dark, but it blends effortlessly into the skin allowing for your skin to match it with itself. I have pretty fair skin, and the light medium blended with my skin perfectly. I love this BB Cream! $13, Target

For Face Powder, I love the Rimmel Stay Matte Powder.

Unknown-1

This is a translucent setting powder that doesn’t cake up, but also controls the oil on my skin. Rimmel is one of my favorite drugstore brands, and I was definitely not let down when I purchased this powder.  It has a creamy velvety texture that I absolutely love.  $4.00, Target

For Concealer, I love the Maybelline Dream Lumi Touche Highlighting Concealer in Radiant.

images-2 images-3

I like this concealer for highlighting my under eye area and my cheekbones. The pinky-salmon color helps counteract the deep purple tones of dark circles or a dark eye area. This Concealer works wonders for the under eye area. $7.99, Ulta

For Bronzing and Contouring, I like one product for both from the drugstore. I use the L’Oreal True Match Super Blendable Powder in Mahogany.

Unknown-2

This powder is cool enough to contour, yet warm enough to use as a bronzer. It doesn’t look to harsh on my pale skin and just gives me a bronzed glow.  $10, Ulta

For blush, I chose a cream and powder blush depending on your preference. My favorite Cream blush is the whole like of Maybelline Dream Bouncy Blushes.Unknown-3 images-4

These blushes have a really interesting “bouncy” texture and apply sheer allowing for buildable coverage depending on the look you desire. I  love the color selection they have available and these also hold up very well on my oily skin, and are also perfect for dry skin. LOVE LOVE LOVE. $6.00, Target.

For powder blush, I love the line of NYX powder blushes.

Unknown-2 images-2

They are extremely velvety and easy to apply. They color selection is AMAZING. They have colors to suit every skin tone. I LOVE THESE. $6.00, Ulta

For highlighter, I chose a liquid primer that I actually use as a highlighter. It is the L’Oreal Magic Lumi Light Infusing Primer.

Unknown-5 Unknown-3

This “highlighter” gives a natural radiant glow without looking too shimmery. You can use this on the tops of your cheekbones after foundation, as I do, as a primer, it’s intended use, or mix it in with foundation for a radiant glow. Love this. $10, Target

Last but not least, is BROWS. Eyebrows, to me, are an extremely important component of the face and can really complete a look. My favorite drugstore brow product is the NYX eyebrow pencil.

images-3

It is hard enough in texture to create the natural look of eyebrow hairs and creates a polished eyebrow look without looking too harsh. $4.00, Ulta.

And those are my favorite face products form the drugstore! Don’t forget to look for my videos on my favorite high end face products and comparing the two! Thanks for reading! Don’t forget to check out the video linked at the beginning of this post!

xoxo,

Pres

alovelyambition

Celebrity Saturday 3- Jennifer Lawrence Makeup!

Hi lovelies!

ImageImage

For my third Celeb Saturday, I decided to recreate J-Law’s iconic smokey bronze makeup. I think she’s hilarious and I love her makeup! This look is SUPER SUPER simple and quick! Let’s jump right in!

CORRESPONDING VIDEO:Celeb Saturday 3- Jennifer Lawrence Makeup!

Okay, to begin, I primed my eyes with wet’n wild’s Fergie eyeshadow primer. Any translucent primer or base will do.

Image

Next, from my Naked2 palette, I’m going to take Foxy on an angled brush and apply that to my browbone. Any Matte color that matches your skin tone will do.

Image

Next, I’m going to take that same brush with L’Oreal’s infalliable eyeshadow in Iced Latte and pop that in my inner corner.

ImageImage

This next step is completely optional, but for some added smokiness at my lashline, I’m taking Maybelline’s color tattoo in Bad To The Bronze, and just smudging that on my lashline with my finger.

ImageImage

Next, to bronze up the lid, I’m taking MAC’s Elite eyeshadow on a 239 brush and patting this on the inner 3/4 of my lid.

ImageImage

Now on the same brush, I’m taking MAC’s Woodwinked eyeshadow and patting this in my outer corner and roughly through my crease. This color is just a bit darker than Elite.

ImageImage

I also smudged that color on my lower lashline.

Now, I’m blending that crease color with my Sigma blending brush.

Image

Now with Milani’s eyeshadow in Java Bean and my MAC 217 brush, I’m going to deepen my crease a bit more.

ImageImage

Now deepen the lower lashline with a matte black.

Image

Line your upper lashline just as you would normally, with no wing.

Image

Take a small brush and a matte black and just smoke out the liner slightly.

Image

Mascara Time! I’m using MAC’s extra dimension lash in black, a new one I’m testing, but use whichever is your favorite. Covergirl Clump Crusher would be great.

Image

Now You’re done! Add some bronzer and a peachy blush to create your Jennifer Lawrence look!

Image

Thank you for reading! Remember to ALWAYS comment requests for future posts.

xoxo

Pres

alovelyambition

Empties! Products I’ve Used Up&Thoughts

Hi Guys!

Sorry I’ve been absent lately, I’ve been one busy girl!

Today I thought I’d share with you the products I’ve used up in the past month and my thoughts on these products. Keep in mind, I’ve repurchased some of these products and will be showing you the new ones because I’ve already tossed the old. Let’s jump right in!

CORRESPONDING VIDEO: Empties! Products I’ve Used Up

The first product I’ve used up is my Clinique Acne Solutions Foundation.

Image

I’ve used numerous tubes of this product and will continue to repurchase it. It makes my skin have a flawless airbrushed look, doesn’t cake up of feel heavy, and treats my acne. Definitely my favorite foundation.

$23.00, Clinique

Next, is my Urban Decay Eyeshadow in Zephyr.

Image

This is a bright white shimmery color with a hint of gold. This is my go-to inner corner shade when I want to brighten up my eyes. I truly love the formula of the Urban Decay eyeshadows, and this color is definitely one of my favorites. I’m starting on my 3rd one!

$18.00, Urban Decay

Next, to no surprise, is my NYX jumbo eyeshadow pencil in Milk.

Image

This is just a white cream shadow that I use EVERY SINGLE DAY in my inner corner and under my eyebrow before applying a shadow, but after a primer. This color is perfect for brightening up the eyes and creating a subtle highlight. LOVE LOVE LOVE.

$5.00, Ulta

Next, I sort of have two things in one. First of all, I used up my ENTIRE Urban Decay Naked Palette. The first one. But also, the first color to go in my second palette is the color “Virgin”.

ImageImage

First of all, I cannot thank my aunt ENOUGH for getting me the Naked palette a few years ago. THANK YOU AUNTIE ANN!!!  I have a love affair with this palette. The colors are perfect to create anything from a natural daytime eye, to a deep dark smokey eye. Hopefully my using up and entire palette is an indication of just how much I love this palette. And the color virgin, second picture far left eyeshadow, is always the first one to be used. It is a light peachy white shimmery highlighting shade that suits any skin tone and just gives a natural glow. If I don’t stop raving over this palette now, I’ll never stop.

$50.00, Sephora (pricey but SO SO SO worth it!!)

Next, is my Clinique True Bronze Bronzer in 02.

Image

Love Love LOVE this bronzer for getting a nice sunkissed glow without looking fake-orange. It’s just the perfect bronzer for me.

$25.00, Clinique

Next is the L’Oreal Carbon Black Lineur Intense. Regardless of not knowing how to pronounce it’s full name, I used the product up! haha

Image

It is what it claims to be: a carbon black liquid liner. I love this eyeliner, do not get me wrong, but I do not see myself repurchasing this in the future due to the fact that I have found my true eyeliner love: L’Oreal the Super Slim liquid eyeliner. While I did enjoy using the Lineur Intense, It is a bit watery and harder to create a precise line.

$7.00, Ulta

Next is my true love in eyeliner form, as mentioned above, the L’Oreal the Super Slin Liquid Eyeliner in Black.

Image

This product is like a marker, and is the easiest liner i’ve ever applied. Rich, dark color and super staying power. Need I say more?

$8.99, Ulta

Next is Clinique’s eyeshadow in Lucky Penny.

Image

This was one of the first eyeshadows I ever used, and still one of my favorites. It’s pretty taupe-y bronze shimmer creates a natural, yet polished look all on it’s own. LOVE LOVE LOVE LOVE L-O-V-E LOVE.

$15.00, Clinique

Next, I have my Cover Fx Clear Prep Anti-Acne Primer.

Image

This face primer applies warm, which I’m not a huge fan of, but I feel like it didn’t effect my acne enough for the price. While it was a good primer, my Smashbox Photo Finish Light controls my oil better and seems to be longer lasting.

Clear Prep: $38.00, Sephora

Next is my MAC blotting powder.

Image

It is exactly what it claims to be: a translucent blotting powder that controls my oil. Love this.

$24.00, MAC

Next is my MAC Studio Sculpt Concealer

Image

Although opaque, I felt like the consistency of this concealer was a bit too heavy and oily for my skin. I’m sure it would be great on drier skins, but for me, I don’t think I’ll be repurchasing this product.

$25.00, MAC

And that is it for my Empties! I hope you enjoyed it! Thank you SO SO SO much for reading.

Check out the video linked at the beginning of this post!

xoxo

Pres

alovelyambition

Must Have Makeup Brushes!

Hello Lovelies!

Long time no see! I’ve been super busy, but things will be back to normal soon. Anyway, today, i thought i’d share with you my MUST HAVE makeup brushes. Not just the ones I like, but the ones I use EVERY. SINGLE. DAY. Let’s jump right in.

CORRESPONDING VIDEO:http://youtu.be/dUZ27QxQq7E

*FYI* All sigma brushes seen in this video were purchased in a kit, not by themselves.

In no particular order, I’m going to start with my HOLY GRAIL foundation brush, which I’ve raved about for a while now. It is the Real Techniques (created by Samantha Chapman of PixiWoo) Expert Face Brush. This brush applies my foundation so evenly and blends it in perfectly leaving my skin looking flawless. $9.00, ULTA Beauty

Image


Next, I can’t live without my Real Techniques Multi Task Brush. I use this for powder and it picks up the perfect amount of product for setting your foundation. It buffs the powder on leaving an airbrushed finish. LOVE LOVE LOVE. (Comes in a set of 3 brushes) $17.99, ULTA Beauty

Image


Next, for applying bronzer, I love my Sigma Large Powder F20 Brush. It is the perfect size for getting that “glow” without packing on the bronzer. LOVE IT! $25.00, Sigma

Image


For a contouring brush, I’m never without my MAC 168 Large Angled Brush. It is, yet again, the perfect size for contouring and getting to all those small areas of the face. $35.00, MAC

Image


For blush, my must have brush is the Sigma Powder Blush F10 Brush. It’s tightly packed bristles allow for the perfect application of any powder blush product. $18.00, Sigma

Image


For Highlighting, I love my Sigma Tapered Highlighter F35 Brush. It isn’t too big and avoids the “overly highlighted” look and gives a natural glow. $17.00, Sigma

Image


Now for eyeshadow brushes. 


For highlighting the eyes, I always use my Tigi Angled Brush. It is not available anymore, but an exact dupe is the MAC 275 ($25.00). This brush can easily get in the inner corner and provides the perfect highlight.  ( I chose a photo of the MAC brush. Again, exact same thing.)

Image


Next, I could not live without my MAC 239 flat shader brush. It applied color to the lid so easily and smoothly. $25, MAC

Image


For crease color and blending, my go-to is the MAC 217 brush. I cannot say enough good things about this brush. It gets in the crease perfectly, and blends flawlessly. LOVE.

Image


For blending eyeshadow, I love my Tigi Blending brush. Again, it is now unavailable, but an exact dupe is the MAC 224 ($24). The perfect blending brush for creating a perfect eye makeup look. (MAC brush pictured)

Image


And that it it for my MUST HAVE brushes! I hope this helped you out if you are unsure on which brushes you need. Check out my video linked at the beginning of this post!

For requests, COMMENT!

Have a lovely Day.

xoxo,

Pres

alovelyambition


Celebrity Saturday#2- Megan Fox!

Hello Lovelies!

ImageImage

For the second post in my celebrity Saturday series, I chose to recreate Megan Fox’s makeup. I thing she is SO gorgeous and I always LOVE her makeup, however, it changes depending on what event she is attending. I chose to do the look I see her wearing most often which is a gold smokey look. I did not add false lashes because lashes are not the focal point of her look. But if you’d like to add some more drama… GO FOR IT! All colors besides one glitter shadow used in this look are from the Too Faced Natural Eye Palette.

Image

CORRESPONDING VIDEO:  http://youtu.be/3lbfPXJjyys

Let’s get started!

ImageImageImage

Let’s start with brows. Megan’s eyebrows are about the same thickness throughout her brow with a lifted arch. I have pretty thick brows, but I enhanced them with my Make Up For Ever Aqua Brow in #15.

Image

With a MAC 266 brush, I ran this through my brow and rounded it at the arch to create the lifted effect Megan has.

Image

$20, Sephora

Next, I primed my lids with NARS smudgeproof eyeshadow base, just a clear base.

Image

$24, Sephora

Now I’m taking my NYX jumbo eyeshadow pencil in MILK and applying this under my brow and in my inner corner and blending it out with my finger.

ImageImage

Now I’m going to take my NYX jumbo eyeshadow pencil in Cashmere (gold) and blend this all over my lid.

ImageImage

Now from the Too Faced Palette, I’m going to take the light cream matte color called Heaven on my Tigi angled brush and apply this underneath my brow and in my inner corner.

ImageImage

Now for some added light in my inner corner, I’m taking my Napoleon loose eye dust in Ice Storm, a creamy white glitter, and apply that around my tearduct.

ImageImage

Now for the gold. I’m taking the Honey Pot (gold) from the Too Faced palette on my MAC 239 flat shader brush, and patting that all over my lid stopping about 1/4 of the way from the edge.


Image

Image

Now for the smokey outer corner. On a MAC 217 blending brush, I’m going to take Erotica, a deep grey toned taupe shimmery shade, and buff this in my outer corner and first half of my crease.

ImageImage

Now I’m going to take Velvet Revolver, a matte color that matches my dark blonde hair, on a fluffy blending brush and buff this above my crease.

Screen Shot 2013-06-14 at 2.51.15 PMUnknown-2

Now to intensify the “smokiness”, I’m going to add “Sexpresso”, a dark neutral toned brown, into the very outer corner and crease with a MAC 217 brush.

ImageImage

Now for the smokey liner. I’m going to take Maybelline Gel Eyeliner in Brown and an Elf concealer brush and smudge that onto my lower lash line.

Screen Shot 2013-06-14 at 7.57.43 PM

For my upper lashline, I want to really smoke out my liner, not as much up, but out to create Megan’s wide-eyed look.

I’m taking my Elf cream liner in Black and my Mac 266 brush and creating a SOFT wing. I’m not dragging it out as far as I normally would, as you can see, I’m stopping shortly before my crease.

Screen Shot 2013-06-14 at 8.01.14 PM

To smoke that out, just take a flat definer brush and a dark brown or black shadow and just move the brush over the liner on the outer half of your eye. No need to be too picky or precise with your line. That, my friends, it the beauty of a smokey eye.

Screen Shot 2013-06-14 at 8.04.27 PM

Now just add your favorite mascara. I chose to use the Maybelline Colossal Cat Eyes, a new one i’m testing. I like the way it flares my lashes at the outer edge.

That’s it for the eyes!

Screen Shot 2013-06-14 at 8.06.31 PM

For the face, instead of heavy contouring, Megan always looks sun kissed. Not TAN, but just healthy.

For this, I used my Chanel Soliel Tan De Chanel, their cream bronzer, and applied this in the normal 3 E motion. Super simple.

images Screen Shot 2013-06-14 at 8.08.53 PMimages

For blush, Megan uses a natural peachy-pink shade. I chose Benefit Hervana Blush.

Screen Shot 2013-06-14 at 8.12.51 PM

For lips, add your favorite peachy pink lipstick and you’re done!

IMG_8900

I hope you all enjoyed my second Celebrity Saturday tutorial! If you have any Celeb requests or requests in general, feel FREE to leave them in the comments. Also, check out the corresponding video linked at the beginning of this post! Have a lovely day, and I will talk to you all very soon.

xoxo,

Pres

alovelyambition

Travel Makeup Bag Essentials!

Hello Lovelies! 

Today, I wanted to share with you what is in my travel makeup/skincare bags. I’m going on vacation and figured this would be the perfect opportunity. I love watching videos and reading blogs on this topic because I find them so helpful when I am packing. I am impressed with how light I packed on this trip. These, however, are my absolute necessities. 

CORRESPONDING VIDEO:http://youtu.be/I4grcD9hWjg

When packing my makeup, I use this makeup bag with a brush case that I bought from Sephora. I find it to be the perfect size and I absolutely love the print.

Image

Image

This is the Sephora Izak bag collection, which was around $25. It is still available on Amazon and Ebay. I highly recommend it.. Perfect size and super cute!

Okay, so i’ll begin with what I brought for brushes. I feel like you should always bring too much then not enough when it comes to brushes, but that’s just me.

Image

These are all of the eye brushes that I am bringing with me. I know it looks like a lot, but these are the ones I use on a daily basis. From left to right: MAC 217 (Crease), Sigma E35 (buffing), Tigi angled brush (Highlight), Tigi angled liner brush (Liner), Another MAC 217 brush (I always seem to need an extra),Sigma E20 brush (Lower lash line) , MAC 239 brush (lid application) Sigma E25 (For blending cream products),  Tigi Blending brush (Blending), Mac 266 angled brush (eyebrow product), MAC 219 pencil brush (smudging liner).

Face brushes:Image

From left to right: MAC 168 angled face brush (contour), Real techniques expert face brush (foundation), Real Techniques multi task brush (powder), Sigma F20 (bronzer), Sigma F35 (highlighter), Sigma F10(blush).

Now for actual makeup!

Image

Clinique Acne Solutions foundation

Image

Clinique Perfectly Real Powder

Image

Maybelline Dream Lumi Touche Highlighting concealer

Image

MAC prolongwear concealer

Image

Clinique True Bronze

Image

Laura Mercier Eye Basic in Wheat (Primer)

ImageImage

NYX Jumbo eye pencils in Milk and Cashmere 

Image

Maybelline Color Tattoo in Precious Pearl

Image

Too Faced Natural Eye Palette

Image

Maybelline Quad in Gusty Green

Image

MAC Omega Eyeshadow (brows)

Image

Make Up For Ever Aqua Brow in 15.

Image

MAC Expensive Pink eyeshadow

Image

Sephora pencil sharpener

Image

Benefit Bene-tint cheek stain and High Beam highlighter

Image

Benefit Hervana Blush

Image

Ardell Brow Gel

ImageImage

Maybelline Colossal Cat Eyes mascara and Make Up For Ever Aqua Smokey Lash Waterproof mascara.

ImageImage

Urban Decay Perversion eyeliner and L’Oreal The Super Slim Liquid Liner

Image

Tweezerman Tweezers 

Image

Tarte Inner Rim Brightener and Urban Decay Liner in Roach

Image

Elf Makeup remover pen

Image

Urban Decay De Slick Makeup Setting and Oil Control Spray

Image

Mayelline Baby Lips in Cherry Me, Revlon Lip Butter in Peach Parfait, and Benefit Lipstick in Jing-a-ling

Now for Skincare! I’ve been trying out the Simple skincare brand and have been pleasantly surprised! It has really cleared up my skin in a short amount of time and controls the oil extremely well.

Image

Simple Oil Balancing Makeup Remover Wipes

Image

Simple Protective mousturizer, Simple sensitive skin foaming cleanser, and Hawaiian Tropic after sun aloe hydration in Papaya.

And that is what I bring in my travel makeup bag! I hope this post helped you out and don’t forget to watch the corresponding video linked at the beginning of this post.

Thanks for reading!

xoxo,

Pres

alovelyambition

Top 10 Summer Lip Products!

Hello Lovelies!

Today, I wanted to share with you my TOP 10 Summer Lip products. I know 10 sounds like SO MANY… but it was SO hard to narrow it down this far! Anyway, let’s jump right in!

CORRESPONDING VIDEO: Top 10 Summer Lip Products!

IN NO PARTICULAR ORDER!!

I’m going to start out with my perfect nude: Blankety Lipstick by MAC.

ImageImage

This is a LONG-WEARING nude lipstick with a pink base. This color is perfect for when I just want to grab something and get out the door, yet it is so flattering and completes any look. I love having a pink-based nude, and I think this should be a staple in every collection. $15.00, MAC

Next, I love MAC’s lipstick in Pleasure Seeker.

ImageImage

This is the perfect muted coral, or a coral with a nude base, for summer. It makes your lips pop, but without being TOO obnoxious. I LOVE this shade for summer. $15.00, MAC

Next is my Revlon Lip Butter in Sorbet, which I mentioned in my “Colors of the Rainbow Tag”.

ImageImage

I love the formula of these because they moisturize my lips so well, but I also love this bright pink color. It is wearable, unlike some bright pinks. I’ve been OBSESSED with this! $7.99, ULTA

Next, for a more natural gloss, I love the BUXOM lip gloss in “Dolly”.

ImageImage

This gloss isn’t so long wearing, but it enhances your natural lipcolor beautifully and adds a bit of shine. $10.00, Sephora

Next, I’ve been loving my NYX jumbo lip pencil in “Pink Brown”.

ImageImage

Name aside, this is a beautiful peachy-pink, satin finish, moisturizing lip product. The color is very opaque, which impressed me. I’ve been loving this day-to-day. $4.99, ULTA

Next, is my Make Up For Ever Lab Shine Lip Gloss in D6.

ImageImage

This is a hot pink gloss perfect for when your face needs some perking-up. This color is sheer, but build-able without getting too goopy or sticky. $18.00, Sephora.

Next, my Maybelline BABY LIPS lip balm in “Cherry Me”.

ImageImage

This SUPER moisturizing balm gives a hint of sheer color while making your lips SUPER soft! You really can’t go wrong with any of the BABY LIPS. $3.99, ULTA

Now for the longest wearing product in this post, my MAC PROlongwear lip glass in “Persistent Peach”.

ImageImage

This stuff is the real deal. When they say “PROlongwear”… THEY MEAN IT. This pretty, peachy, opaque gloss had some SERIOUS staying power. I’m talking 5-7 hours… NO JOKE. This is great for the hot summer months and the color is perfect as well. $20.00, MAC

Next, I’ve been loving my Maybelline Color Whisper in “Petal Rebel”.

ImageImage

I feel like these are the Maybelline version of the Revlon Lip Butters, WHICH I LOVE, and this Barbie Pink color is absolutely perfect for summer. $5.99, ULTA

Last, but certainly not least, I’ve been obsessed with the Rimmel lipstick in “Pink Blush”.

ImageImage

These are awesome lipsticks, and I love wearing this pink to match my Stila pink blush. $4.99, ULTA

Those are my top 10 summer lip products! Thank you for reading! Also– don’t forget to check out the corresponding video linked at the beginning of this post!

xoxo,

Pres

alovelyambition

Celeb Saturday #1: Demi Lovato

Hi Guys! Today, I’m introducing my new series called “Celebrity Saturday”! Every Saturday, I’ll be doing a makeup tutorial of a different Celeb. This week, I chose Demi Lovato. I’ve been LOVING Demi’s makeup on the X Factor and in her music Videos. I chose the look I see her in most often: A light, shimmery, nude lid, shimmery crease, and WINGED LINER! She wears lashes, but that part is optional!

ImageImage

CORRESPONDING VIDEO: Celebrity Saturday 1 Demi Lovato!

Let’s Get Started!

First, I primed my lid with MAC Painterly Paint Pot, A nude base.

Image

Image

Next, I took a MAC 217 brush and my NYX eyeshadow base in “White” and added this under my brow and in my inner corner.

Image

I blended with my finger

Image

Next, i took MAC Constructivist Paint Pot, as seen in my Daytime Smokey Eye Tutorial, and my Real Techniques Dome Shadow Brush, and added this through my crease to help create Demi’s carved out and defined crease. I also blended this out with my finger.

ImageImage

Now, I just hilighted my brow bone with my face powder,and my inner corner with MAC’s Vanilla pigment, a creamy gold loose shadow.

ImageImage

Now I’m taking MAC’s HEY eyeshadow, a shimmery nude color, and adding this to my ENTIRE lid with a MAC 239 brush.

Image

Image

Now for the crease. I took MAC’s Sable eyeshadow and a 217 brush and buffed this throuought my crease to crease a lot of definition.

Image

For more definition as seen in Demi’s crease, i’m taking L’Oreal’s infalliable eyeshadow in Continuous Cocoa on a tapered crease brush and tracing a line to get the definition this look requires.

Image

Now, blend.

Image

Now, create a winged line. I used ELF’s cream liner in “Black”.

Image

Add some lashes, or just Mascara, and the eyes are done!

For the face, Demi bronzes as opposed to heavy contouring. I used my Clinique True Bronze in 02 and did the 3 E motion to get the bronzed effect.

Image

For blush, I used my Stila Custom Colors blush in pink to match Demi’s blush in the picture.

Image

For lips, I used Rimmel’s lipstick in “Pink Blush” to match the blush! Any pink will do.

Image

And that is my Demi Lovato look!

I hope you enjoyed it and please check out the video for a step by step video tutorial!

Thanks for reading!

xoxo,

Pres

alovelyambition

Daytime Smokey Eye Makeup!

Hello!

Image

Today I wanted to share my go-to daytime smokey eye makeup. This look is SUPER simple, quick, and flattering! All, besides one, of the colors come from the LORAC PRO palette! I love doing this on days when I want to look put together, but not have a heavy, night-time smokey eye going on. I applied some Katy Perry false lashes for an extra pop, but that step is completely optional. For an in-depth video tutorial, see the link below.

Daytime Smokey Eye Tutorial

Image

Let’s get started!

I already primed my eyes with MAC’s Painterly Paint Pot. Any skin-toned primer will do.

Now I’m going to apply MAC’s Constructivist paint pot, a dark, warm brown, shimmery cream shadow. I’m going to apply this to the outer two-thirds of my lid.

ImageImage

Next, I’m going to take a fluffy blending brush and “Taupe” from the LORAC PRO palette, which is the lightest warm brown color. Image

I’m going to buff this through the crease and create a rounded shape by using small circular motions and taking my time. This will create a light, blown out, wash of color.

Image

A smokey eye is traditionally darkest at the lashline and fades upward. To get that effect, I’m going to take “Sable”, the slightly darker warm brown from the palette, and buff this through my crease, concentrating on applying the color closer to the actual crease and not blending up as far.

ImageImage

Next, I’m going to take MAC’s PROlongwear eyeshadow in “Fashion Fix”, a dark ash brown shade, on my Urban Decay “Good Karma” brush, and apply that to my lid. $21.00, MAC Cosmetics

ImageImage

Now I’m taking a bit more of “Sable”, the second brown I used on a MAC 217 brush and blending my lid and crease colors together with small winshield-wiper motions.


Image


Next, I added “Nude”, the light shimmer shade to my browbone and inner corner. I then toned my browbone down a bit with “Cream” a matte skin toned color.

Screen Shot 2013-06-06 at 9.34.54 PMScreen Shot 2013-06-06 at 10.11.12 PM Screen Shot 2013-06-06 at 10.11.23 PM


Now for Liner! As usual, I’m going to use my L’Oreal “The Super Slim” Liquid Liner in “Black” and make a small cat eye/wing on my eyeliner. $8.99 Ulta Beauty

Image

Next, to make the liner look more “Smokey”, I’m going to take “Black” from the LORAC palette on the Urban Decay brush I used earlier and smudge out my liner slightly.

Image

Image

I didn’t smudge the wing of my liner, because I want that to stay crisp and clean.

Next, I added my false lashes.

Now I’m taking “Espresso” from the palette on the same Urban Decay brush and I’m smudging that on my lower lash line for a “smoked out” effect.

Image

Image

Now, for a final touch, I’m going to line my water line, or inner rim, with MAC’s eye kohl in “Smolder” (black), and add mascara to my bottom lashes.

ImageImage

LORAC PRO palette $42.00, Sephora

And VOILA! Your perfect, daytime-appropriate smokey eye!I love this look and get so much wear out of it, and I hope you will as well. Check out the video I linked at the beginning of this post and feel free to leave requests as comments! Have a wonderful day!

Image

xoxo,

Pres

alovelyambition

Foundation Routine!

Hello!

Today I’m going to show you my everyday foundation routine! Now, sometimes I just pop on some powder, but this is when I want to lookextra put together! Let’s get started!

CORRESPONDING VIDEO: Foundation Routine!

Screen shot 2013-06-05 at 1.17.59 PM

I’m going to take my Clinique Acne Solutions foundation in shade 01 and put a dime size amount on my hand. To apply this, I’ll be using my Real Techniques Expert Face Brush, a.k.a., THE BEST BRUSH EVER. I love this foundation and brush combination because the foundation alone gives me a flawless, airbrushed  effect, but combines with the brush it makes blending a breeze.

ImageImage

Next, I take my finger and dot the foundation on to a CLEAN, MOISTURIZED FACE.

Image

I know it looks a little crazy right now, But it makes blending SO much easier! I will apply some to my forehead later on.

Now, I’m just going to begin to blend this out with my Real Techniques brush, as mentioned earlier.Image

As you can see, I’m pulling the brush in a downward motion. You ALWAYS want your finishing strokes to go in a downward motion because the hair follicles on your face tend to grow in a downward motion and this gives a more natural effect.

Foundation: $27.00, Clinique. Brush:$8.99, Ulta Beauty

Image

Again, just on the opposite side of my face, I’m just blending out my foundation and ending with downward strokes.

Now for my forehead, I just repeat the same process, but in between the brows, you want to finish with upward strokes as opposed to the rest of the forehead.

Image

REMEMBER: always blend down the jawline and neck to avoid any harsh lines!

Image

Next is Concealer! I personally use two types of concealer, but this is totally optional. For blemishes, I use my Holy Grail concealer, my MAC Prolongwear concealer in “NW20”. This covers my blemishes and DOES NOT BUDGE throughout the day no matter what I end up doing.

Image

I just take my finer and dot this on any areas that need extra coverage and blend it out with my foundation brush, patting in a downward motion as opposed to dragging the product downward.Image

Image

I also use my fingers to blend if needed. $18.00, MAC Cosmetics. *It looks a bit pricey, but this concealer lasts FOR. EVER.*

Now for Undereye Concealer! I love my Maybelline Dream Lumi Touche Highlighting Concealer in “Radiant”.

Image

I just place this under my eyes and blend with my foundation brush and fingers if needed! I do not have bad undereye circles, so this just highlights the area. If you have bad dark circles, try using the MAC concealer with a fluffy eyeshadow brush under your eyes.

Image

Image

POWDER TIME! I have extremely oily skin, therefore, I set my foundation with a powder all over my face. For dry skin, try putting the powder throughout your T-Zone only, unless you like to powder it all. *Your T-Zone is your forehead, your nose, and chin.*

For powder, I use Clinique Perfectly Real Pressed Powder in shade 102. To apply it, I use my MAC 182 Kabuki brush.

ImageImage

Just get some powder and PAT, not rub, again in a downward motion in those areas where you get oily, or just feel you need powder.

Image

Powder:$25.00, Clinique.

Now for Bronzer, Contour, Blush, and Highlighter! For those in a hurry, contour and highlighting can be optional. Blush and bronzer, just a tad, I feel are a MUST.

Bronzer is first. I use my Clinique True Bronze in shade 02, “Sunkissed”. Remember, Bronzer is just to add a “Glow” to your face, not to give you a complete tan.

Image

To apply this, I use my Real Techniques Blush Brush.

Image

I apply this bronzer in a “3 E” motion, starting at your temples and edge of forehead, down under the cheekbones, and down the jawline.

ImageImageImage

Also apply just a tad across your nose, chin, and forehead.

Bronzer: $25.00 Clinique

Now for Contour. Contouring, when applied correctly, gives the appearance of a more sculpted face and more facial structure. The idea is to apply a shade that is darker than your skin tone to the hollows of your cheeks. For this, I use my Benefit Hoola Bronzer (This is not for traditional bronzing as in the previous step) and my MAC 168 Angled face brush.

ImageImage

You can do the “Fishy Face” haha, if needed to find the hollow of your cheeks, or simply, under your cheekbones.

Image

Image

Just lightly buff, *cough cough* DOWNWARD MOTION *cough cough*, underneath your cheekbones. $28.00

Now for BLUSH! Blush adds life and color to your face! I’m going to use my sigma blush brush and my Stila Custom Color Blush in Pink, MY FAVORITE BLUSH!

Image

Image

This blush may look scary, but it works with the natural temperature of your skin to create a flattering pink color. Just take some on your brush and pop in on to the apples of your cheeks blending it back towards your temples. $20, Sephora

Image

Now for Highlighting! Highlighting goes hand-in-hand with contouring in the fact that it makes your cheekbones appear higher and gives the look of more facial structure. For this I use my NARS Albatross Highlighter and my Sigma Tapered Highlighting brush.

Image

Although it looks white, It is actually a golden shimmery cream color. $29, Sephora

Image

Apply a highlight shade on top of the cheekbones and around the tail of your eyebrow and on the browbone if you’d like.

Image

And you’re done! Thank you so much for reading!

xoxo,

Pres

alovelyambition