Sultry Valentines Day Makeup + Outfit Ideas ft. Naked 3

Hey guys!

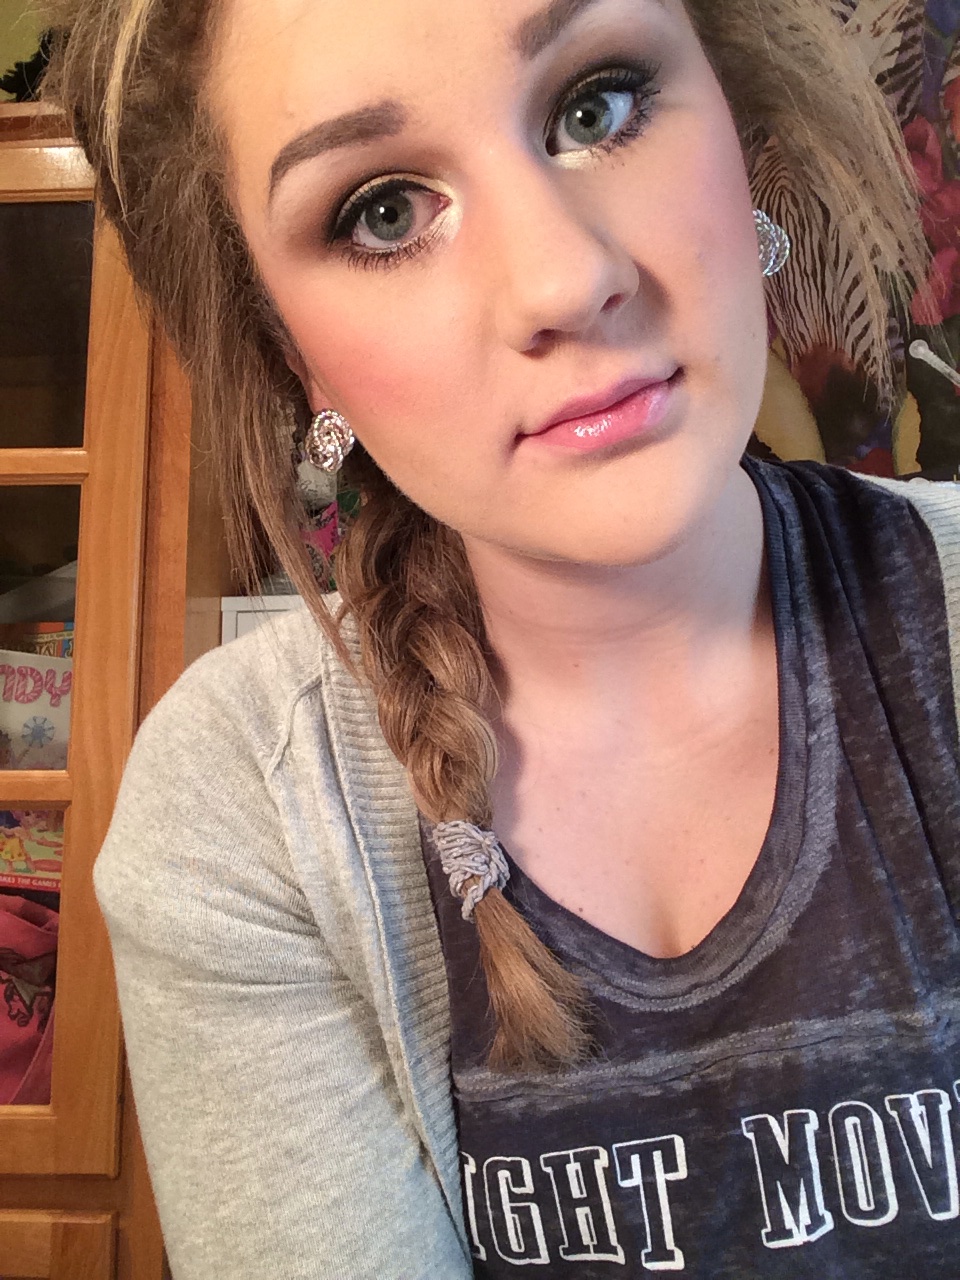
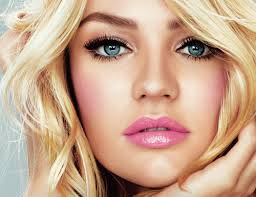
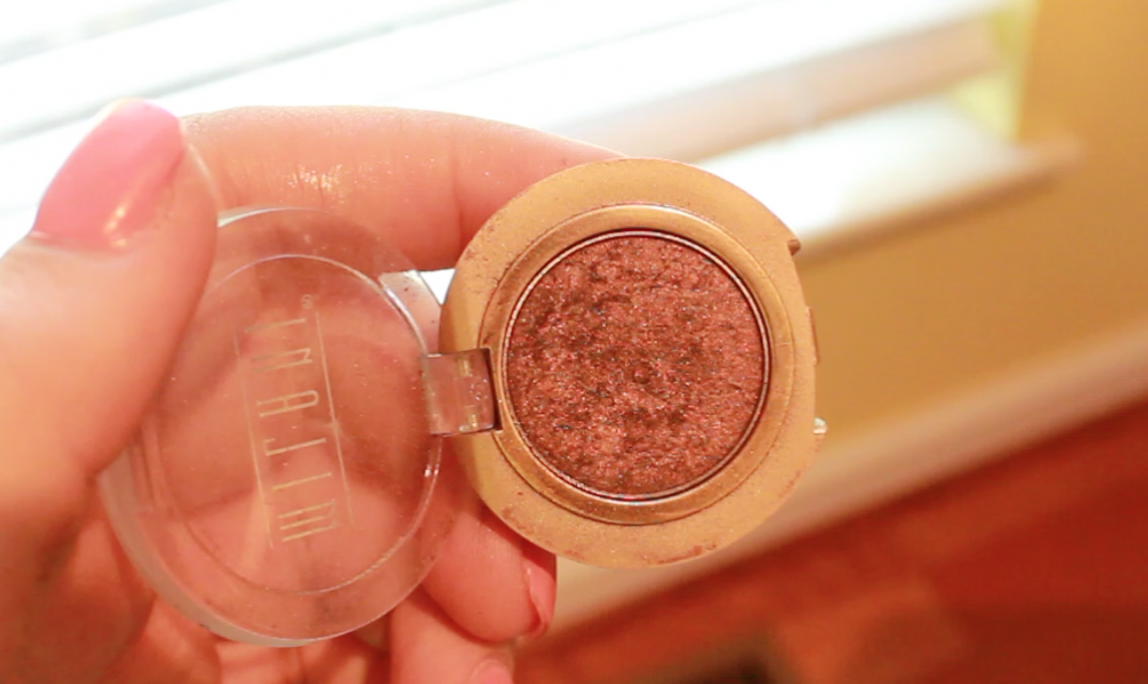
Today I created a look that is perfct for Valentine’s Day using my Urban Decay Naked 3 palette. I’ve also created a hair idea and two outfit ideas!

Let’s jump right in.

ImageImageImageImage

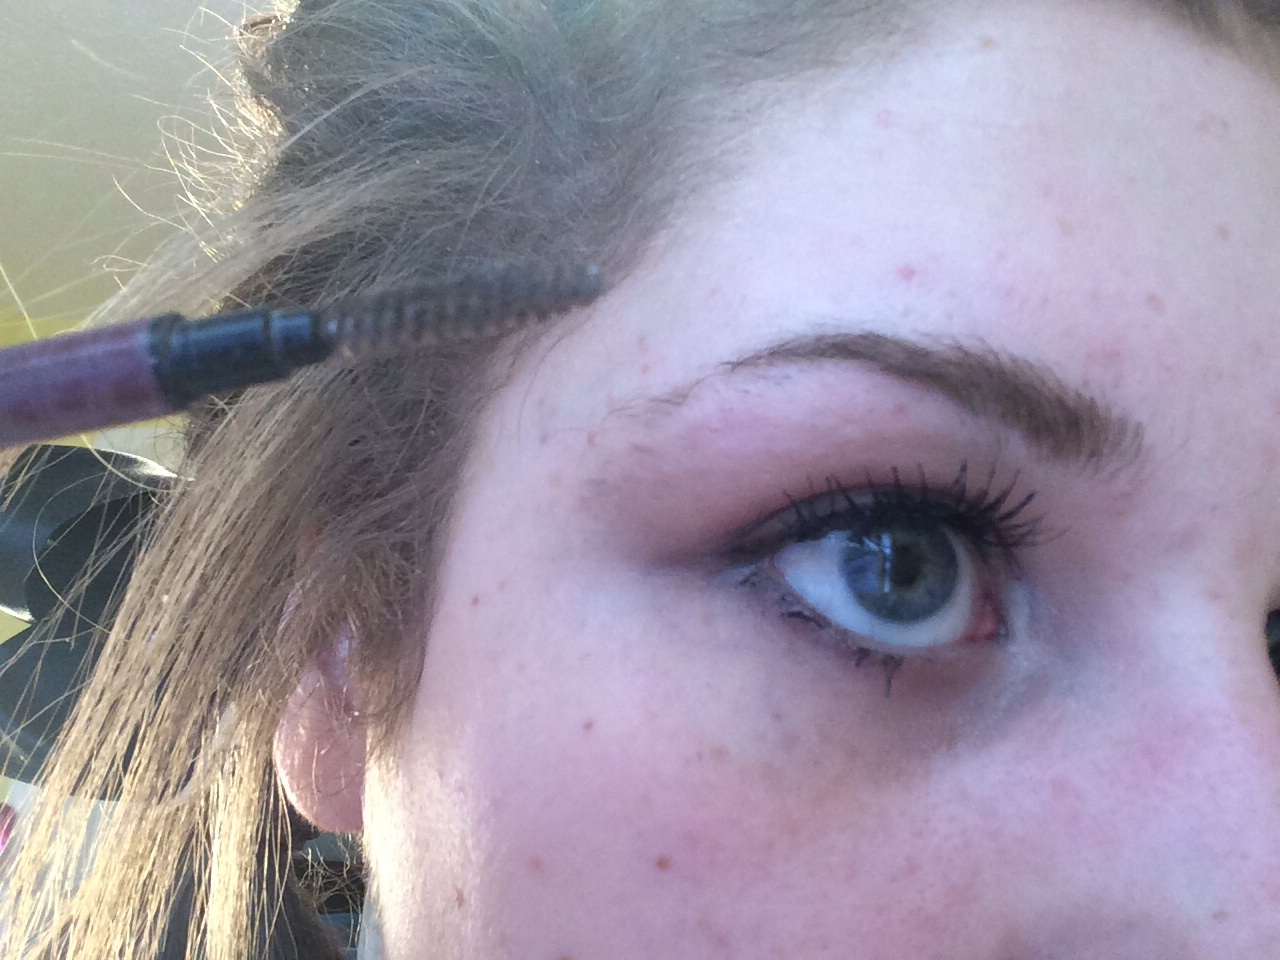
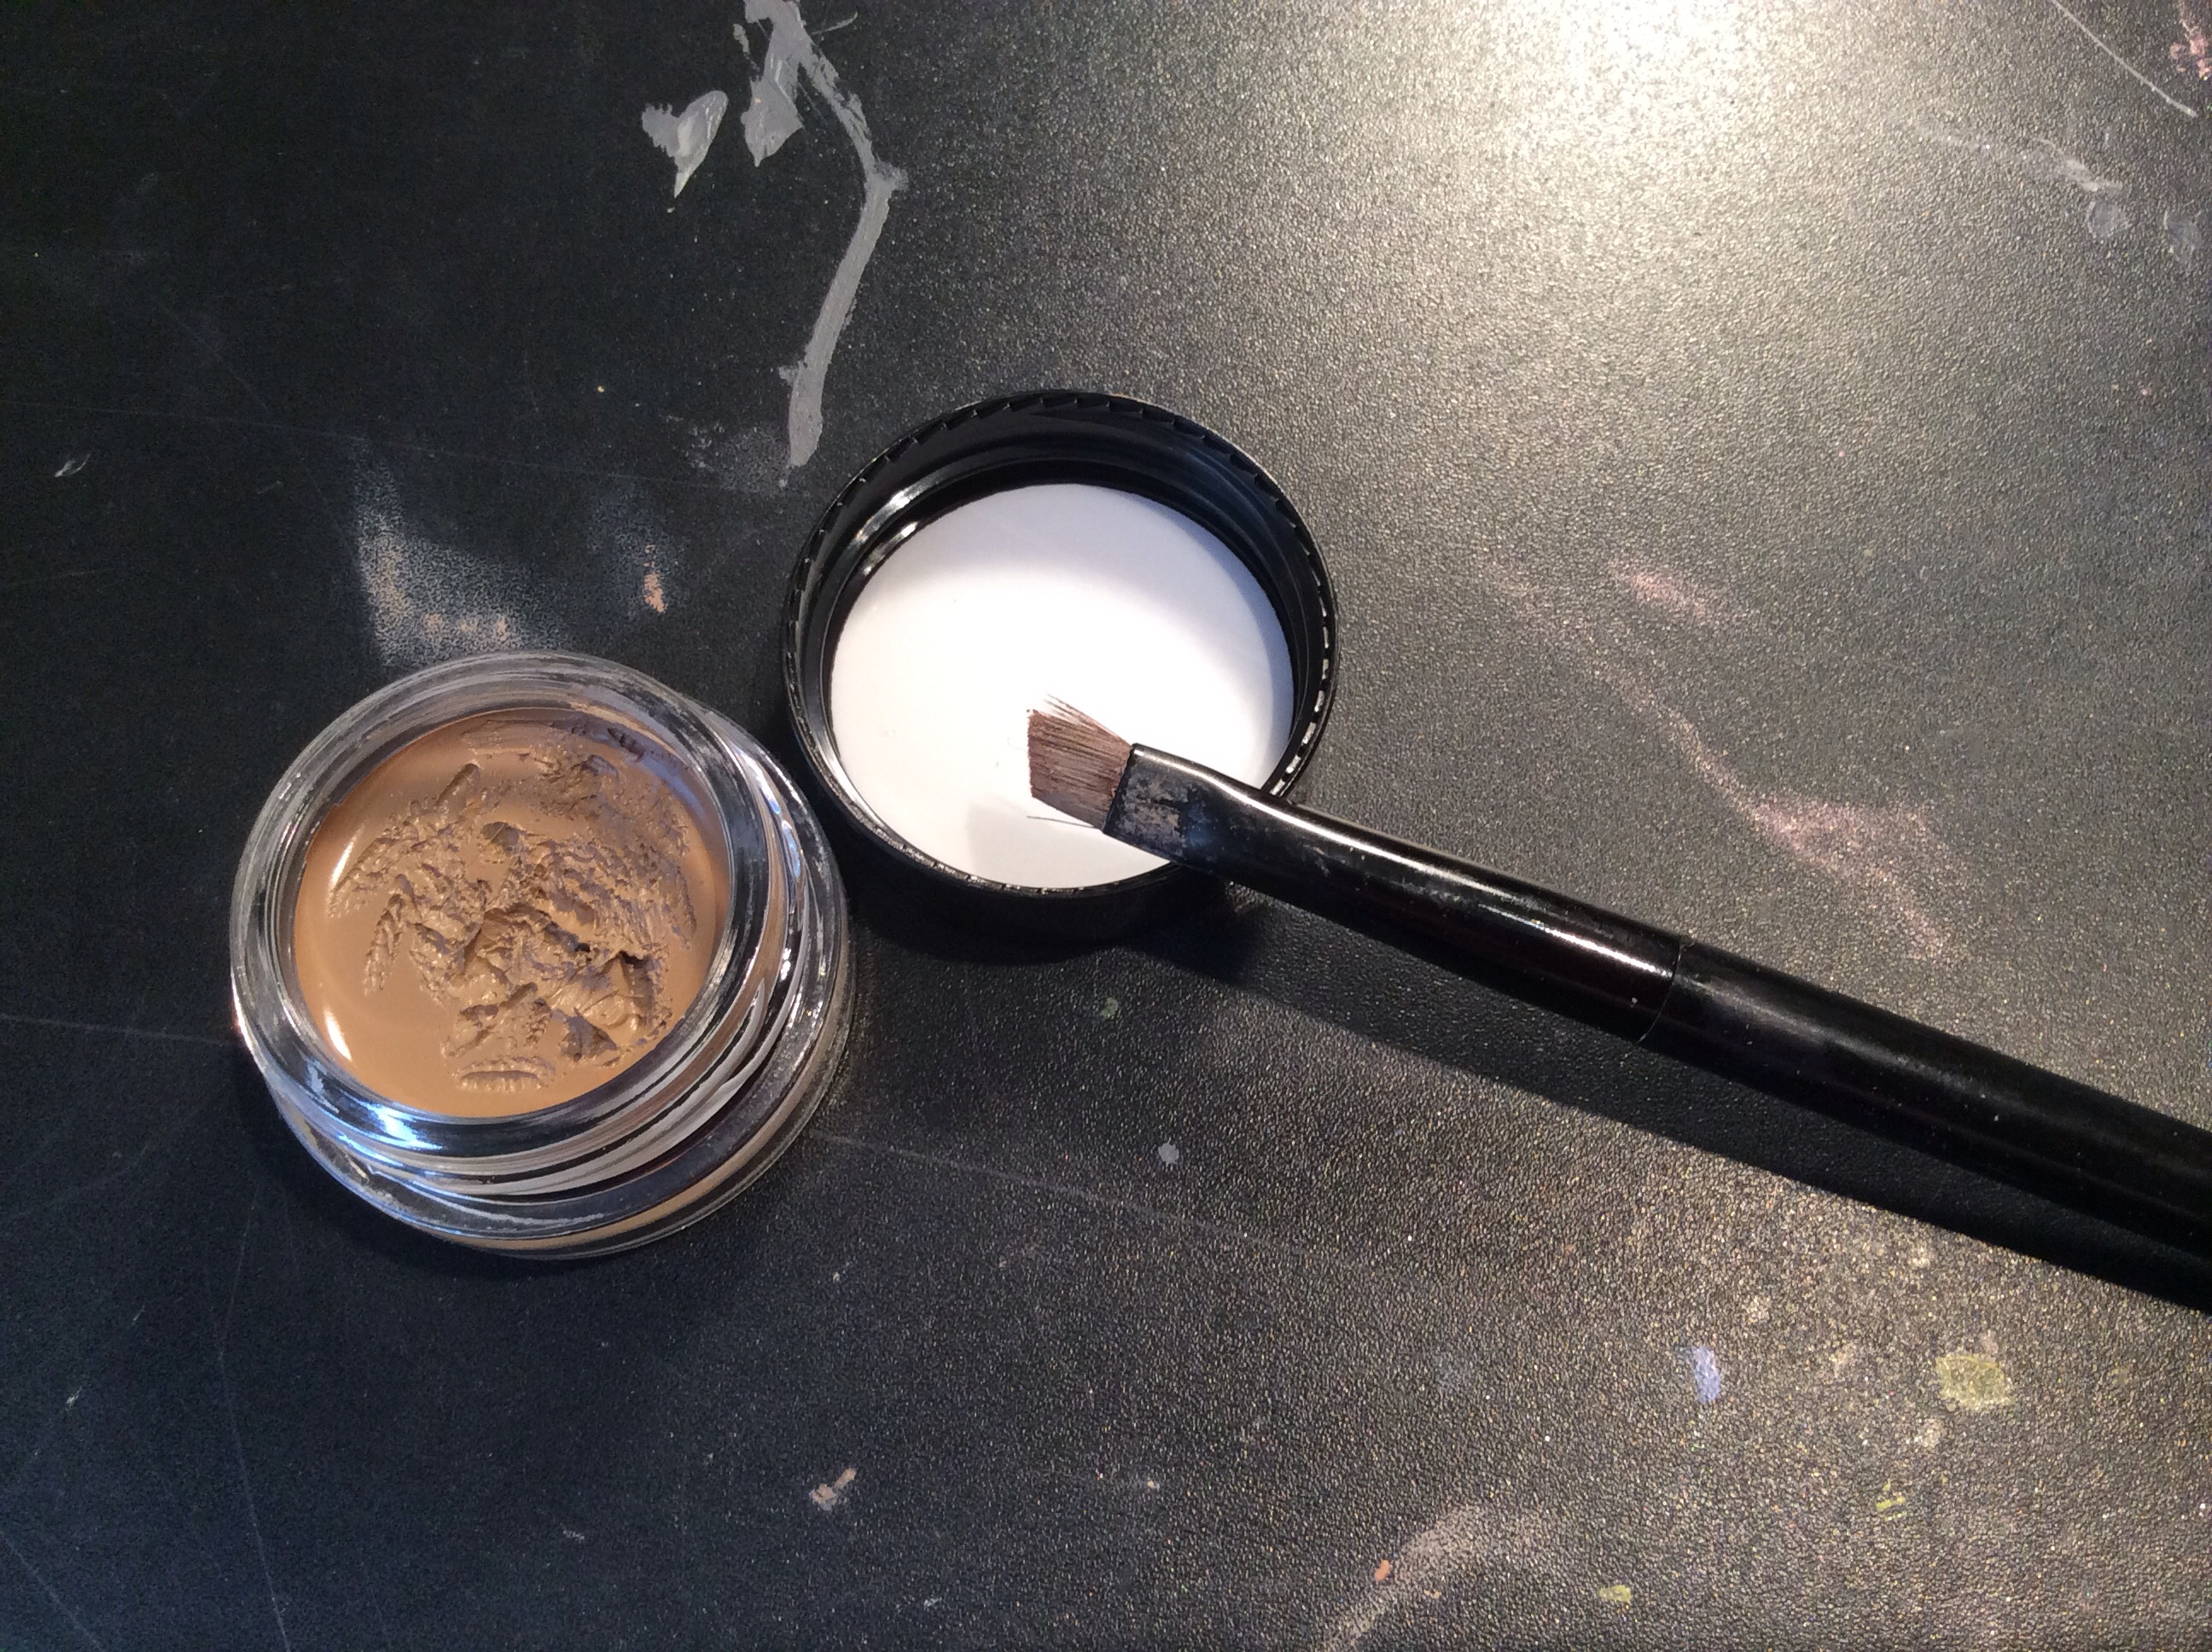
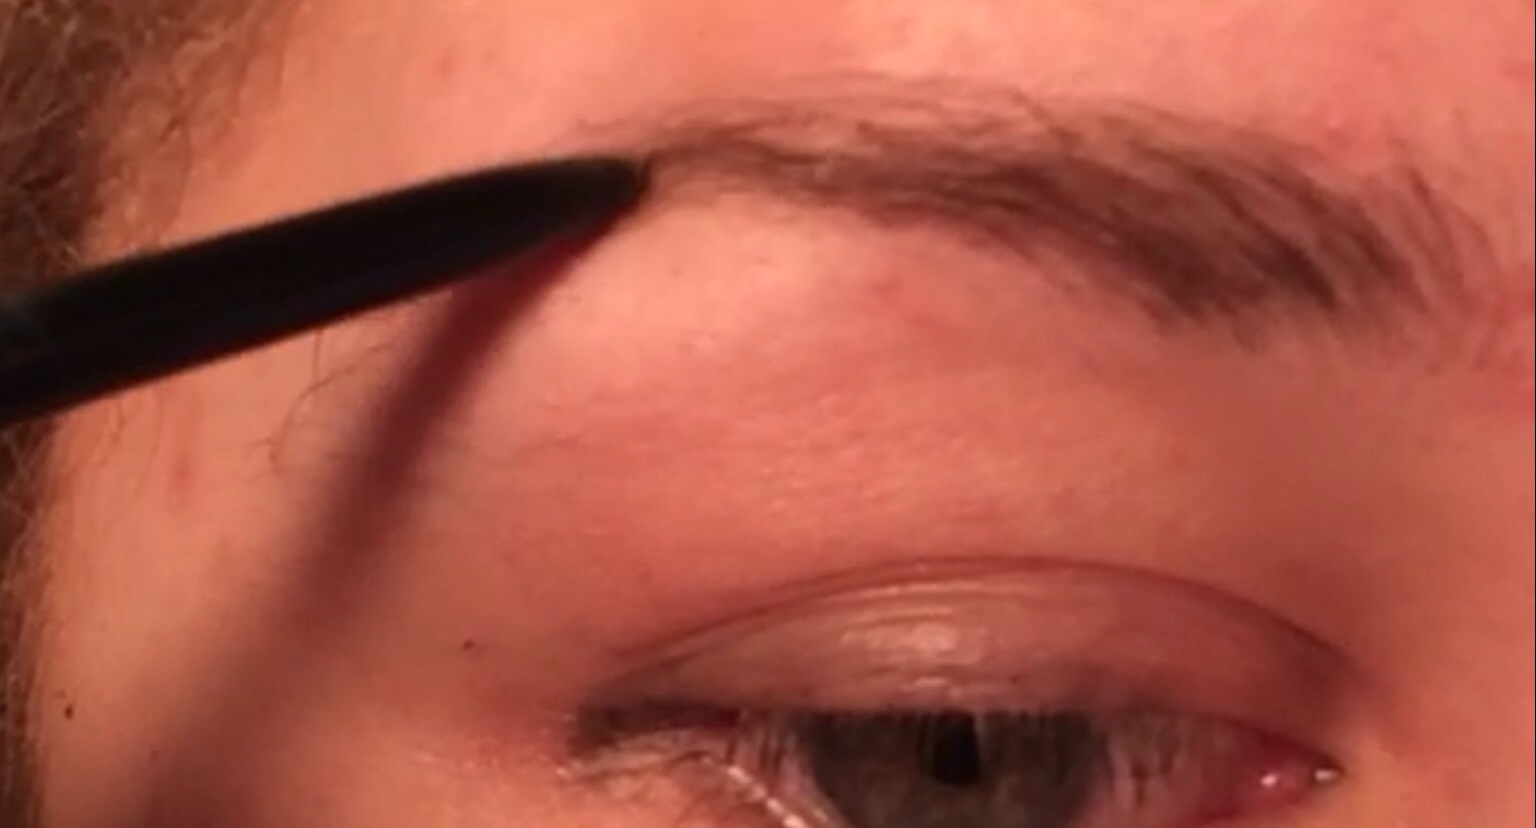
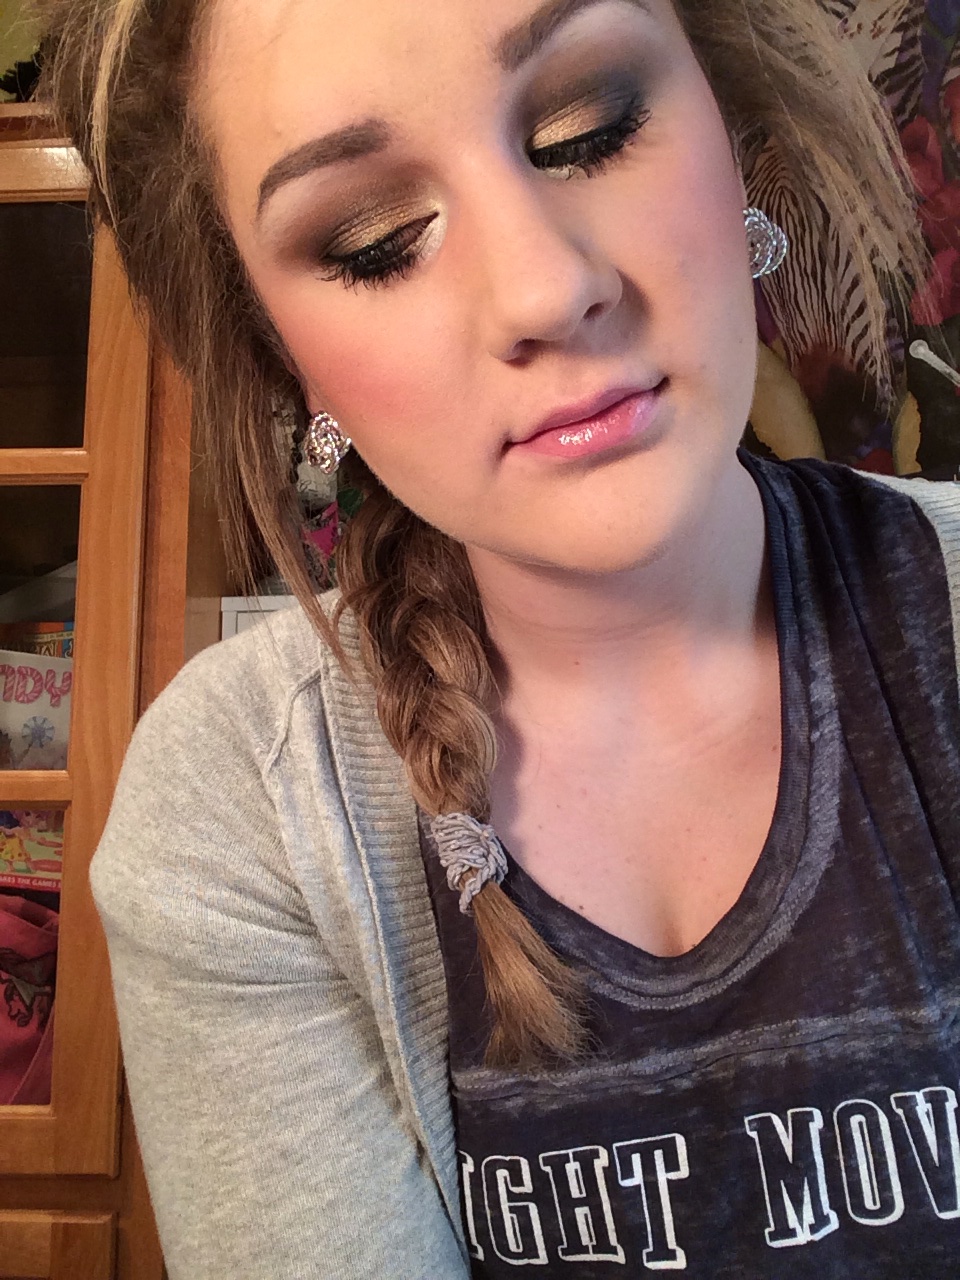
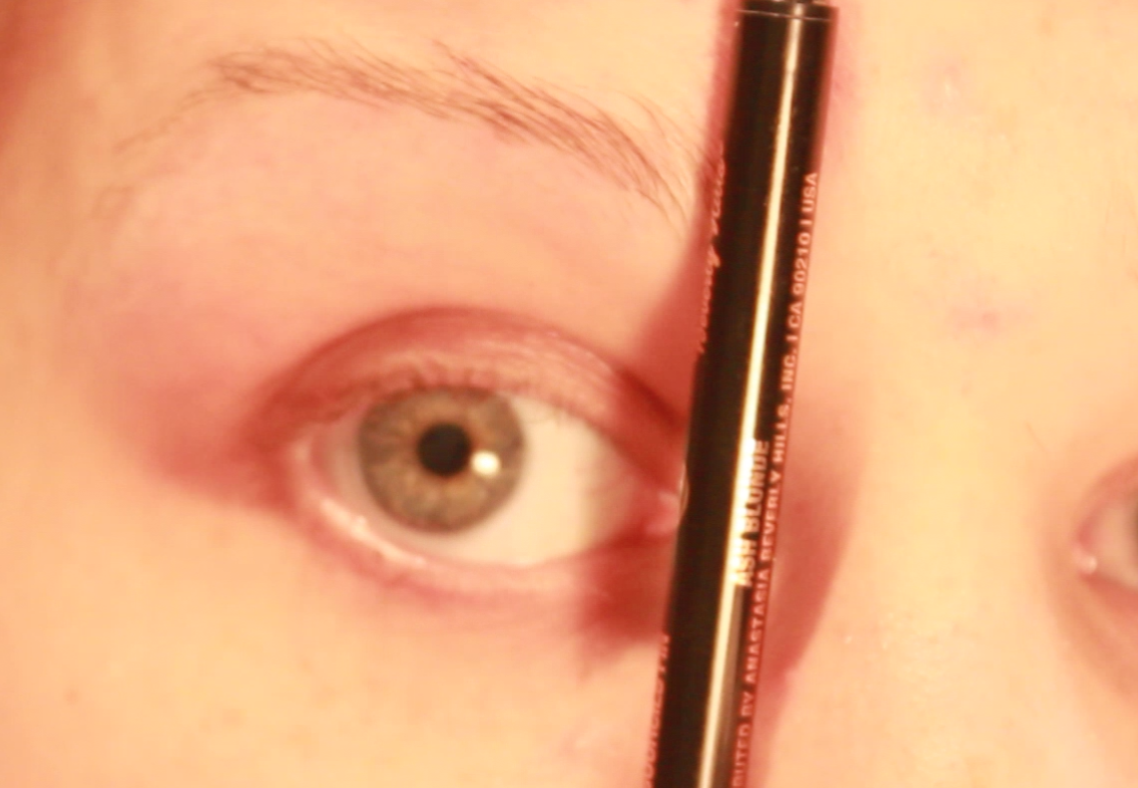
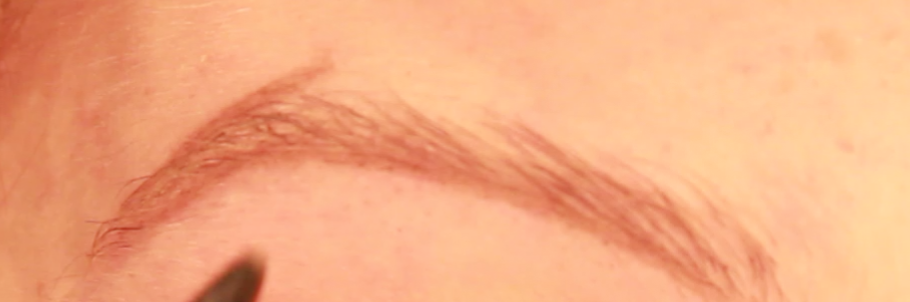
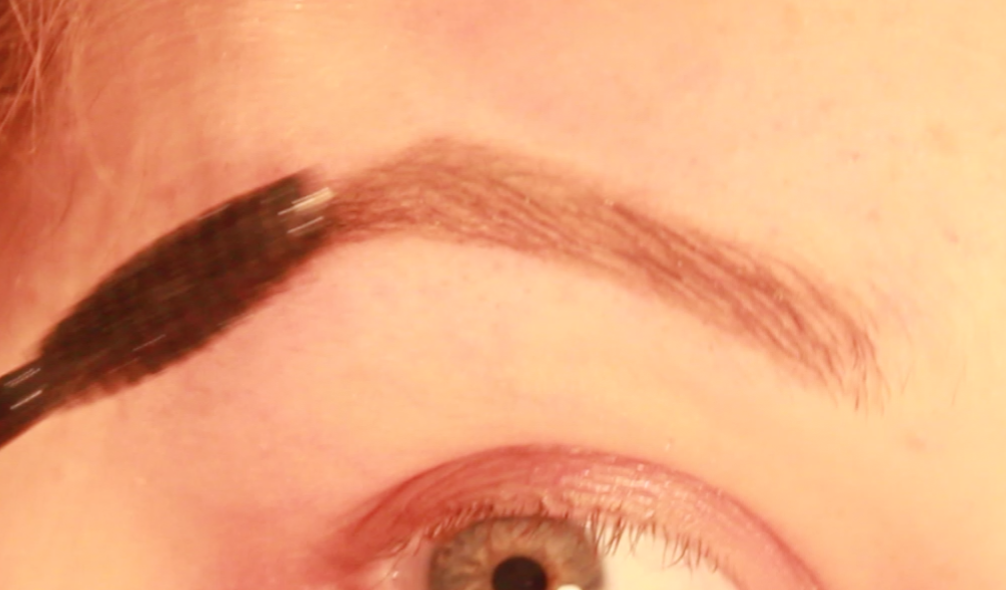
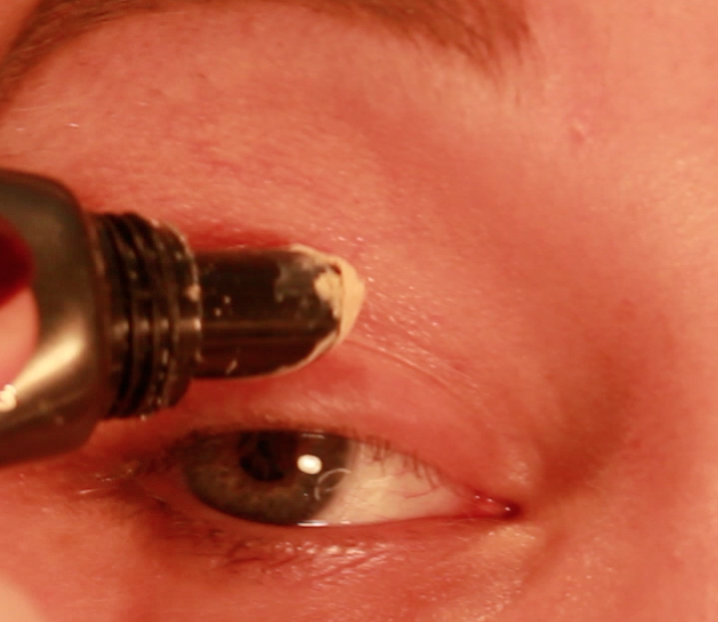
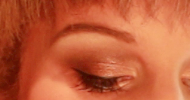
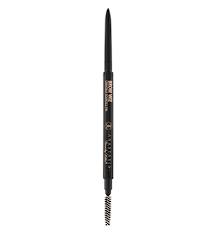
To start off, I’m filling in my brows with the Anastasia Dip Brow Pomade in Blonde. 

ImageImageImage


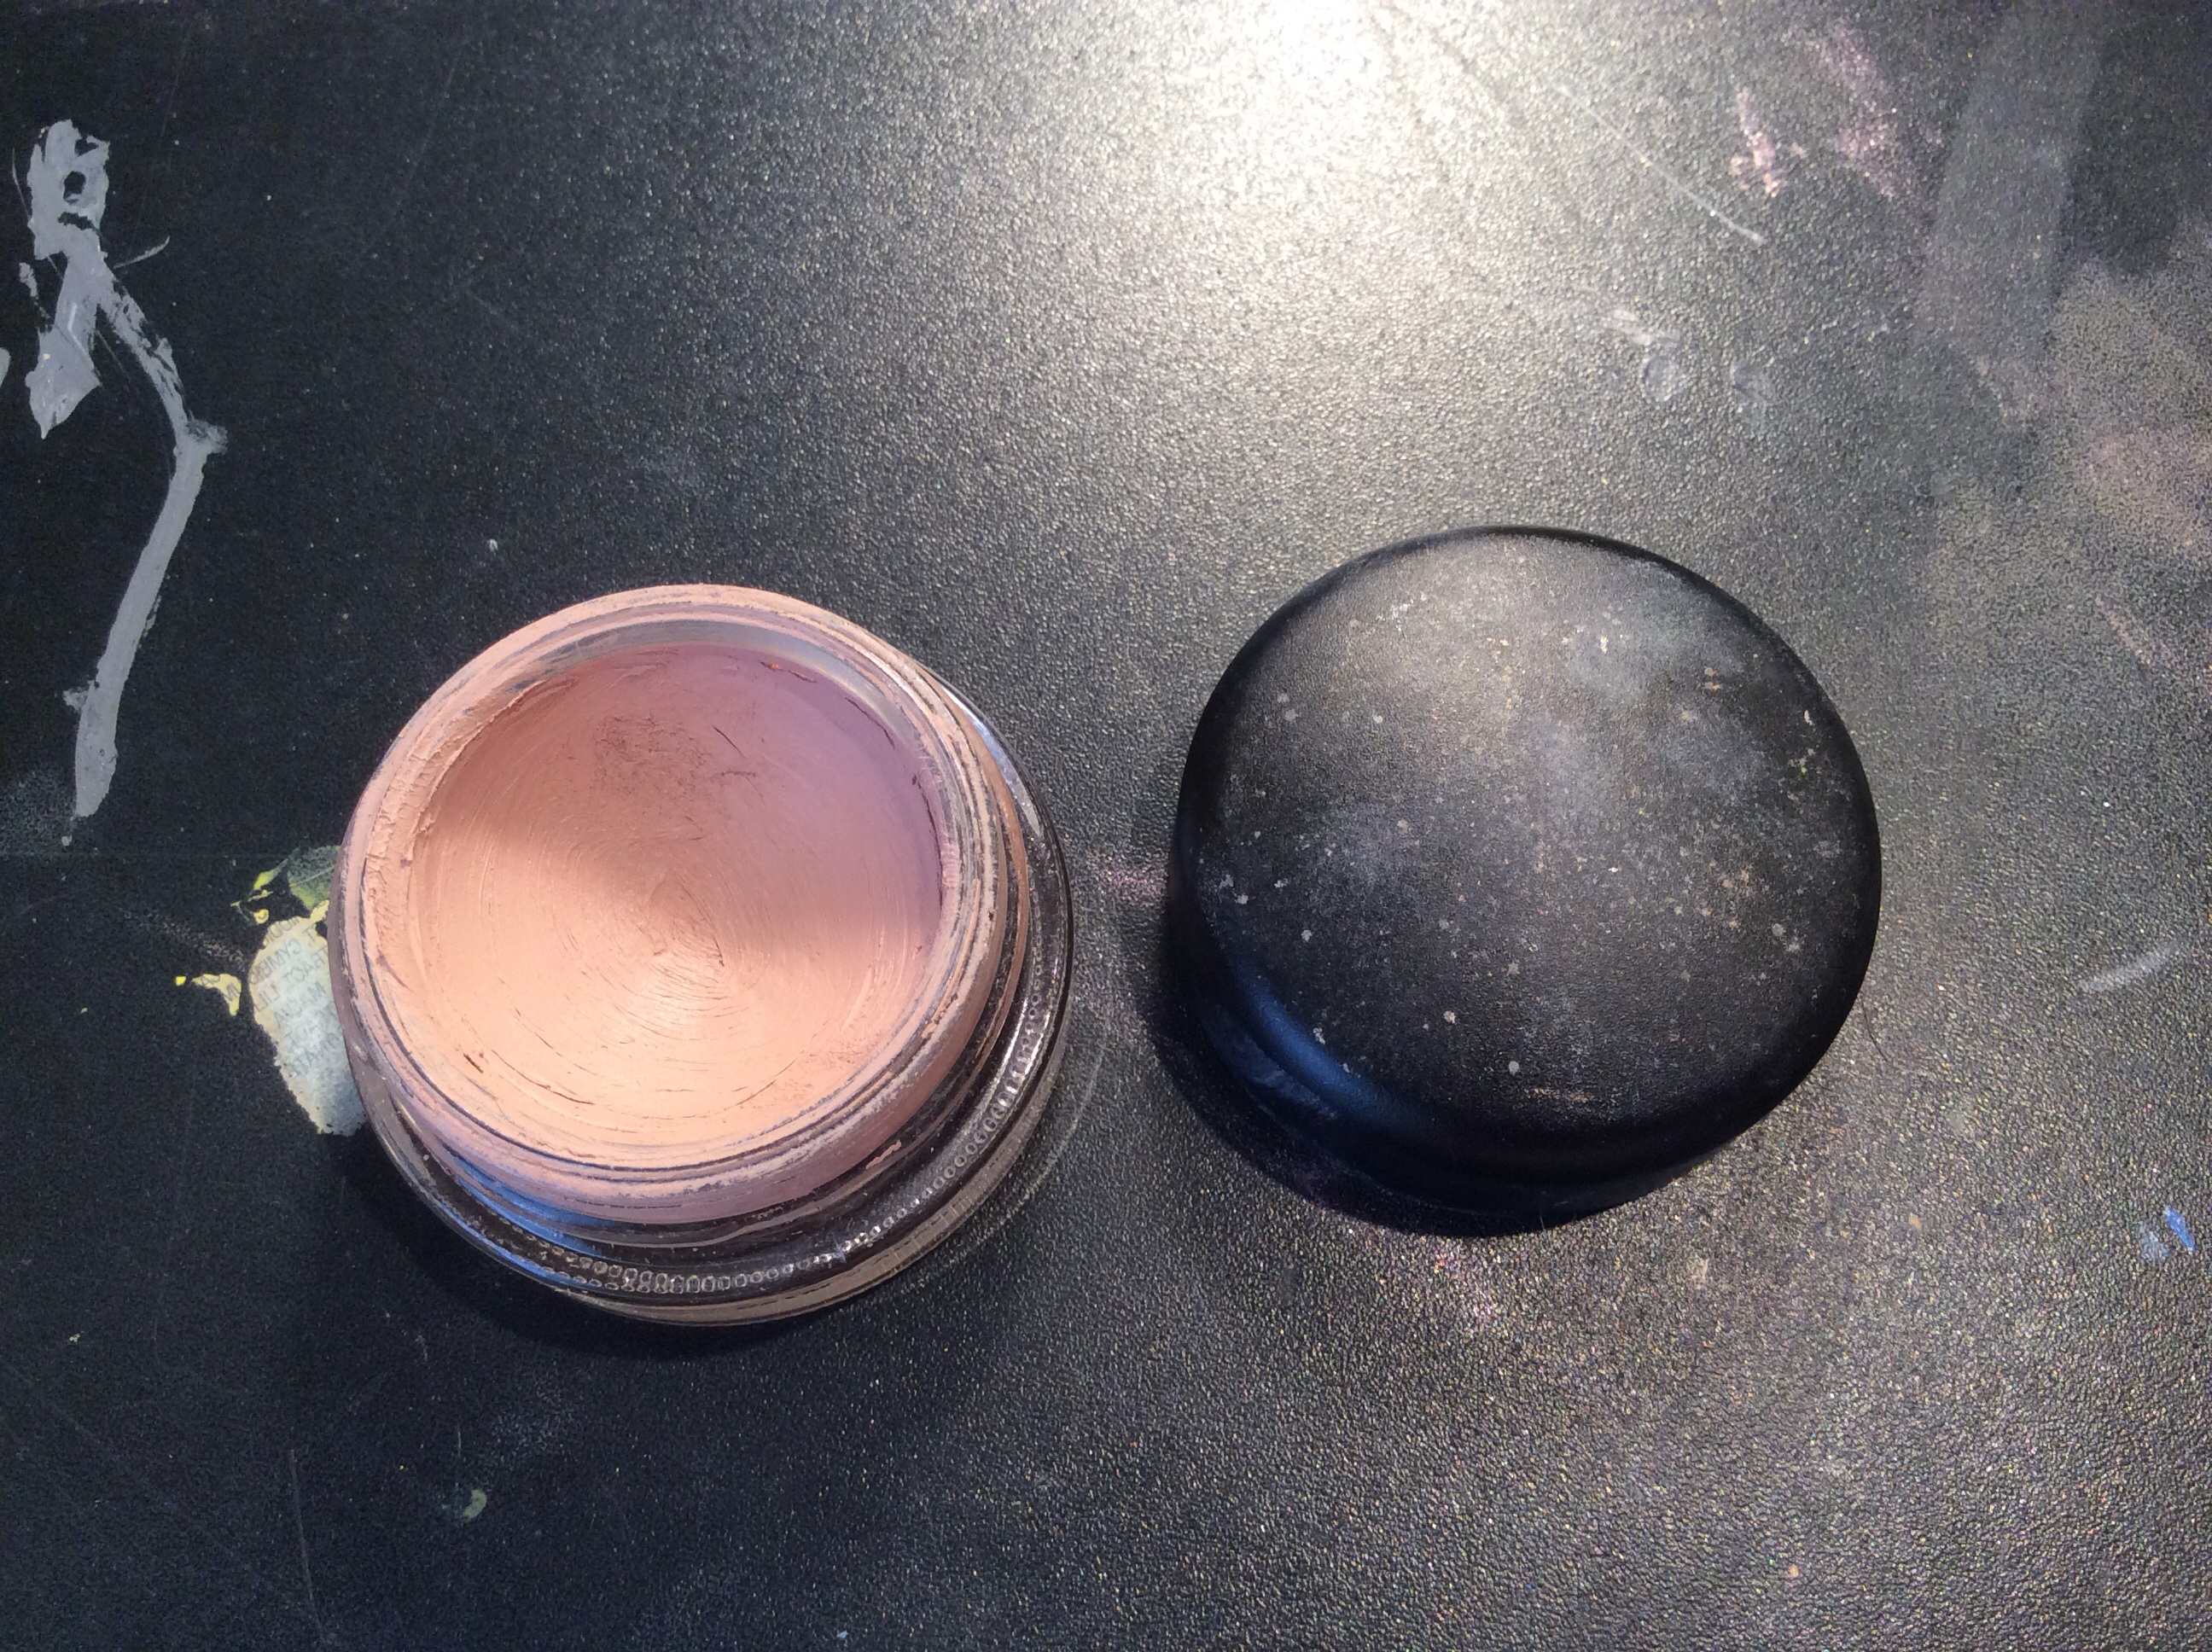
Next, I’m going to prime my eyes with MAC’s Painterly Paint Pot. This is going to give me a blank canvas to work with.

ImageImage


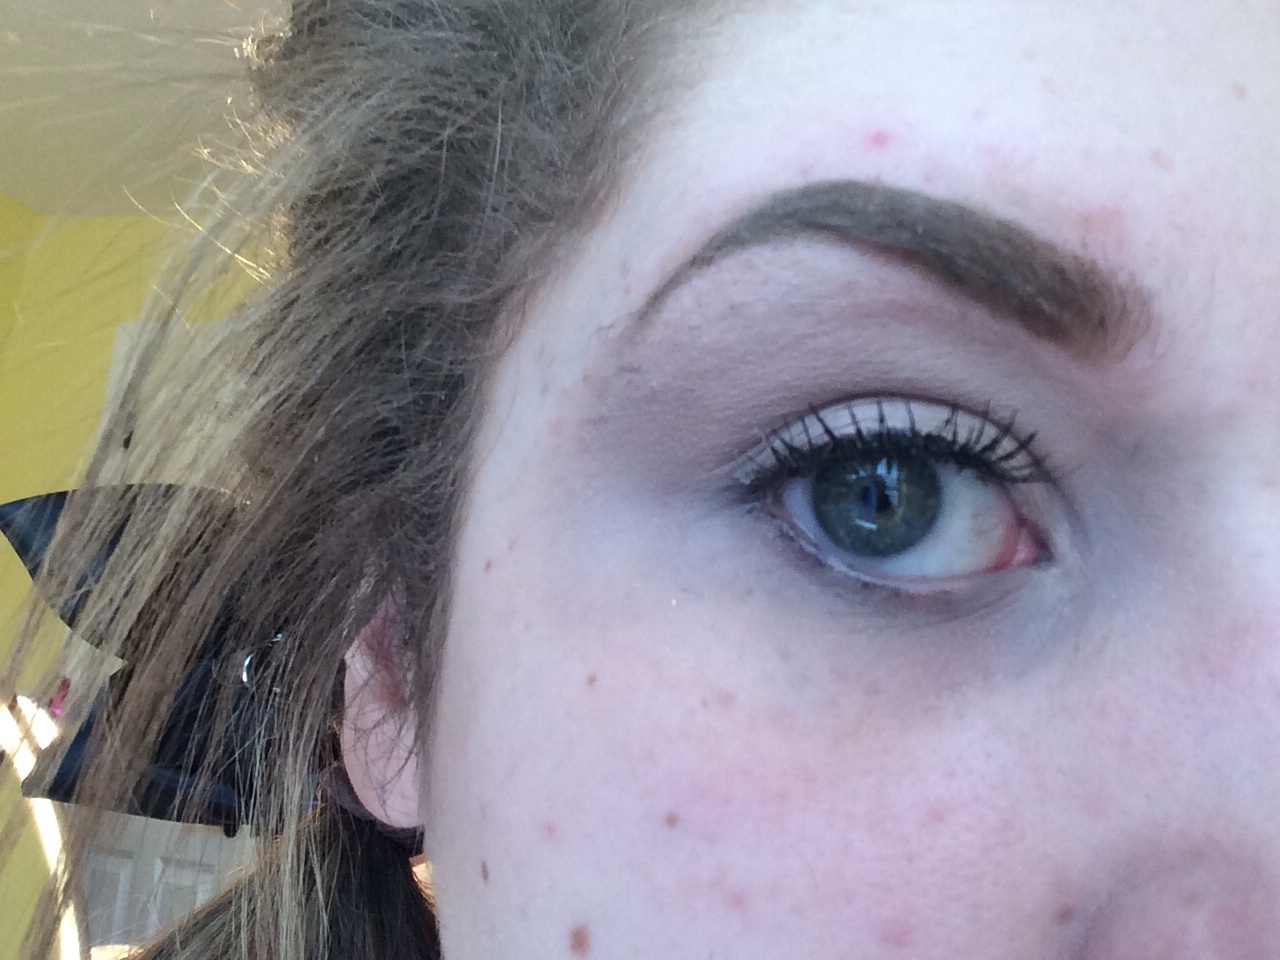
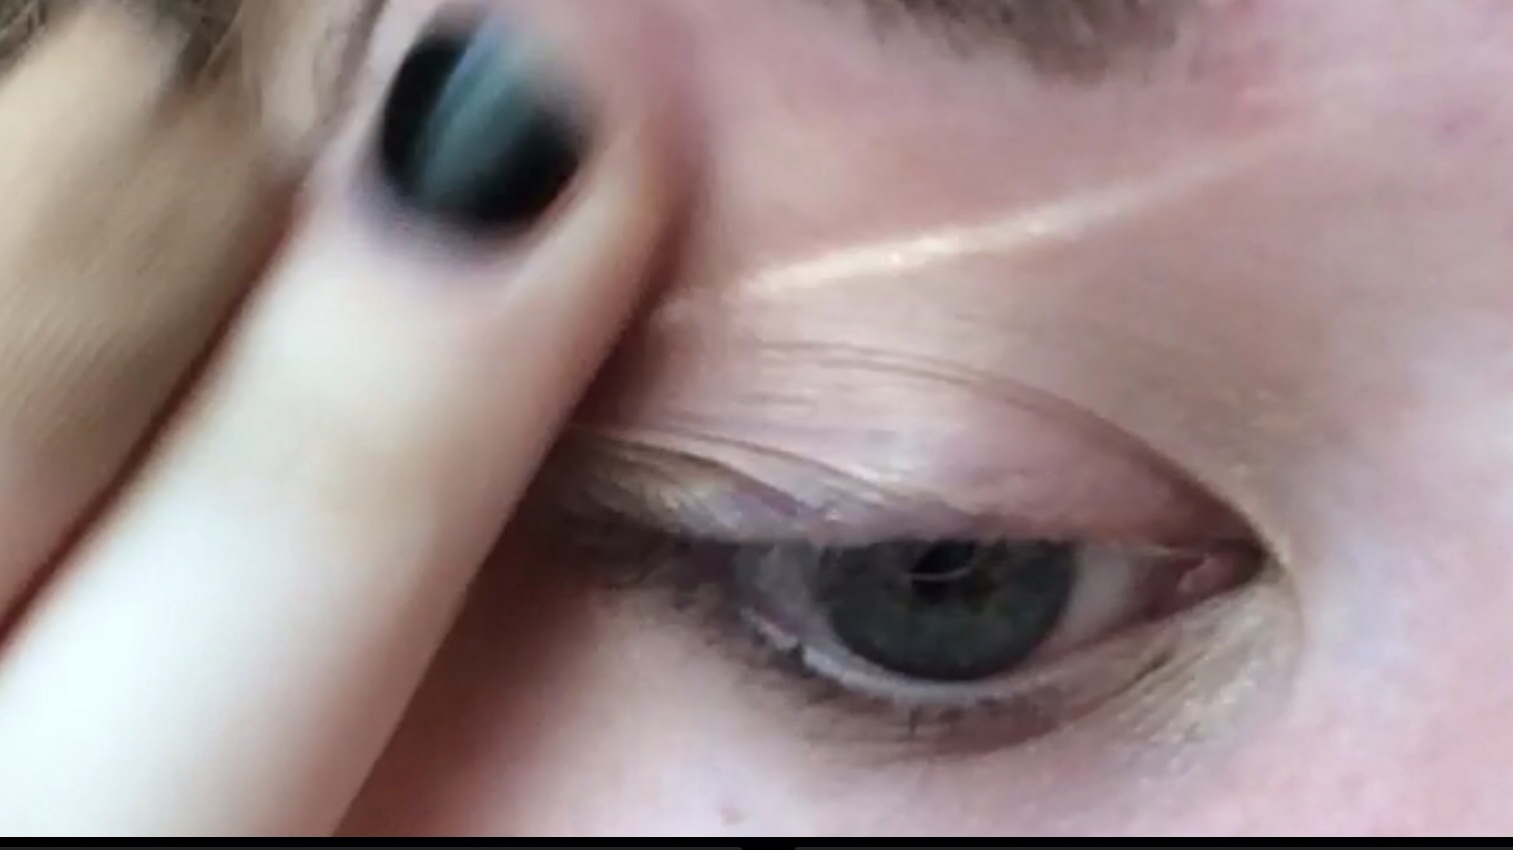
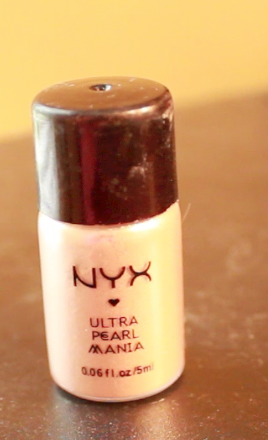
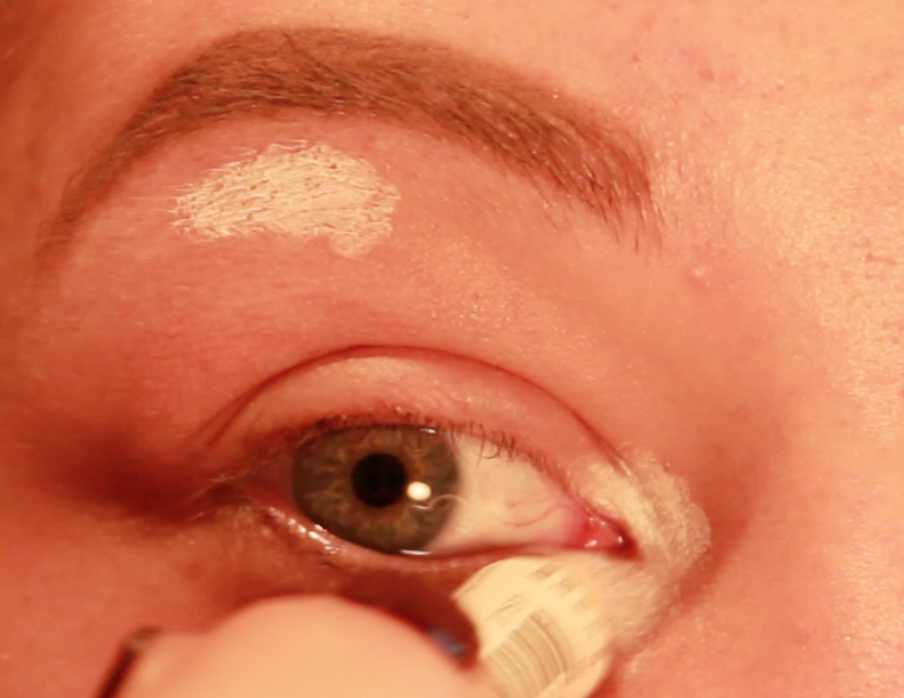
Now, as always, I’m adding a white cream shadow under my brow and in my inner corners. Just blend that with your ring finger.Image


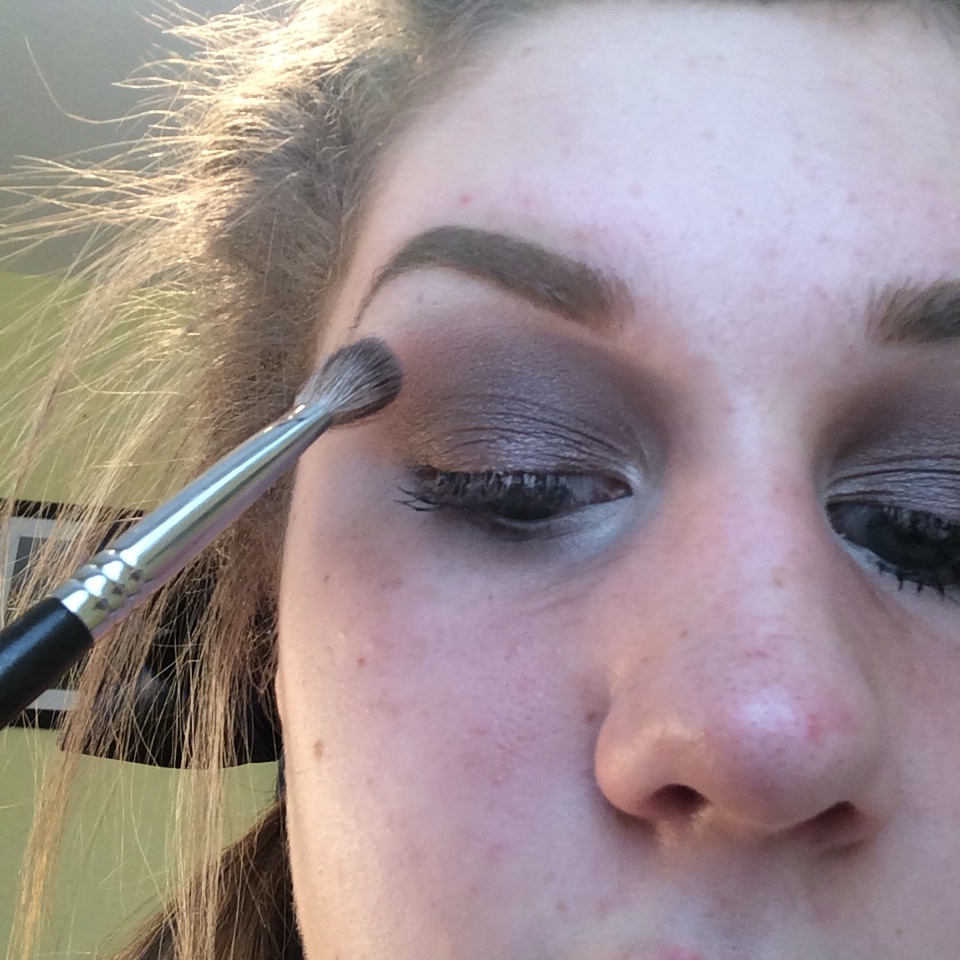
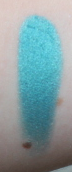
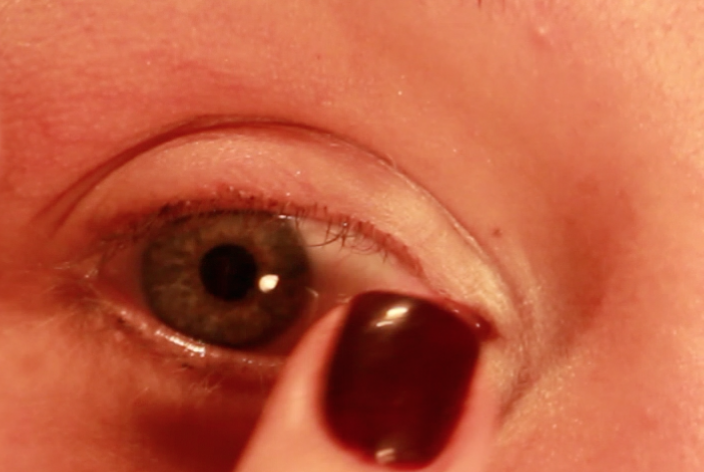
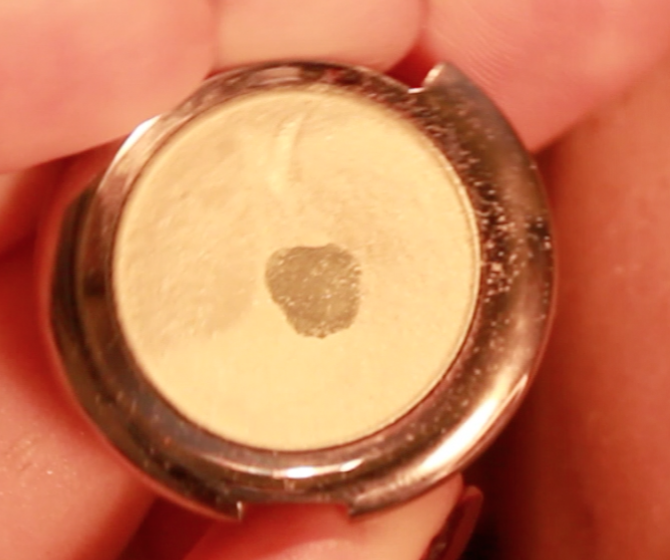
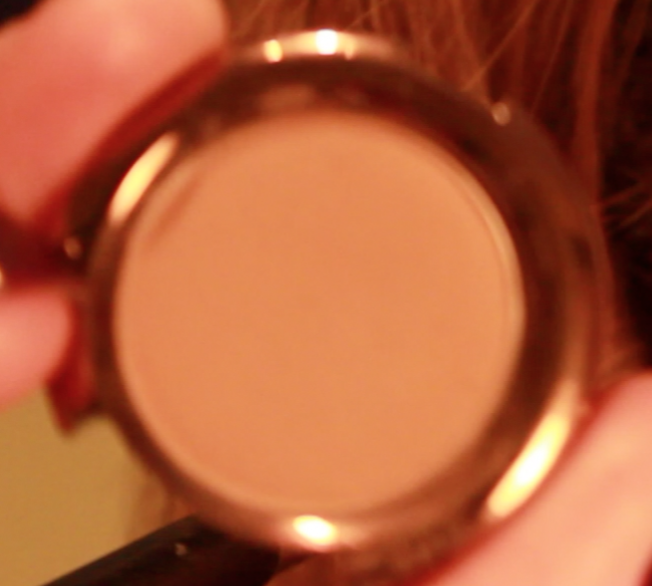
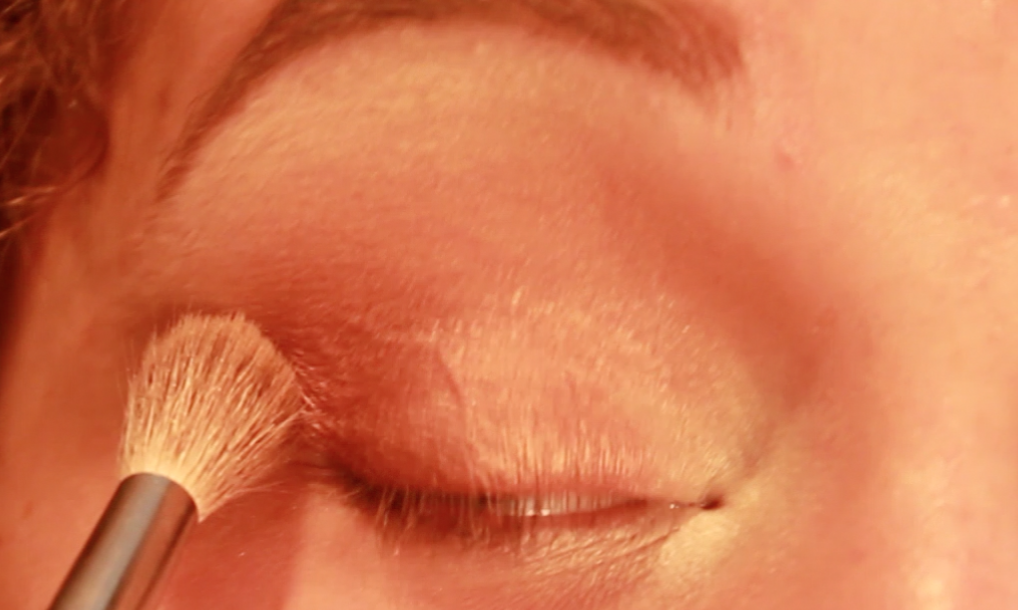
Now I’m going to take a fluffy angled brush and Strange from the Naked 3 and highlight both of those areas.

ImageImage


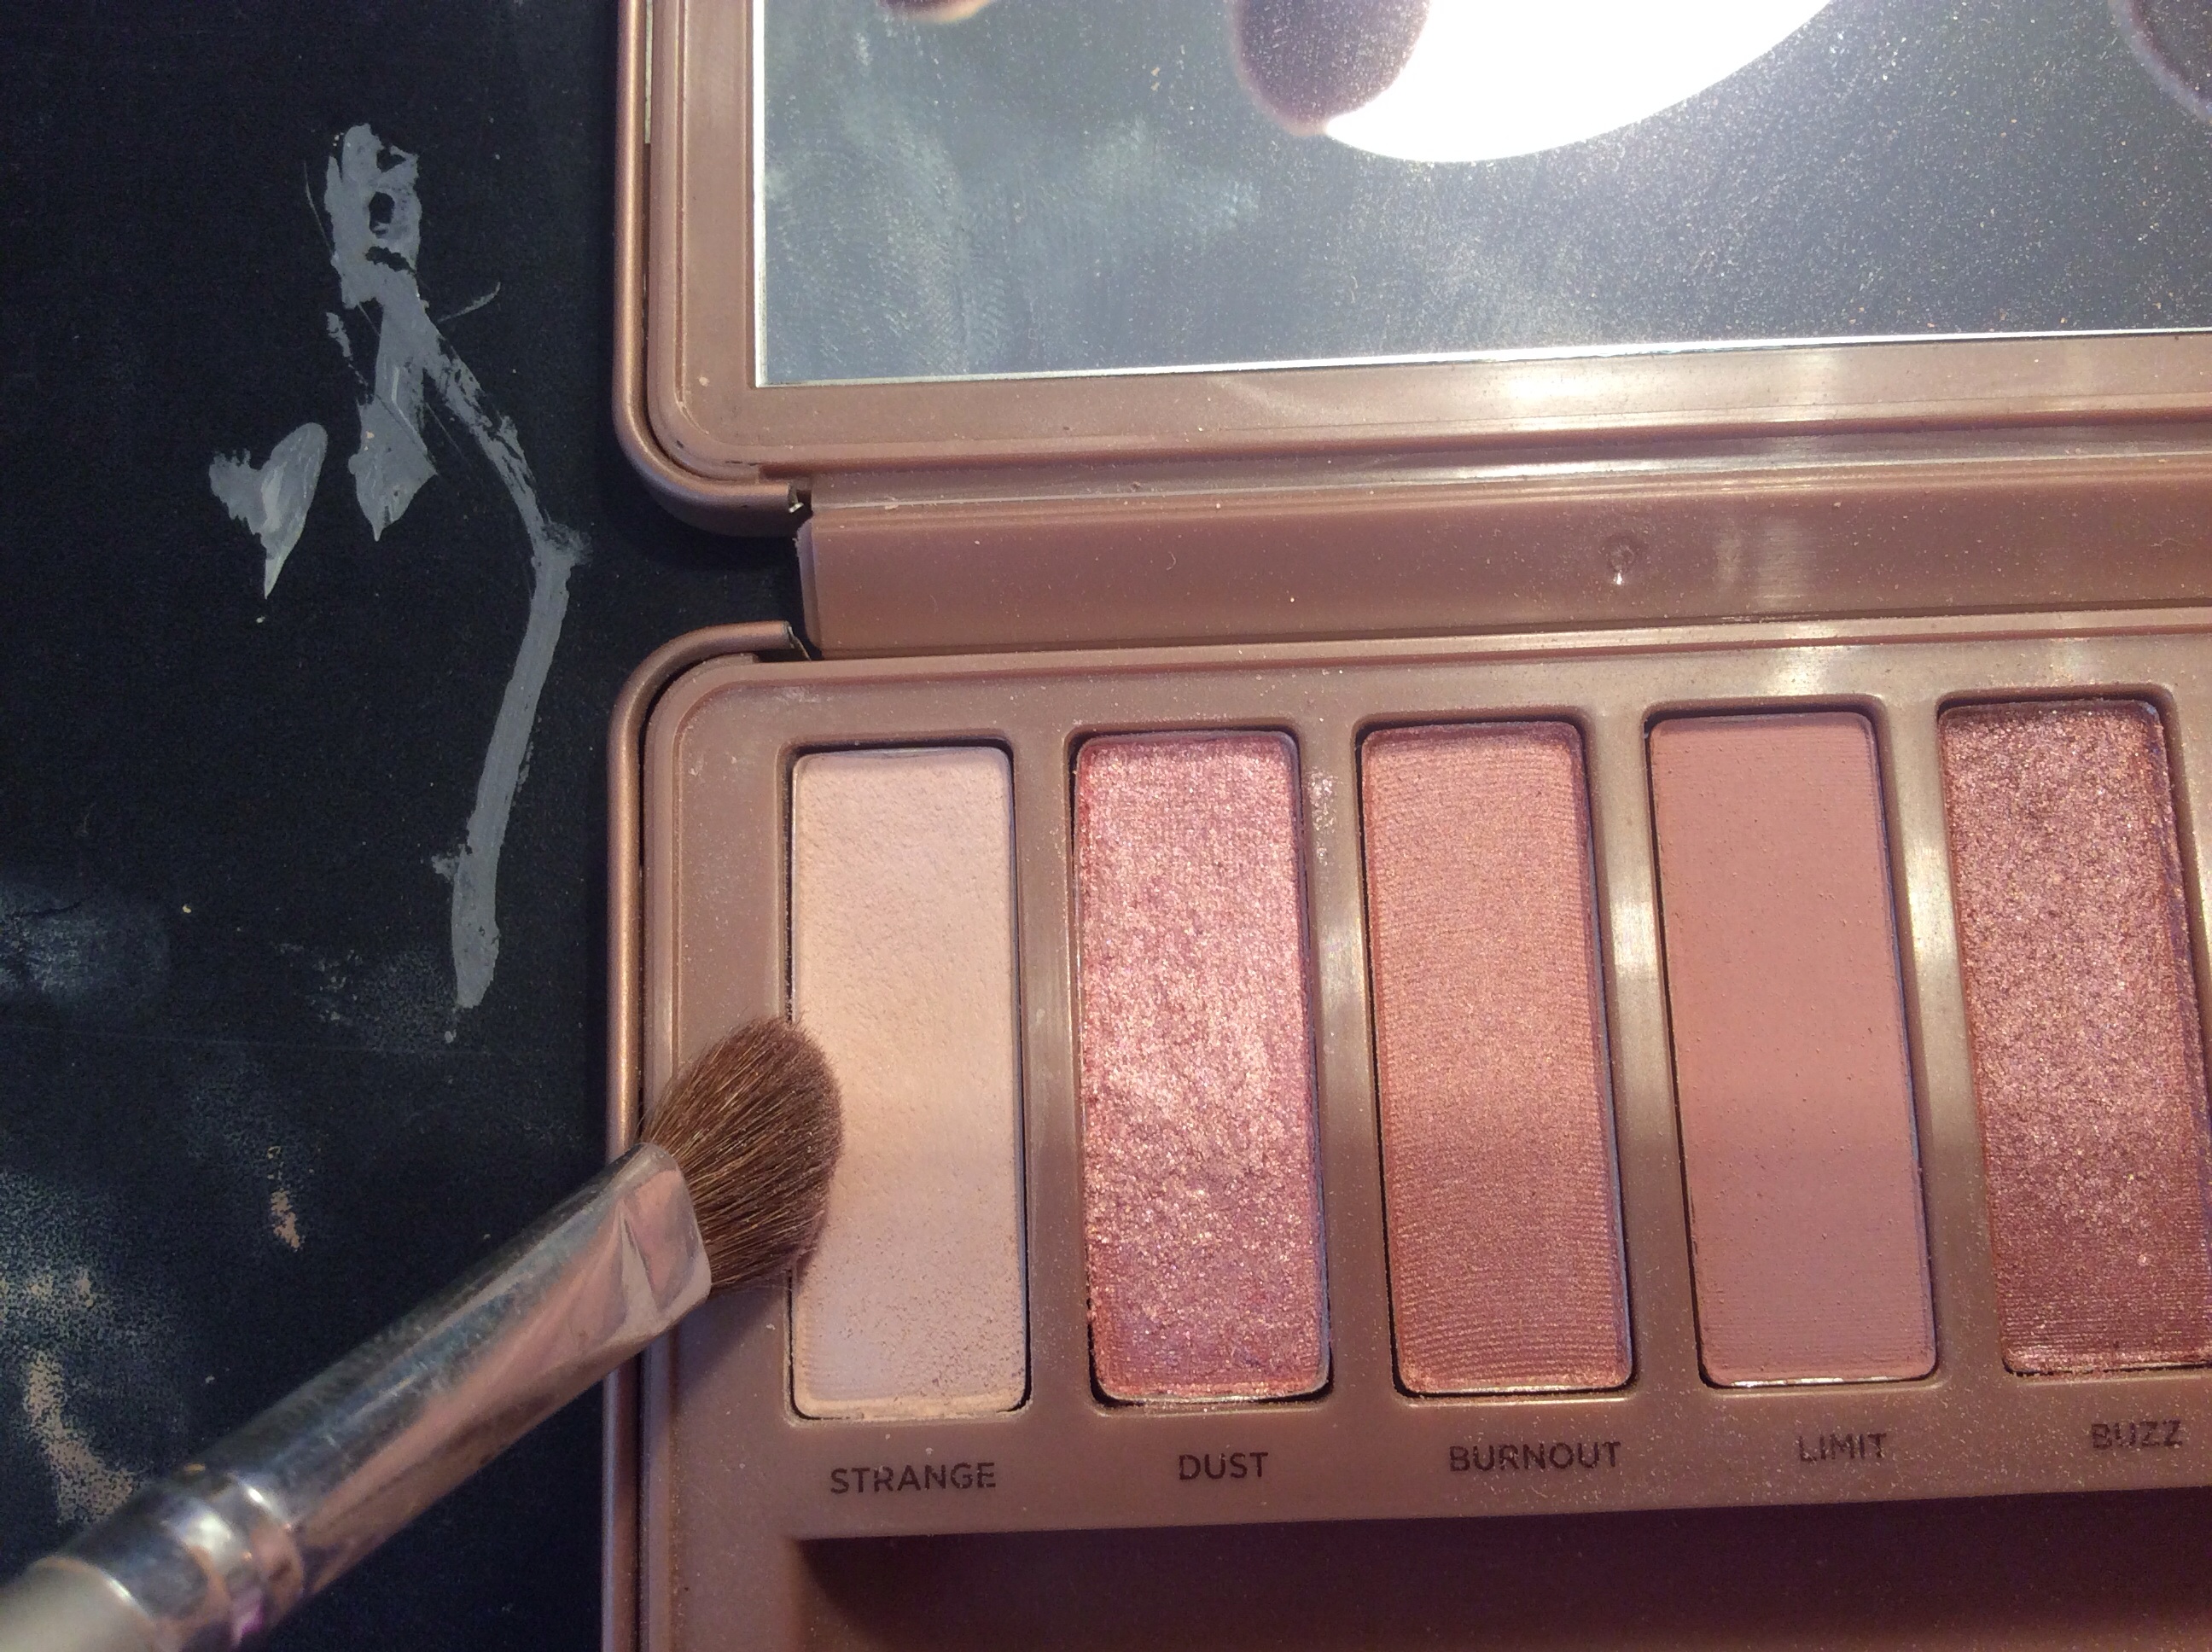
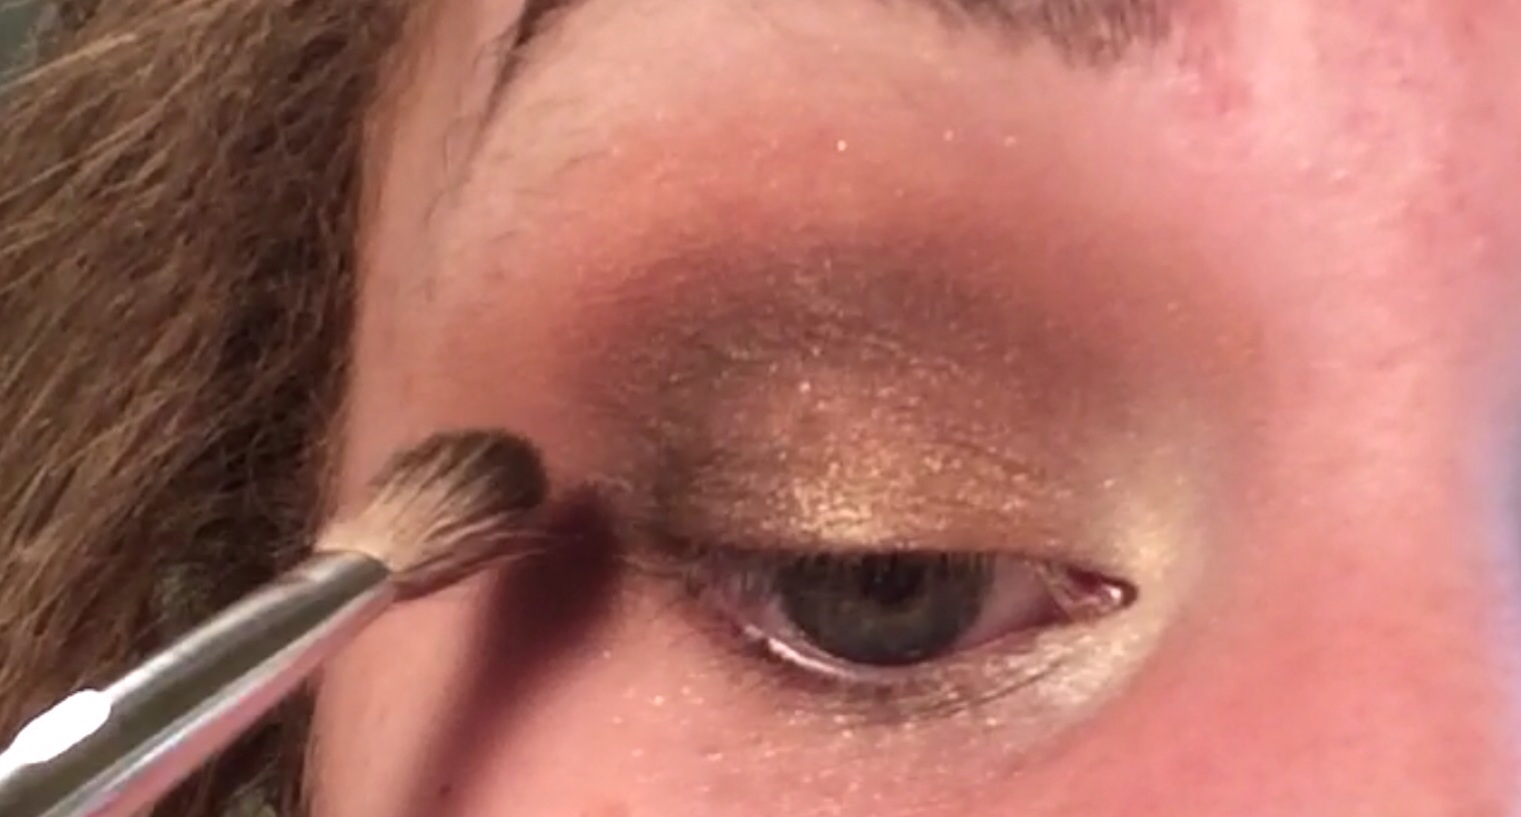
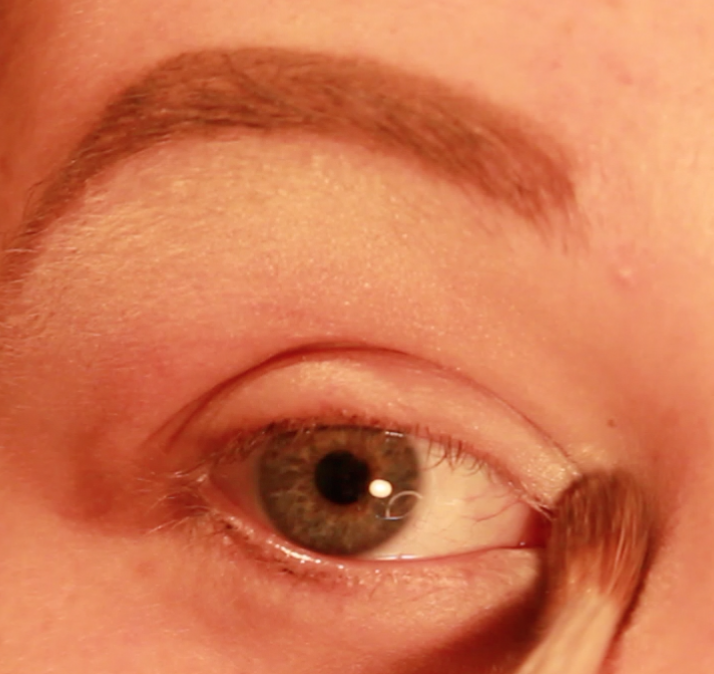
Now with a fluffy blending brush, I’m going to softly define the crease with Nooner


ImageImageImage


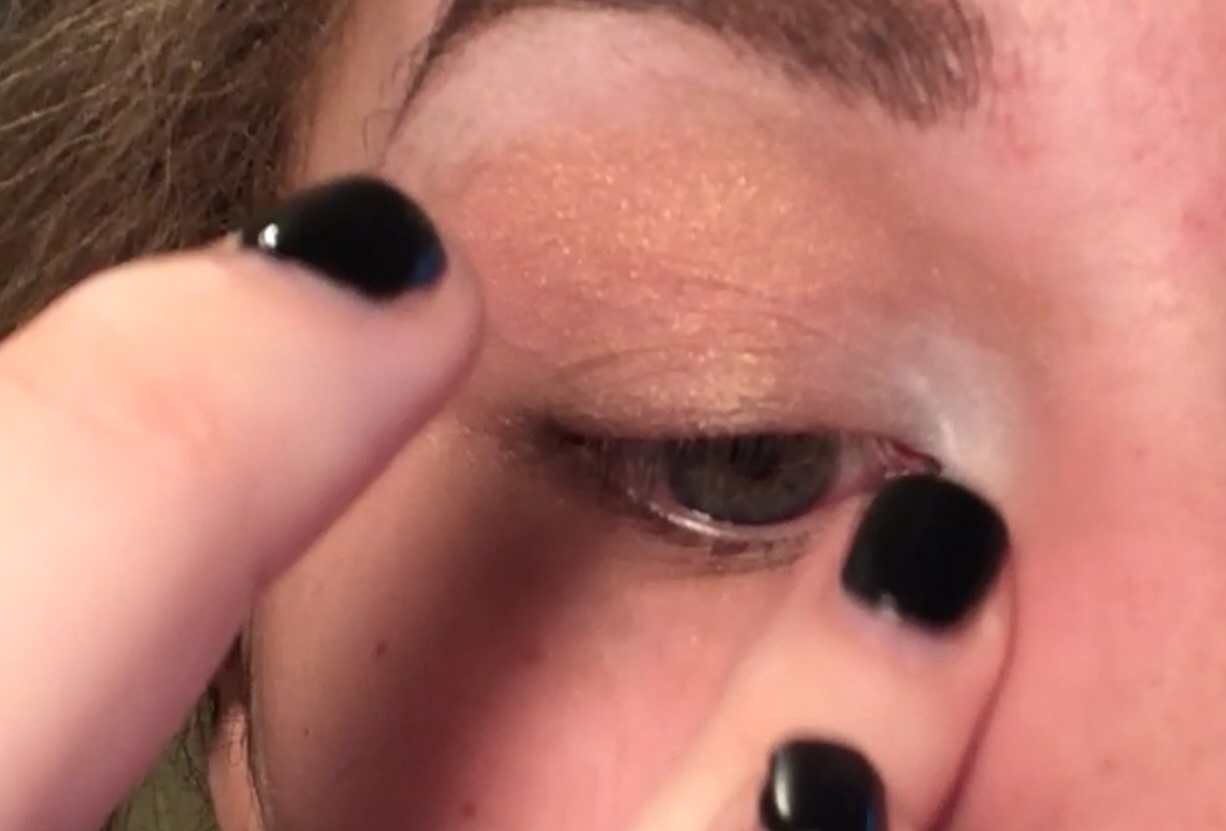
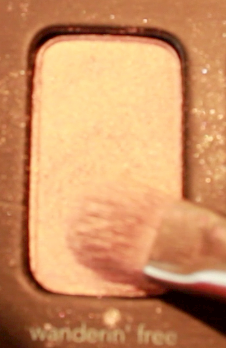
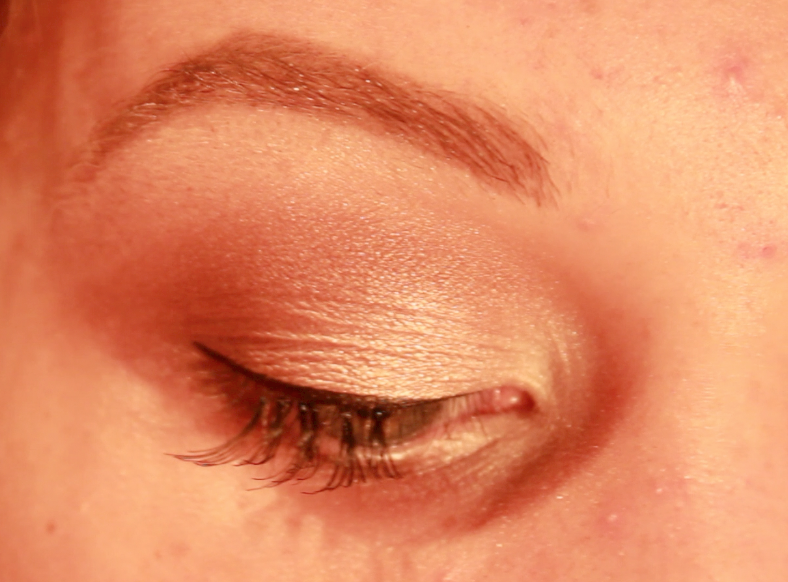
Now with a flat shader brush, I’m taking Darkside, a deep rosy-gray, and packing this on my lid.


ImageImageImageImage


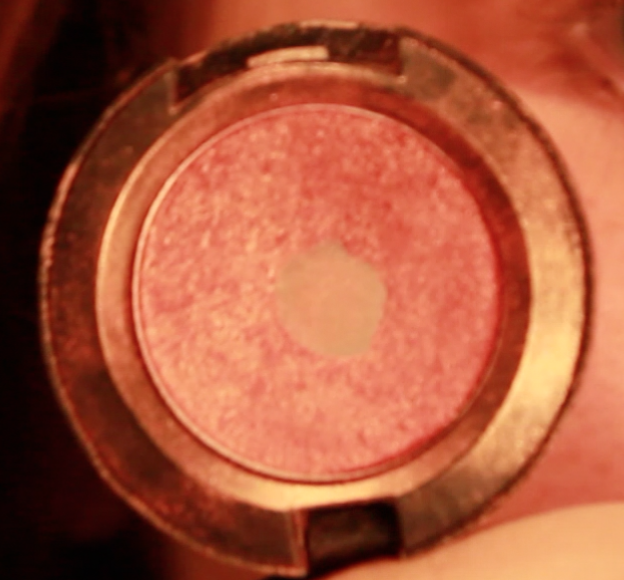
To brighten up and smoke-out the lid, I’m going to pat a bit of a lighter shimmery rose on the center area.ImageImageImage


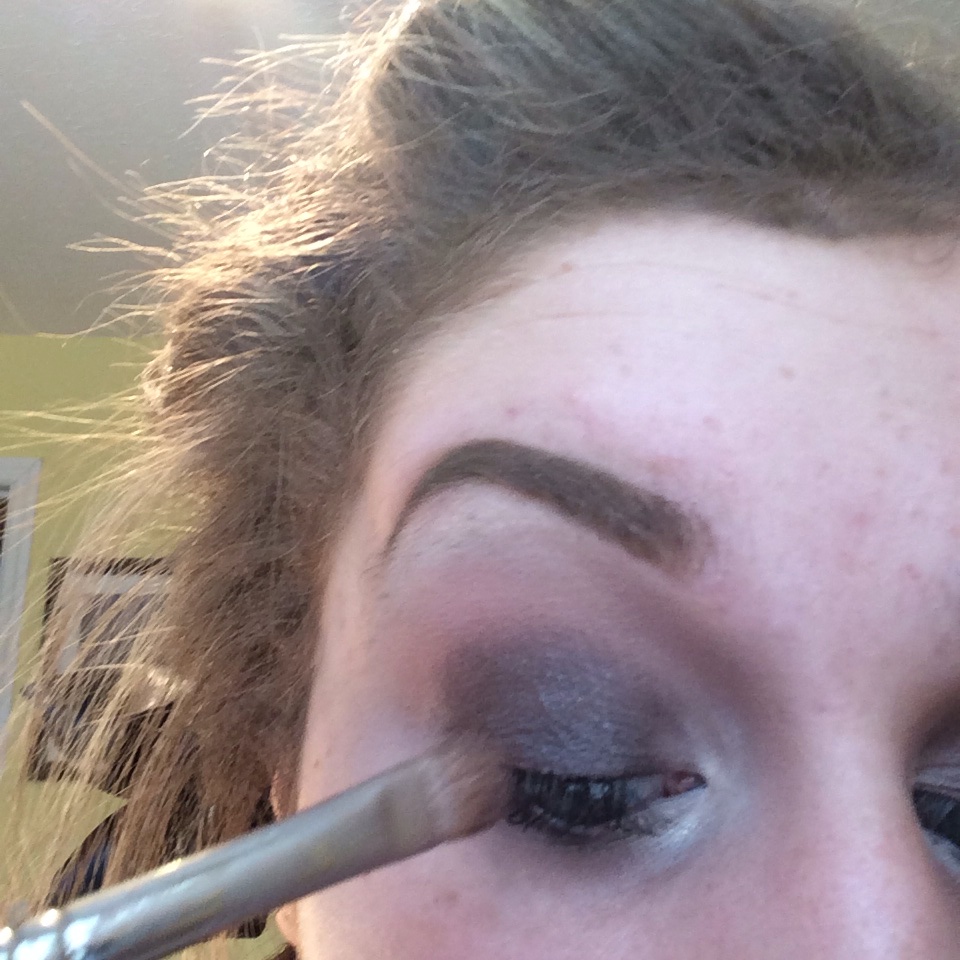
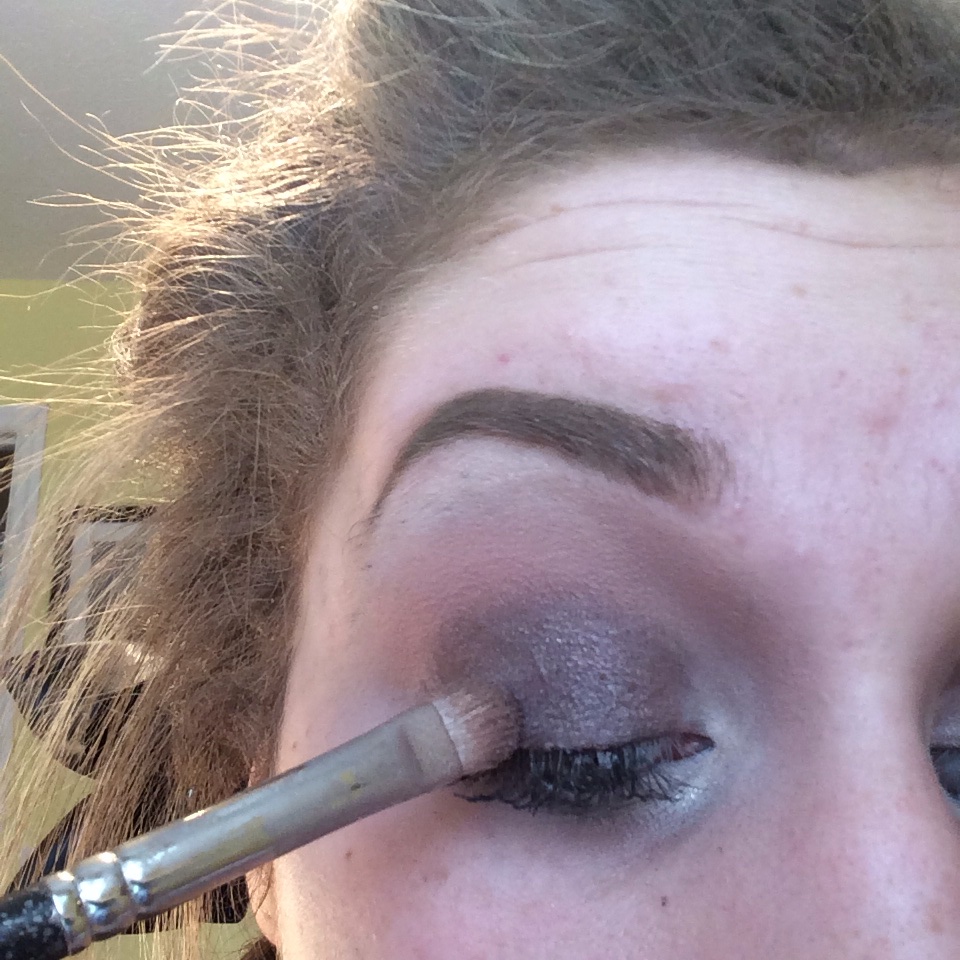
Now, in the very center, I’m going to pat a bright glittery rose just to add some dimension.


ImageImageImageImage


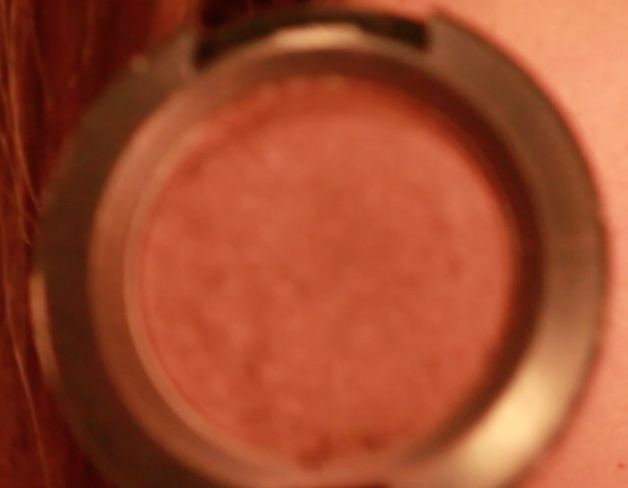
Now i’m going to blend the outer edges of the gray with a bronze-y rose, extending it and blending through the crease. You want an ombre effect throughout the crease, but don’t add too much color.ImageImage


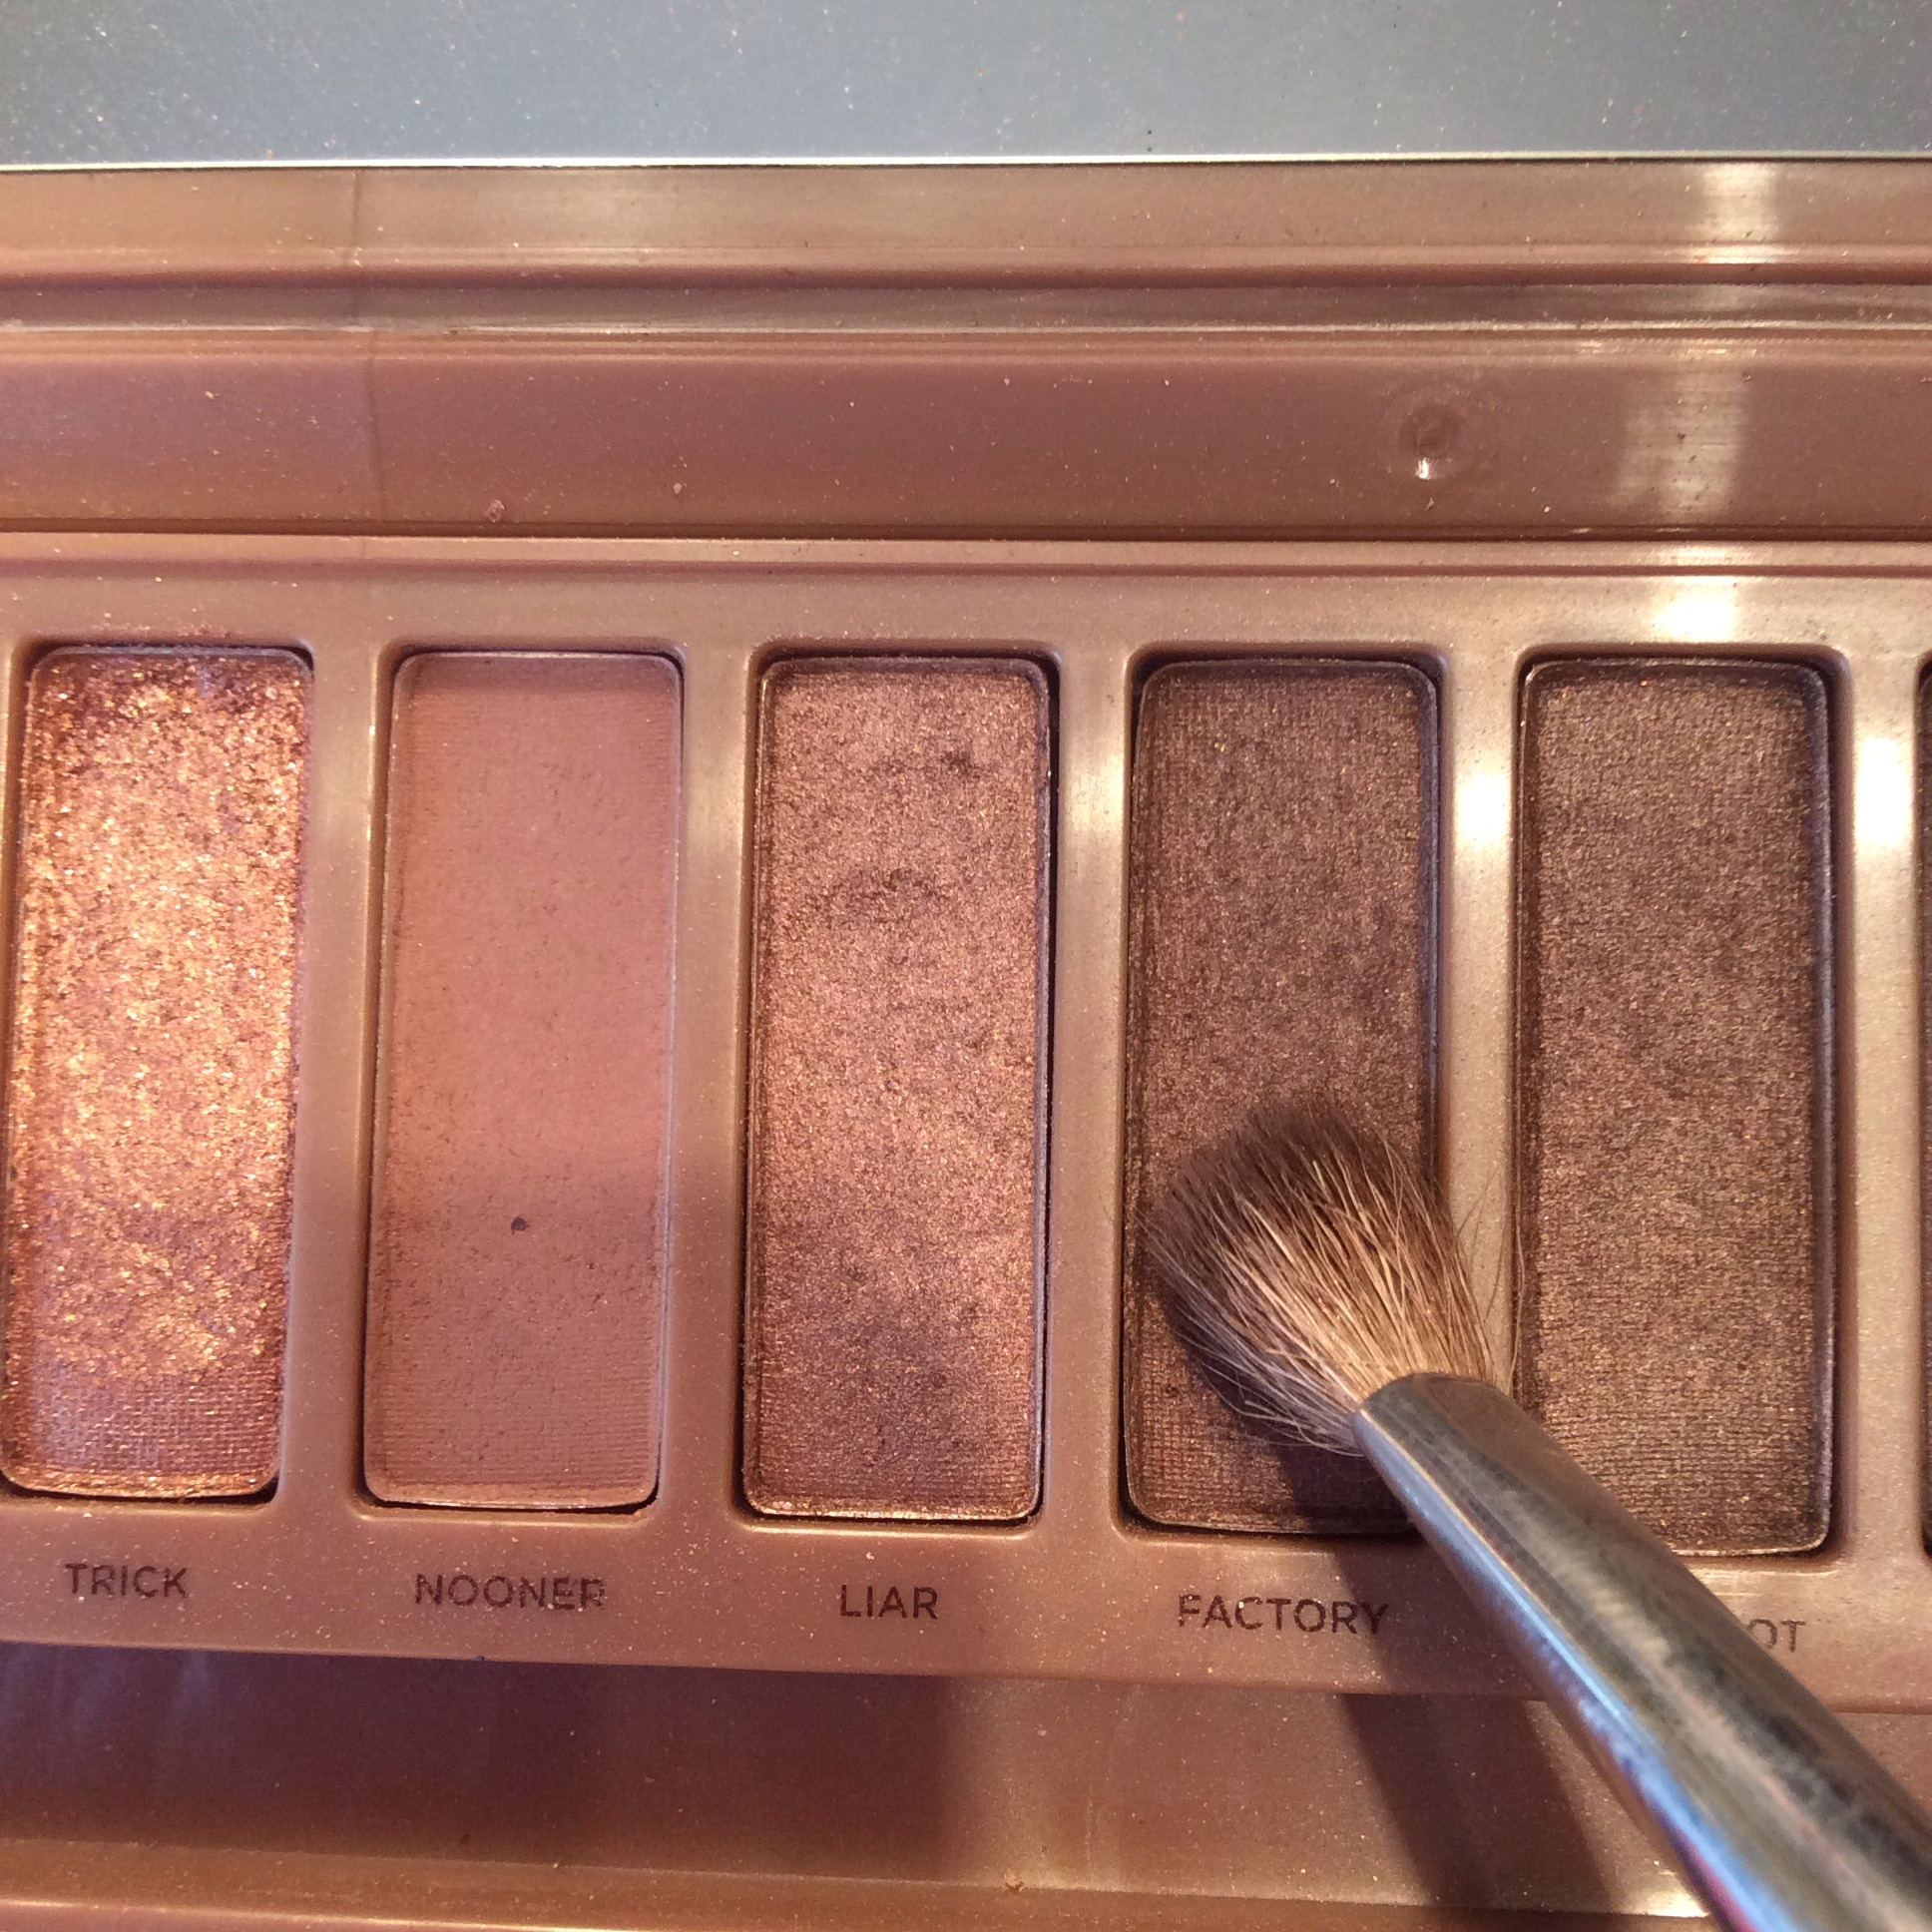
To further blend these colors, I’m going to blend it out with a deeper matte rose.

ImageImage


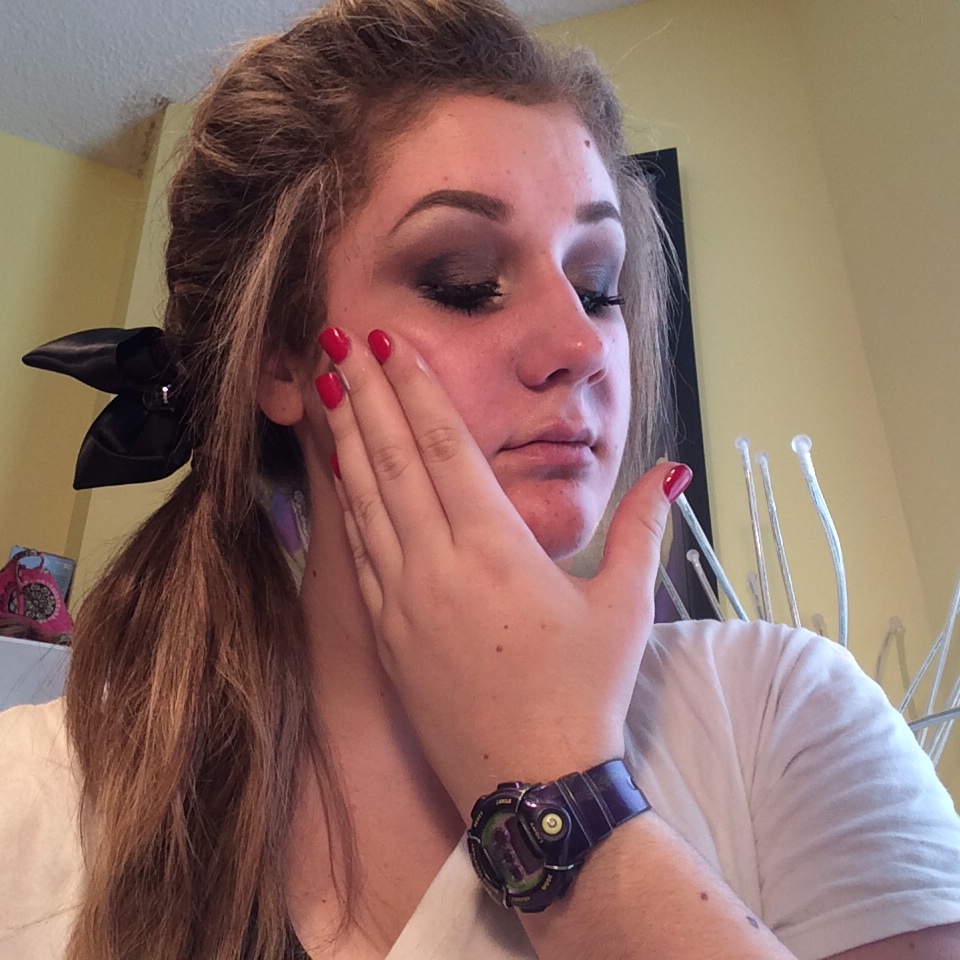
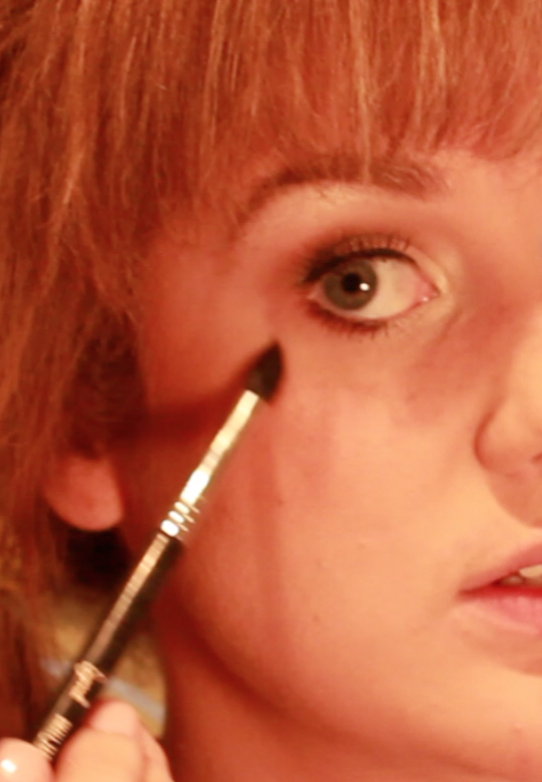
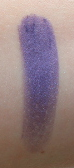
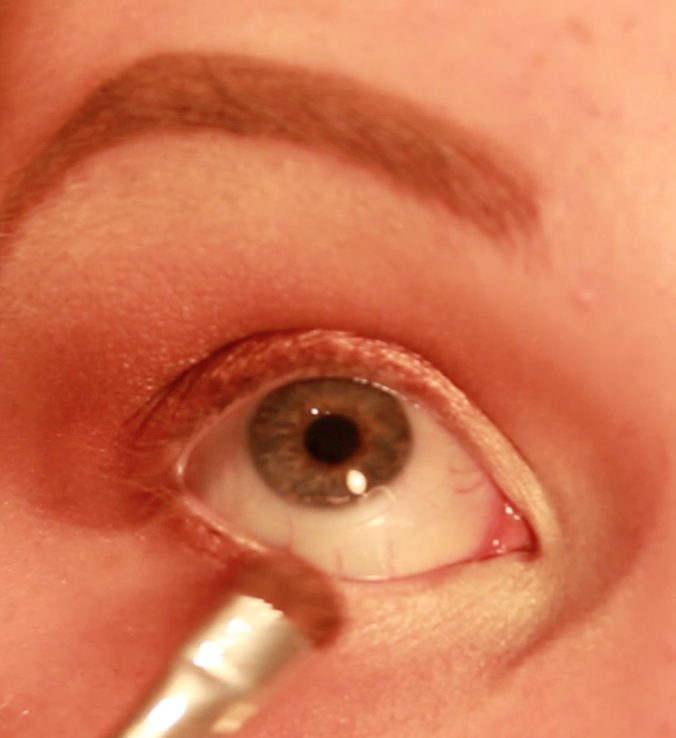
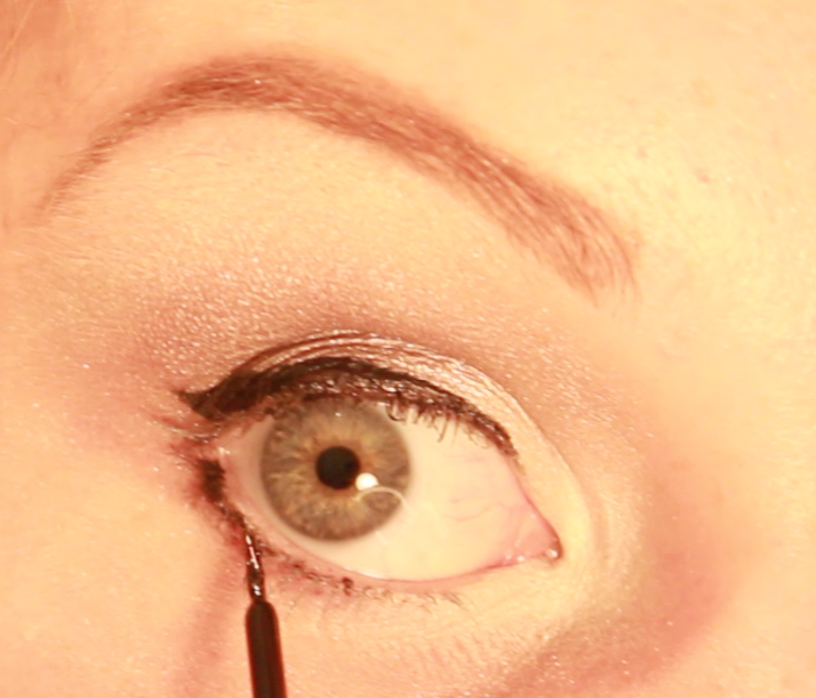
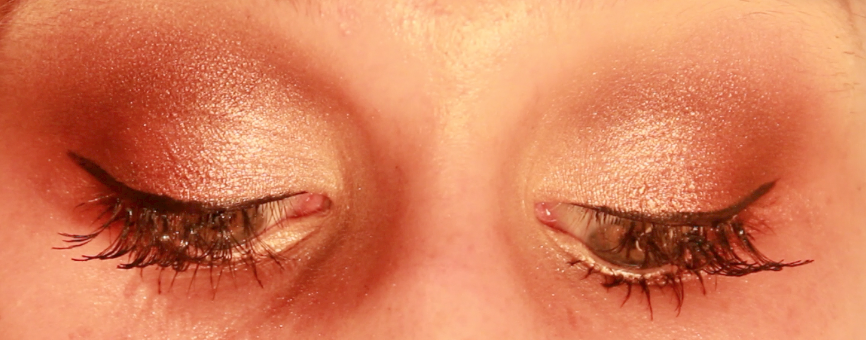
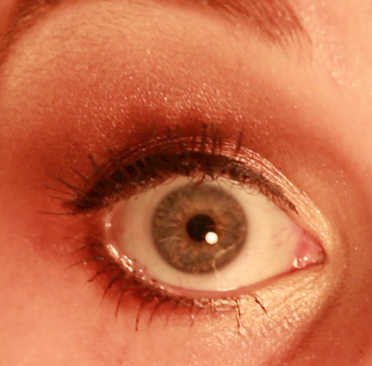
Now, to deepen the outer V, I’m going to take Blackheart, a black with rose glitter, and place, then blend, this in my outer corner.ImageImageImageImageImage


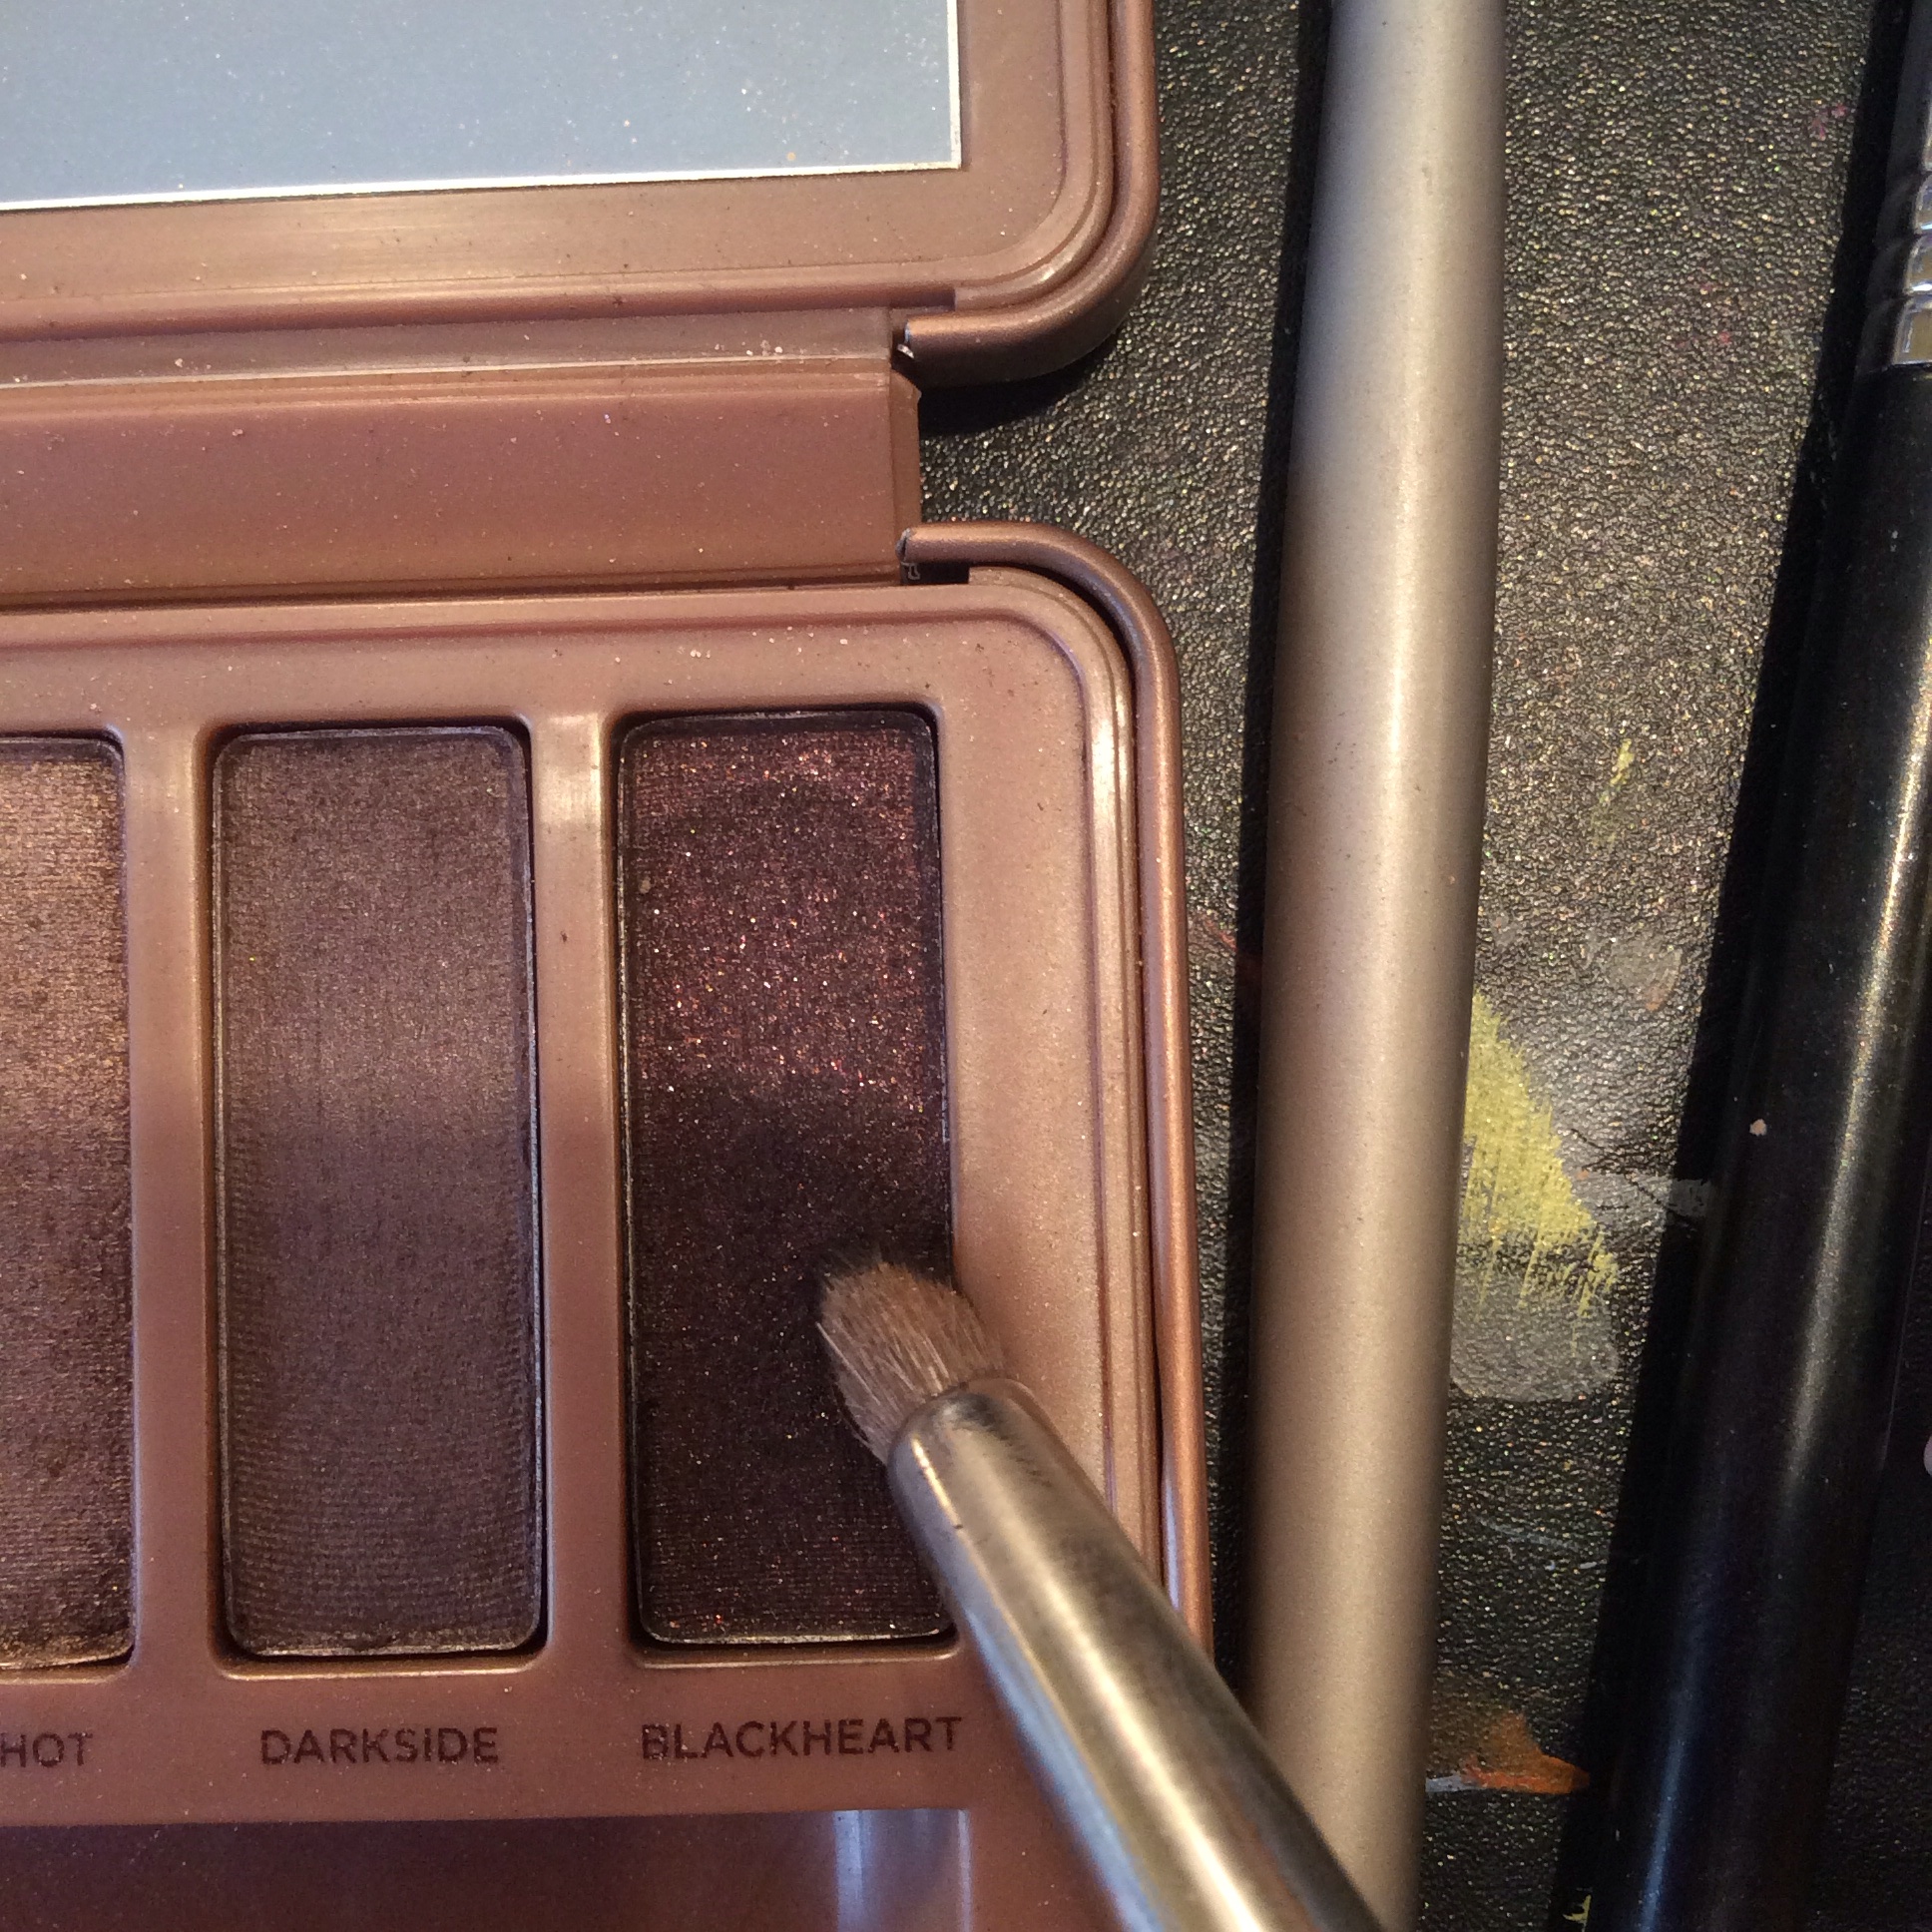
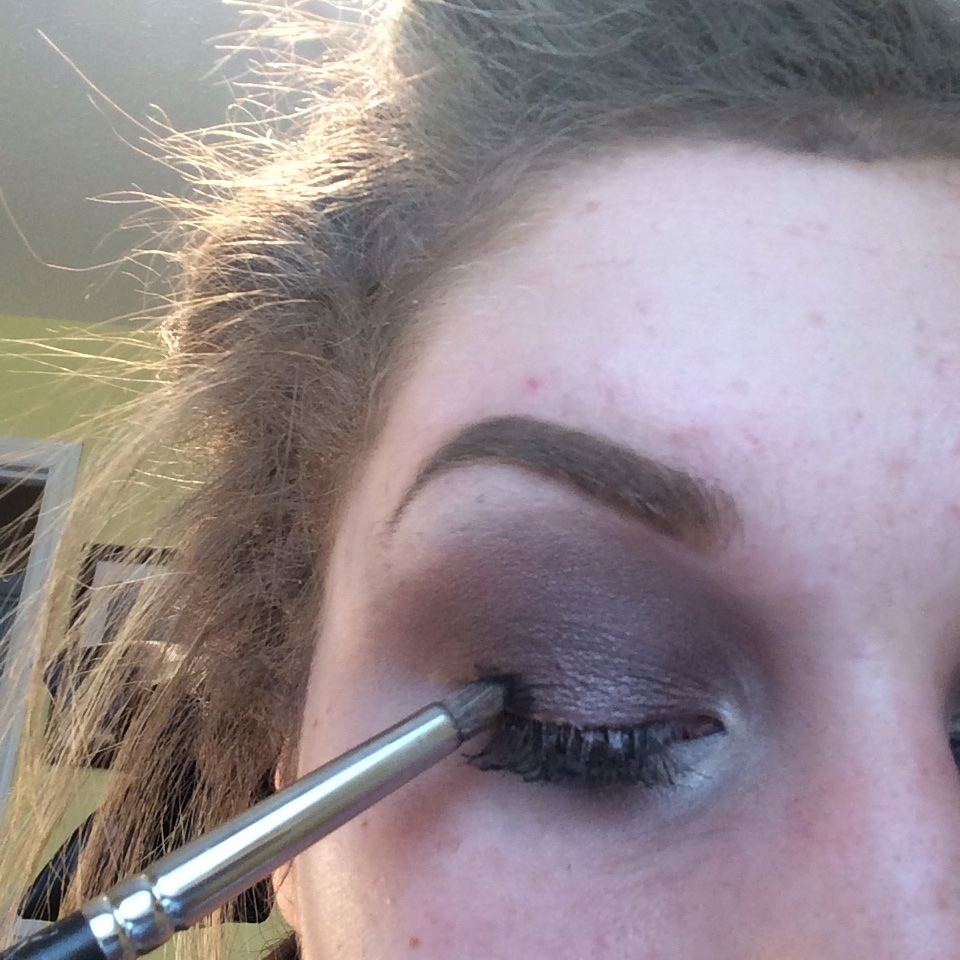
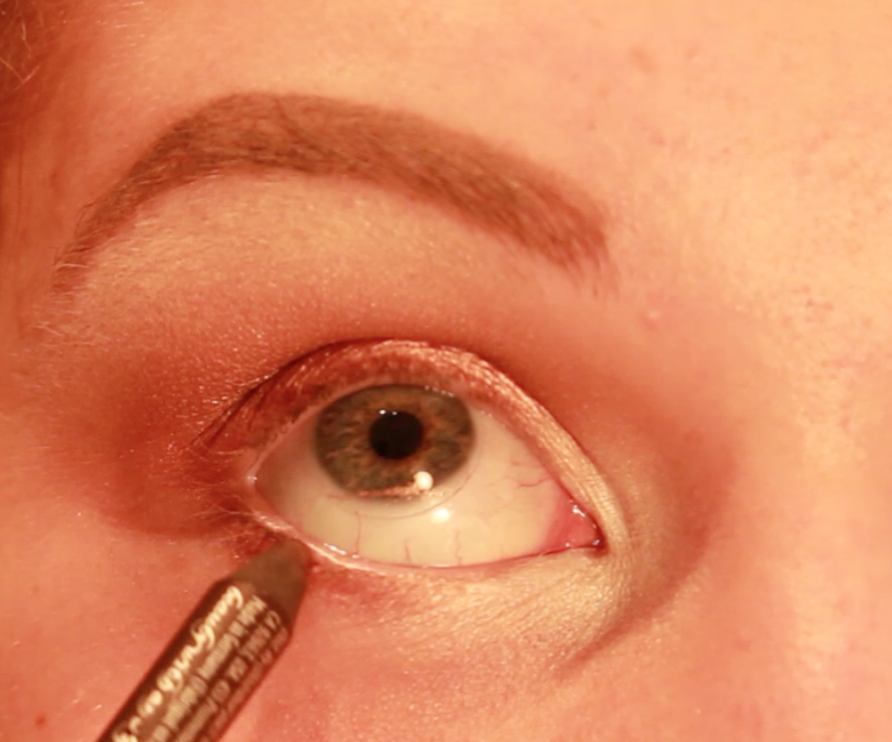
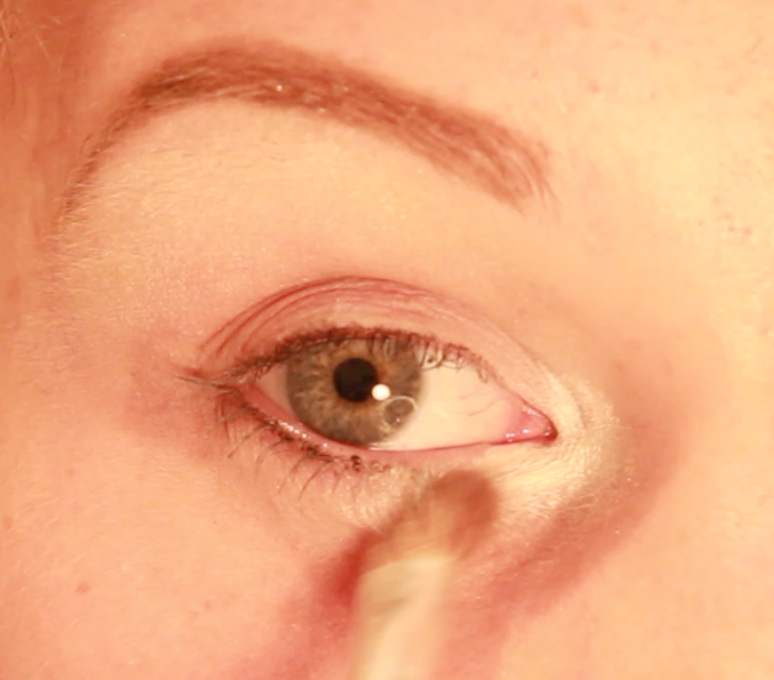
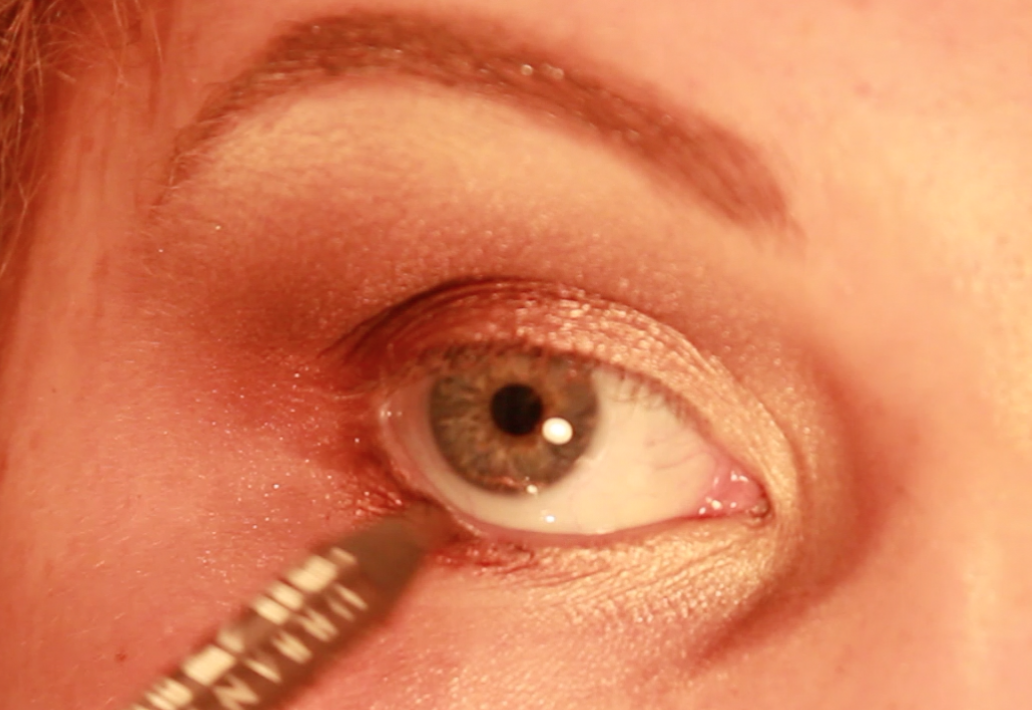
Now I’m taking the bronze shade we used earlier and smudge that on my lower lashline

Image


ImageImage


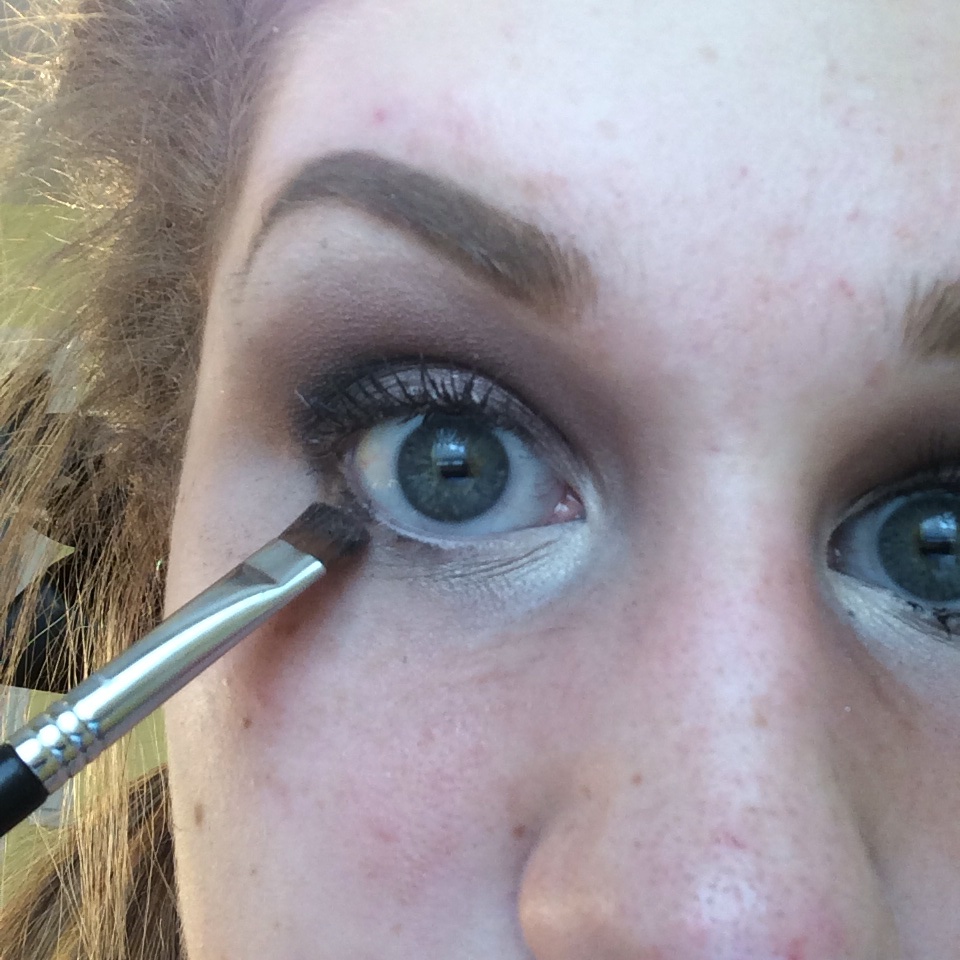
I added some individual lashes for some added drama. Apply LOTS of black mascara.

ImageImage


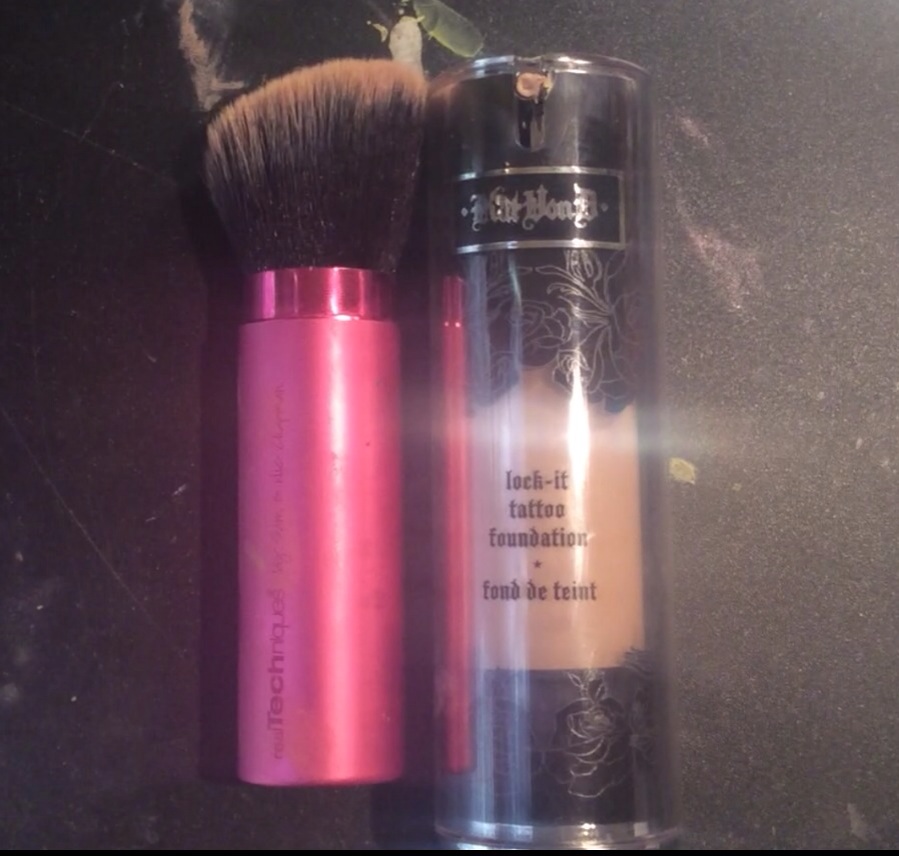
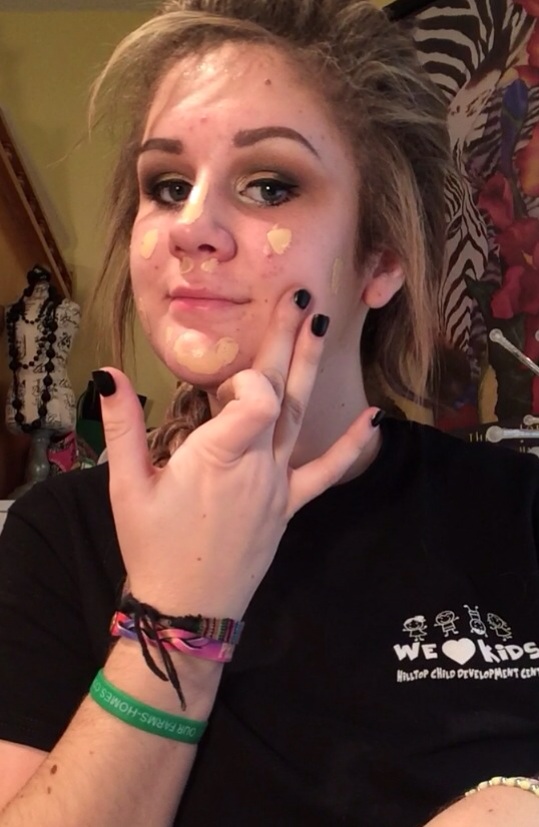
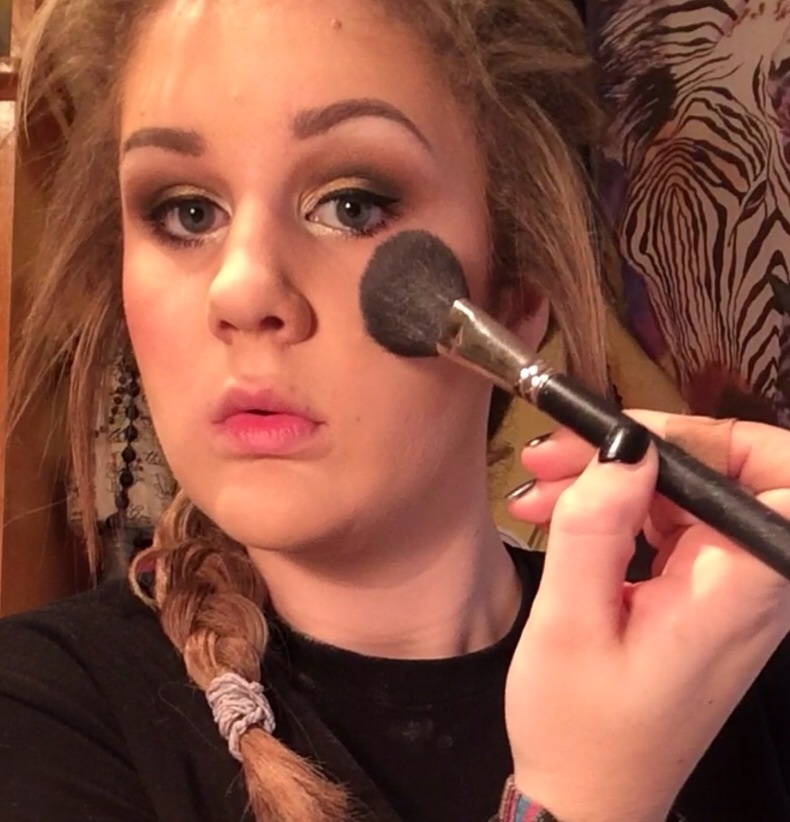
For the face, I’m starting with the Hourglass Mineral Veil Primer, then using the Kat Von D Lock it Tattoo Foundation.ImageImageImageImageImageImage


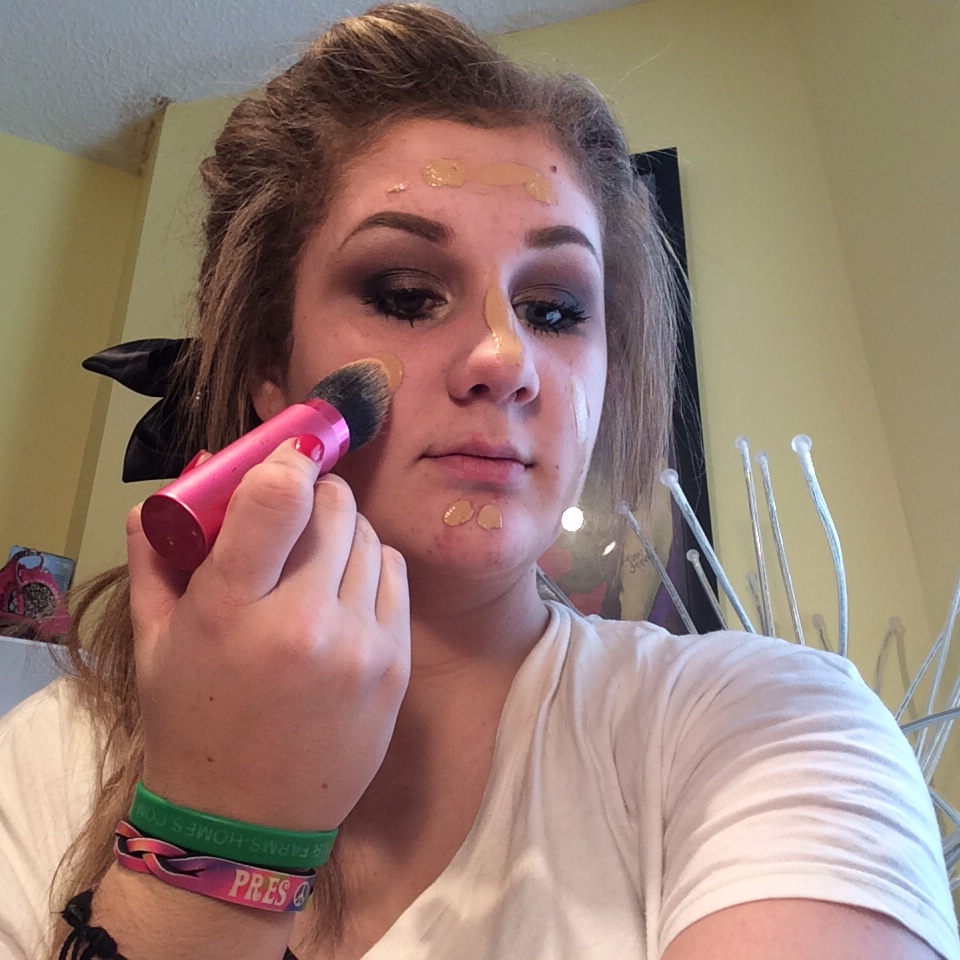
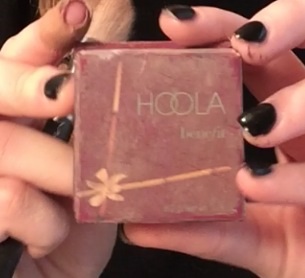
For Bronzer, I’m going to use a cream for an extra glow. I love the Soliel Tan De Chanel for this.

ImageImageImageImageImage


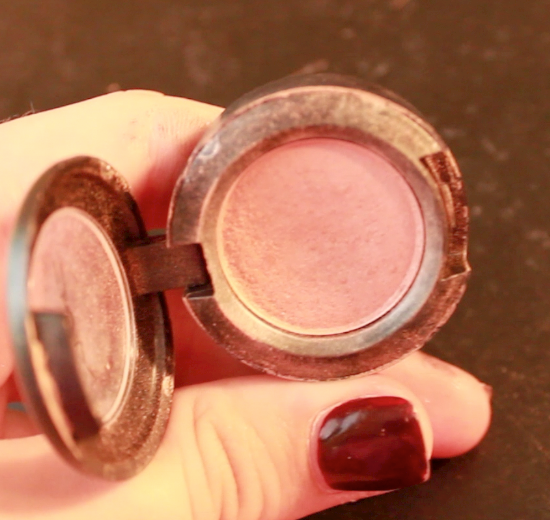
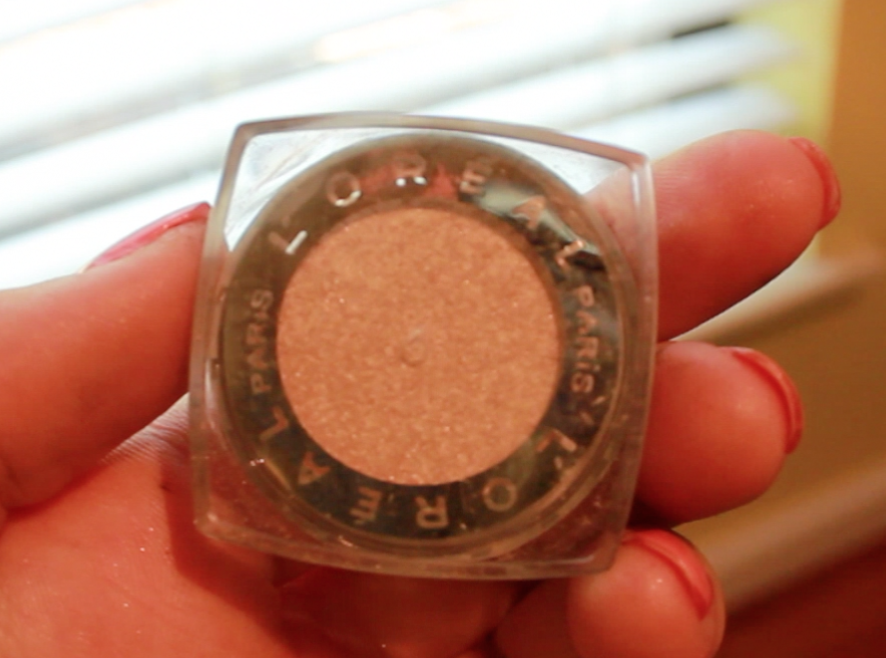
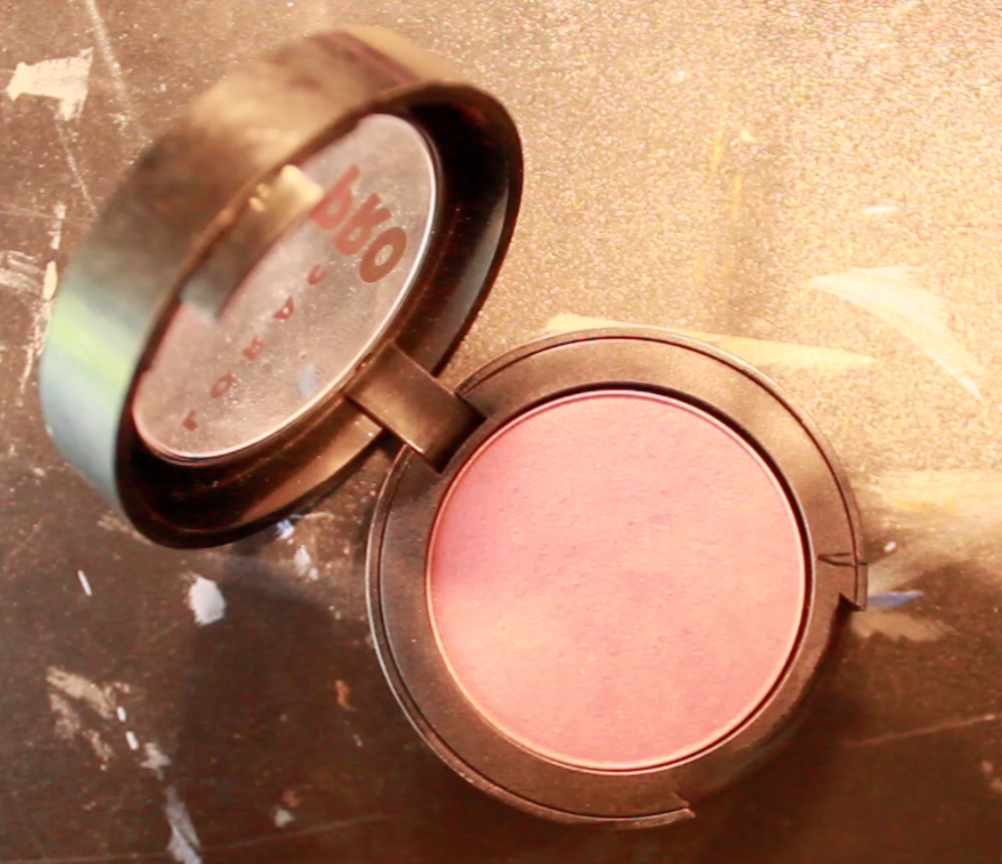
For blush, I’m going to use the Maybelline Master Glaze cream in number 10

ImageImageImage


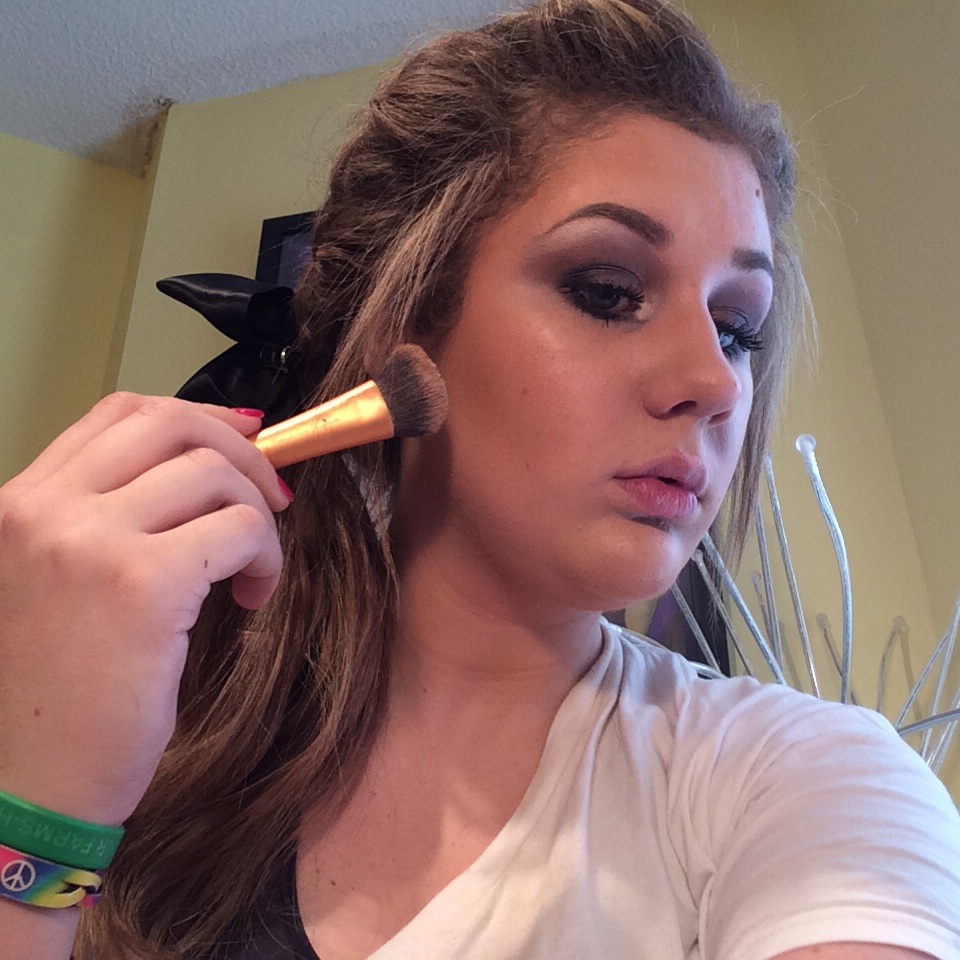
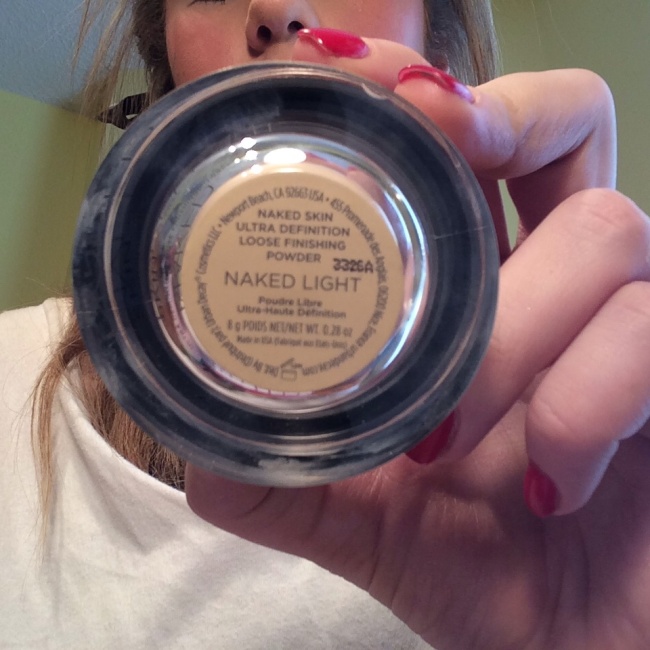
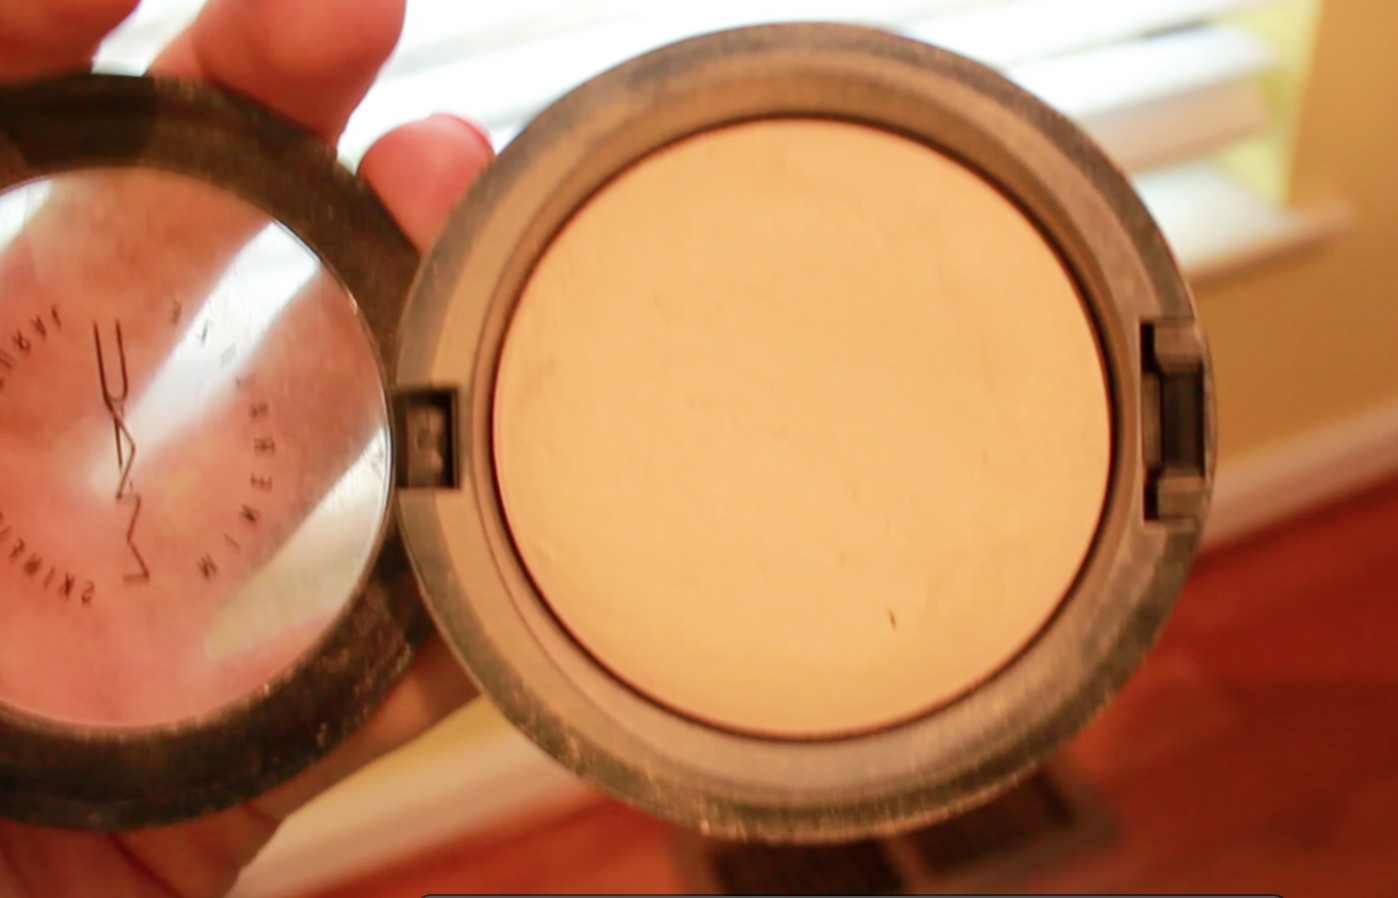
To set everything, I’m using the new Urban Decay Naked Skin Powder in Naked Light


ImageImageImageImage


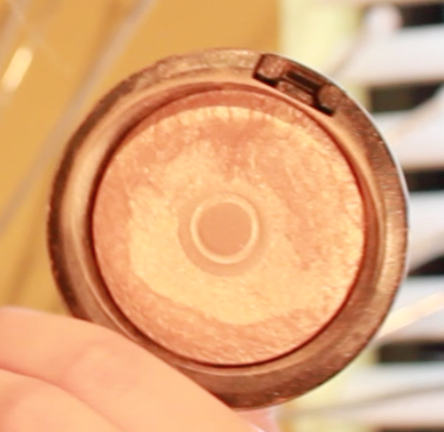
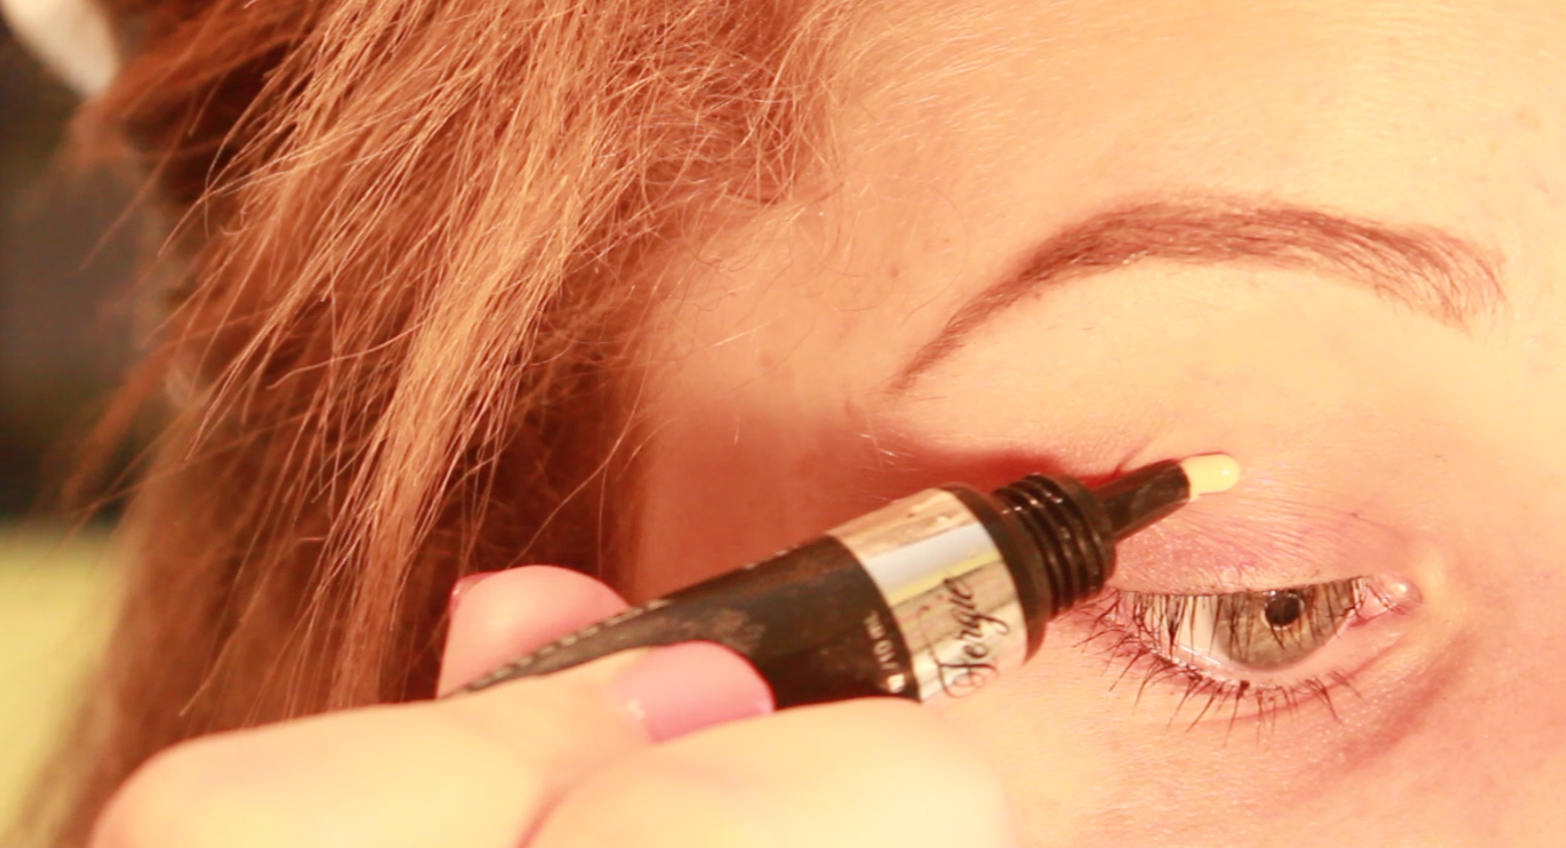
For a highlight I’m going to use the Urban Decay Naked highlighter.

ImageImageImage


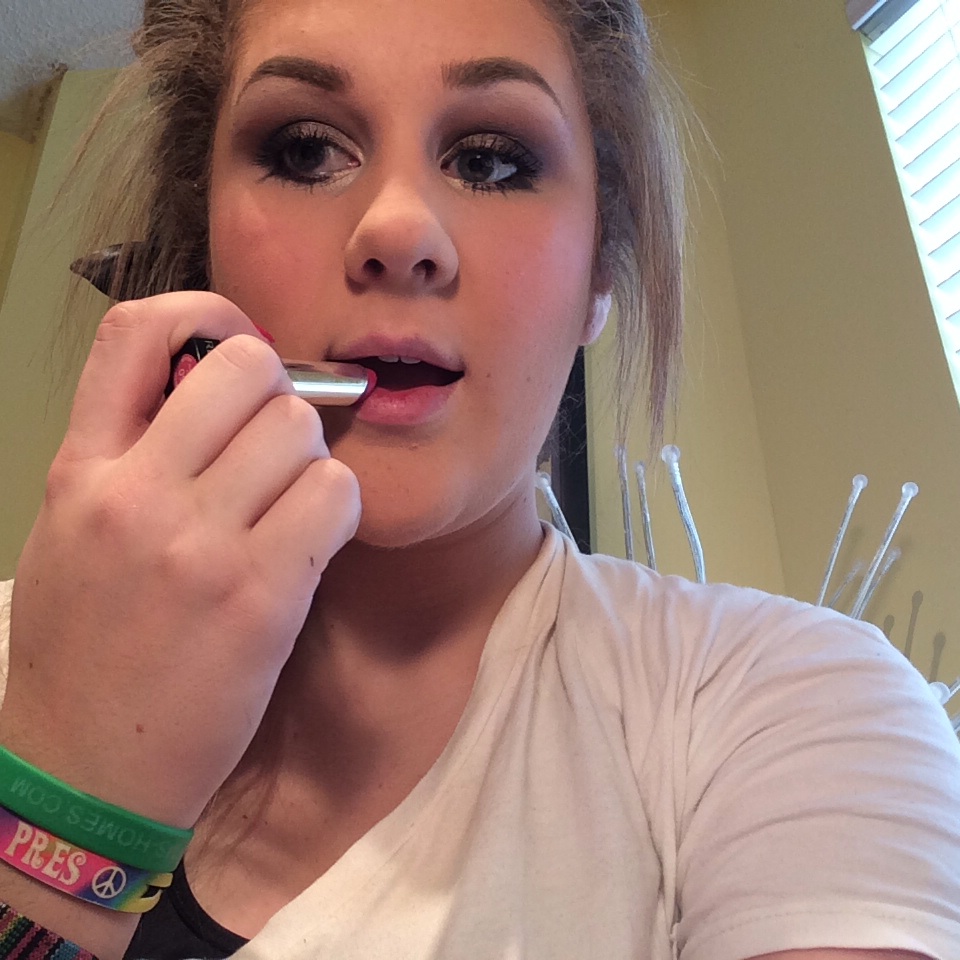
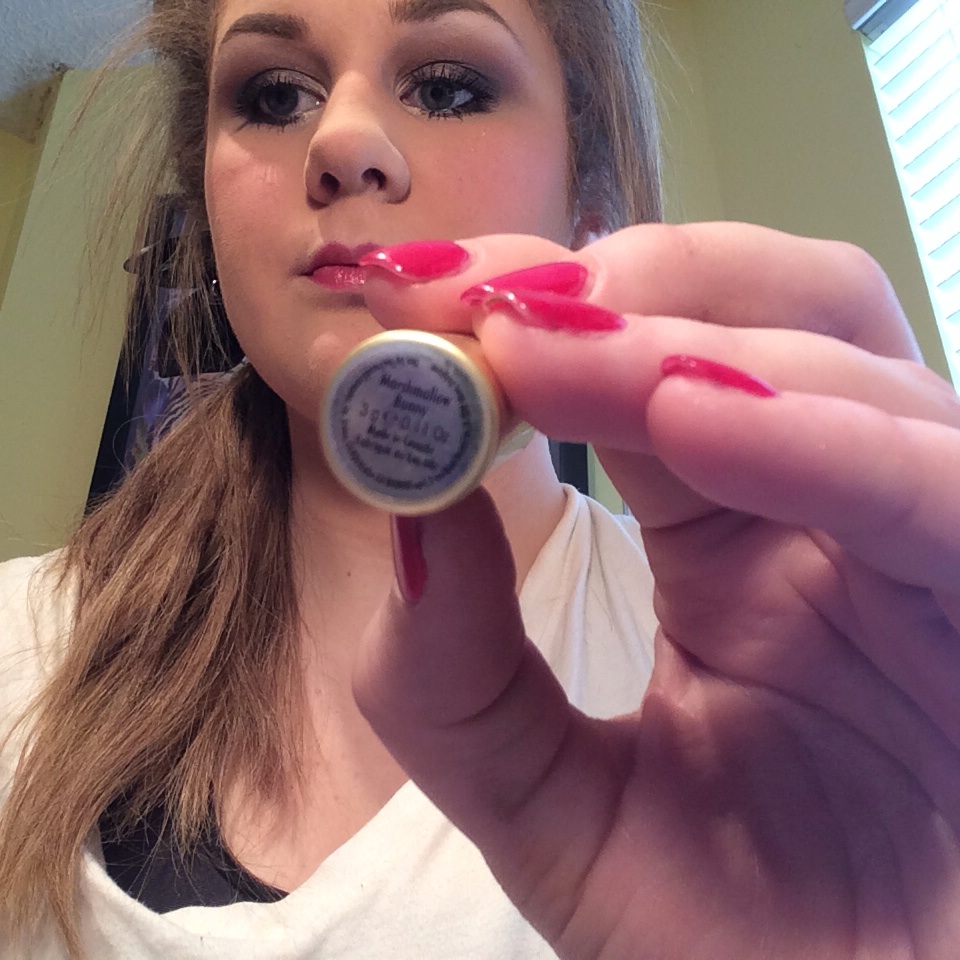
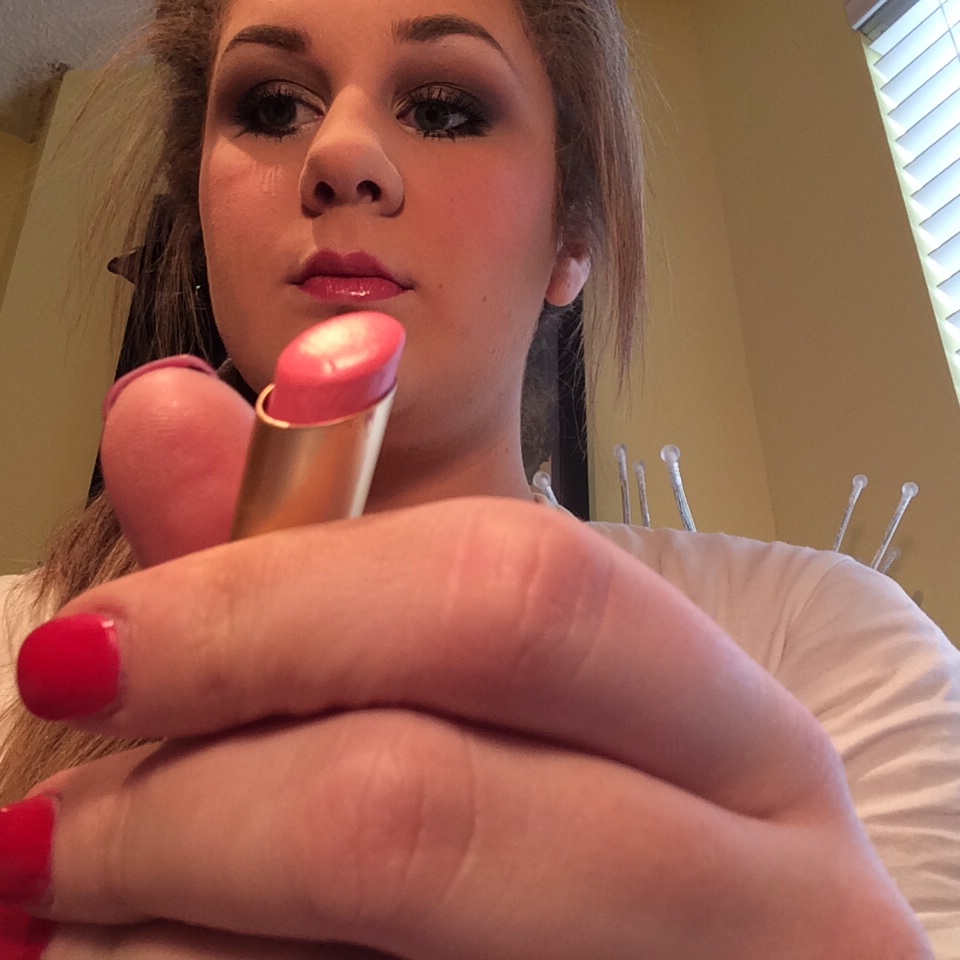
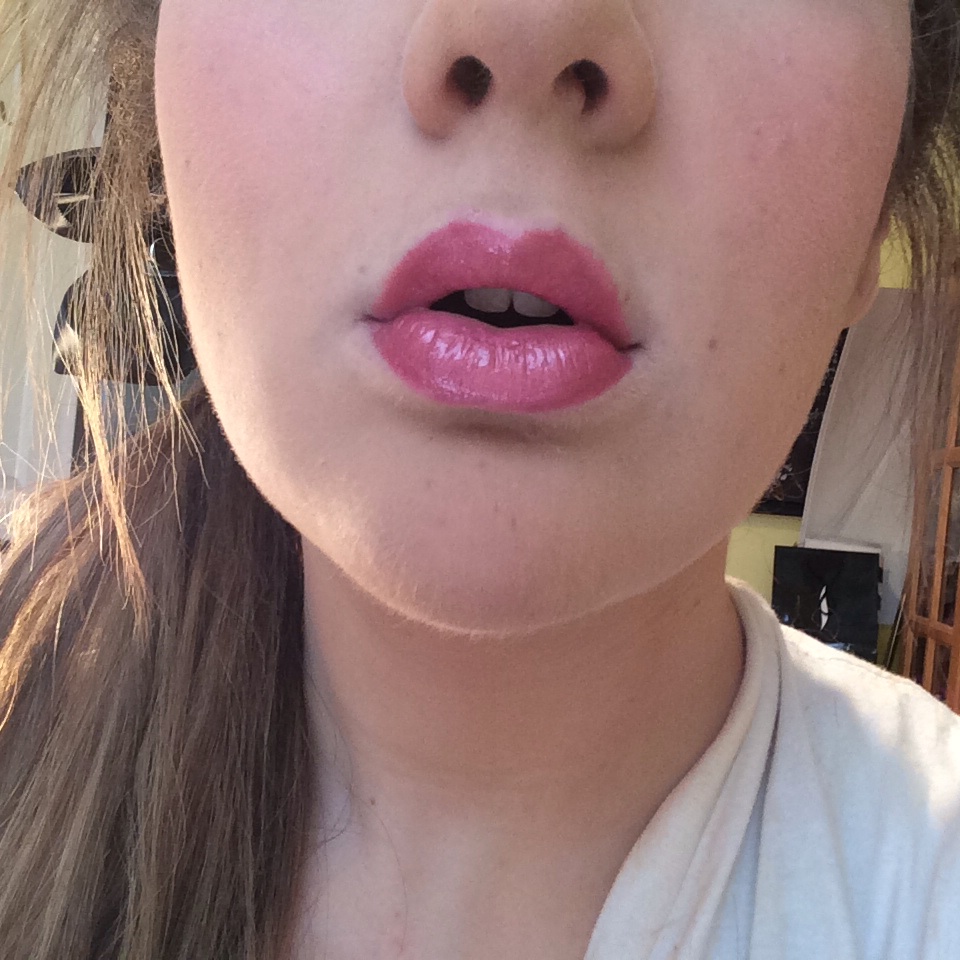
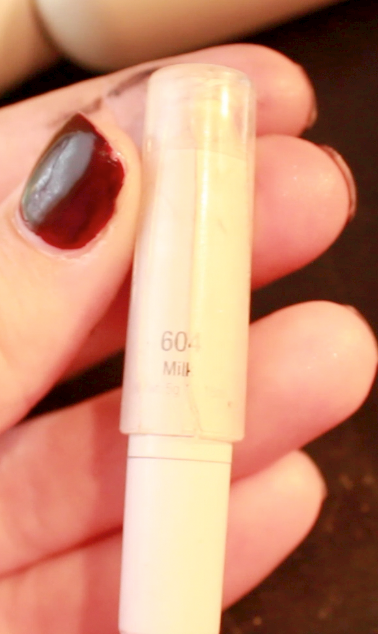
For lips, I’m going to mix the Revlon Lip Butter in Berry Sorbet and Too Faced lipstick in Marshmallow PinkImageImageImageImageImageImageImage


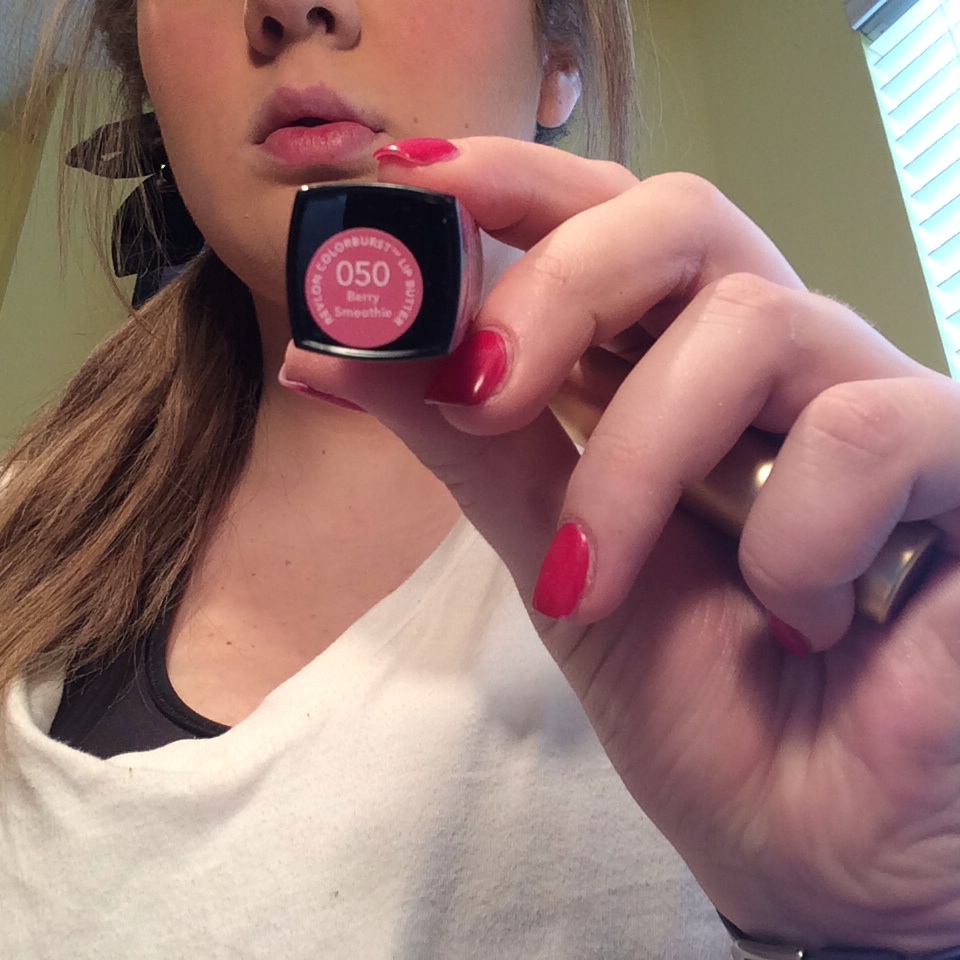
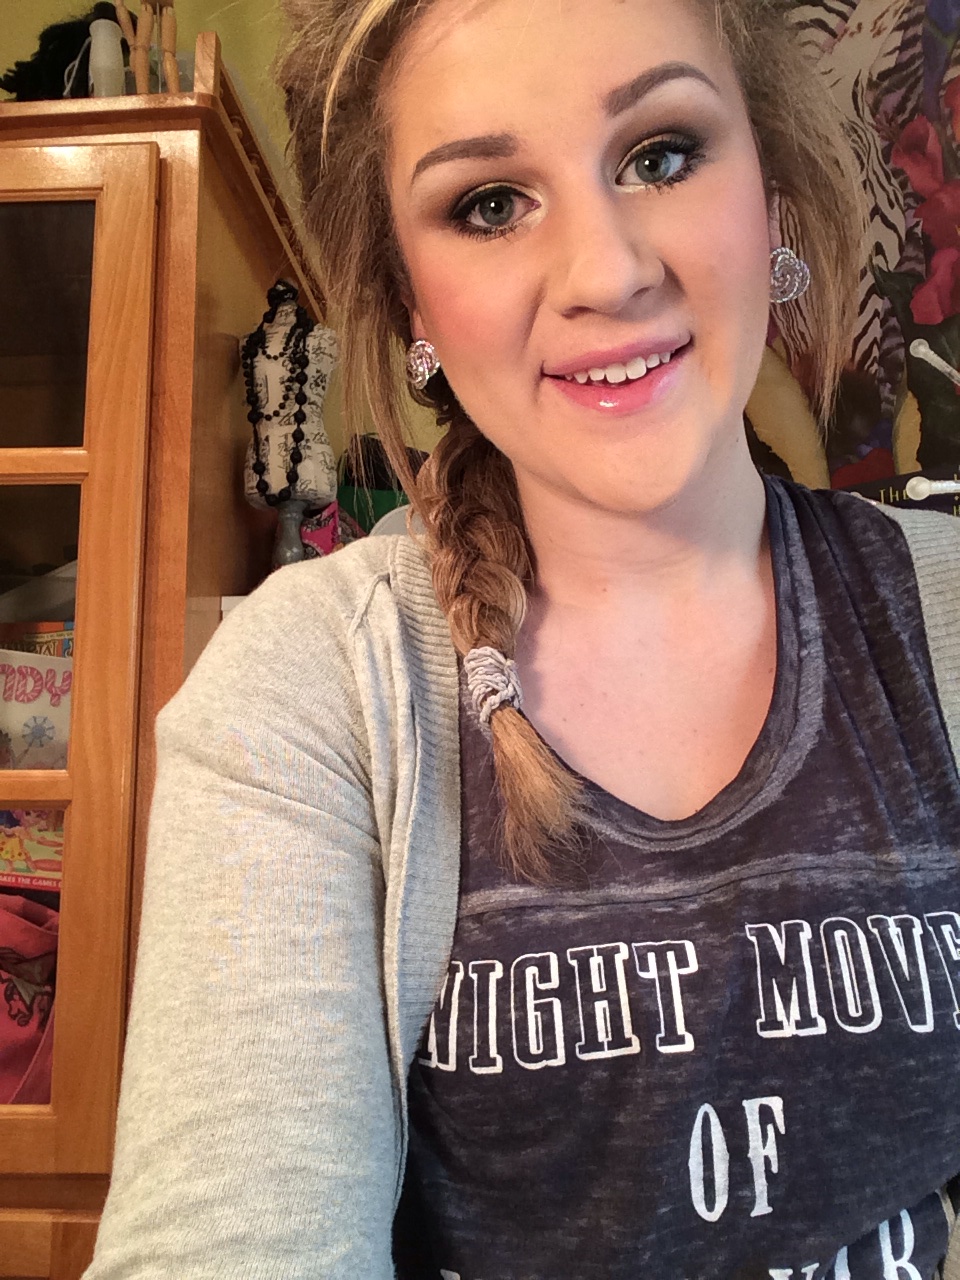
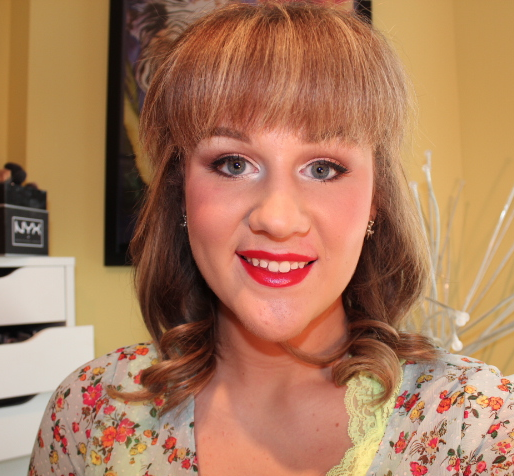
All done with the Makeup!

ImageImage


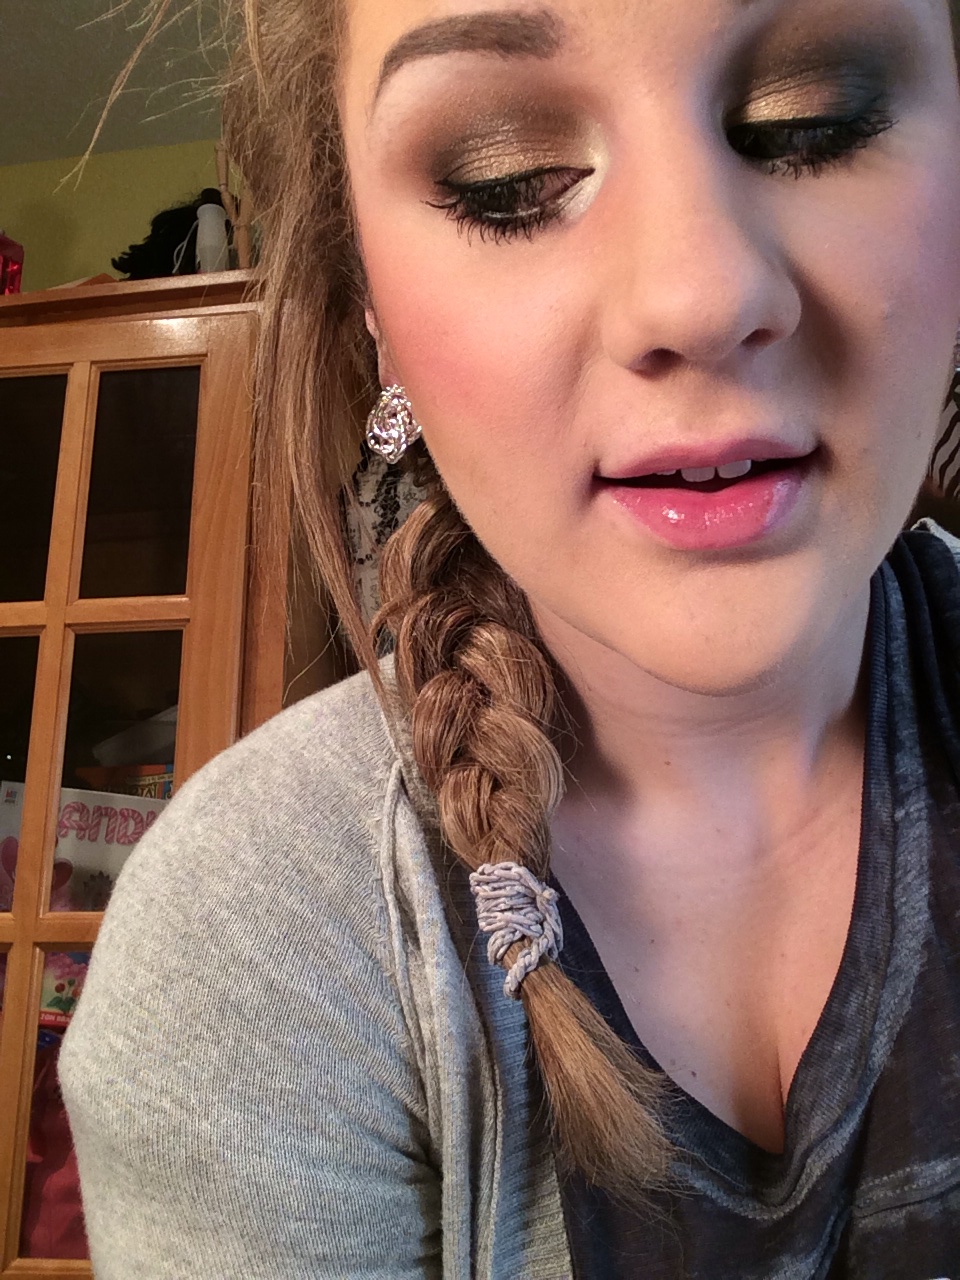
I french braided my bangs and the back of my hair into a low ponytail and added a black satin bow.ImageImage


Now for the outfits.

The first idea is more of a date outfit.

I chose this deep red dress with black polka dots from belk over some black leggings. I’m wearing These black low-heel boots and a Jean Jacket over top, due to the weather.ImageImage


Now an outfit for those who have to work on Valentine’s Day. AKA ME.

ImageImageImage


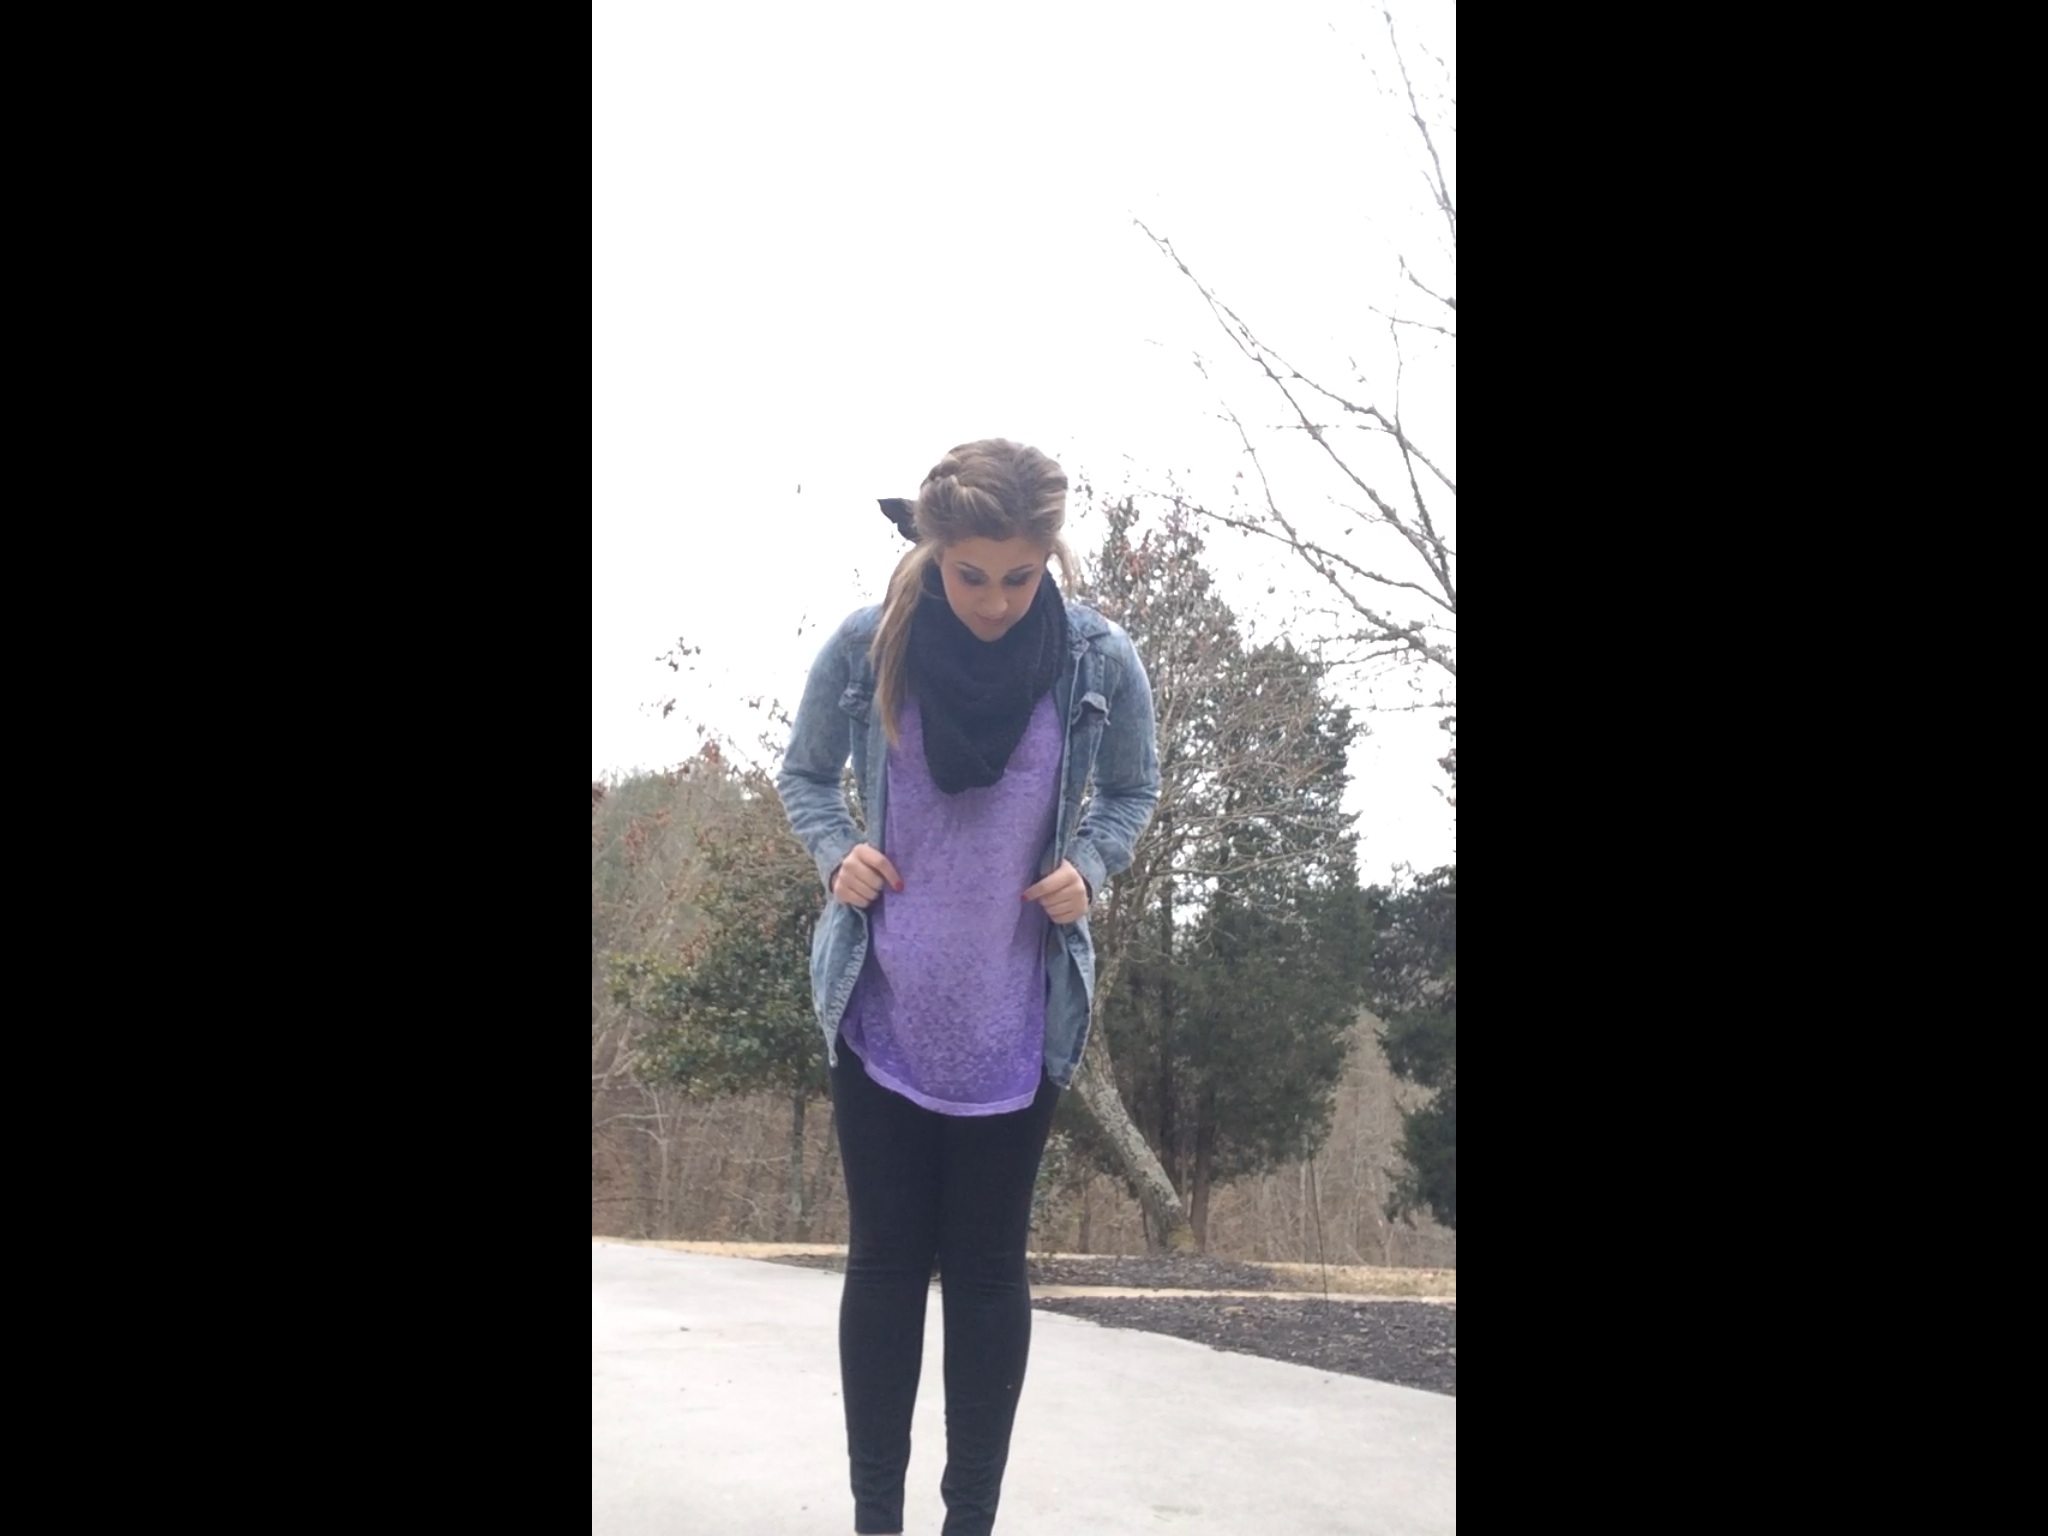
I changed out the dress for this long flowy purple top from Free People. I also switched out the boots for some Sanuks in a tribal print. Cute, yet comfortable.


I hope this helped if you were in a “Heart-Day Rut” or just needed some ideas! Let me know if you try this out! Thanks for reading, an Have a Happy Valentine’s Day!

xoxo,

Pres

alovelyambition


Current Favorites!

Hey guys!

Today I wanted to share with you the things, beauty related and not, that i’ve been loving over the past weeks. Let’s jump right in.

Okay, so i’ll start with the beauty related items.

ImageImageImage

The NARS one night stand blush palette. I absolutely love this. It has a bronzer, highlighter, and four blush shades. The Highlighter is a new shade, a sandy goldish white color. The bronzer is none other than Laguna, a matte warm bronzer. The blush shades are Angelika, a bright pink with flecks of glitter, Deep throat, a light peachy gold, Orgasm, their famous peachy pink, and Sin, a deep rose gold. So pigmented and easy to use.

$65, Sephora

Next is the eyeshadow palette featured in my last tutorial. The Too Faced “All of my Favorite Things” palette.

ImageImageImageImage

It has a wide range of super rich and pigmented eyeshadows for every occasion. It also comes with a pink plush as well as a peach one. Also, a large pan of their famous “Chocolate Soleil” bronzer, and the Sun Bunny duo bronzing powder.

Next, I’ve been loving th NAKED basics palette by Urban Decay for carving out my crease.

ImageImage

Nice neutral shades for a variety of looks, and the Urban Decay shadows are ALWAYS the best.

Next are my Tweezers. The Tweezerman tweezers are great for….. their purpose! haha

Image

I’ve also been loving the Bobbi Brown eyeshadow in Toast, and the Long wear cream shadow in Sandy Gold.

ImageImage

Image

Image

Image

Image

Now moving on to Non beauty related items, I’ve been loving my Crosley Executive Record Player. Vinyl is making a comeback!

Image

You can also turn Vinyl music into digital with this record player.

Here’s what I’ve been playing most often:

The Beatles “Blue” album:

image

Katy Perry’s Prism:

Image

and Lana Del Rey’s Paradise:

Image

Next, I’ve been loving my custom Beatles Collage phone case that I created on Skinit.com ! They’re not too expensive, and you get a completely CUSTOM phone case for almost any model of phone. Mine is the Gold 5s. You can upload your own pictures to create your case.

Image

Now that we’re on the subject of phones, I’ve also been loving my wallpapers. My lock screen is a VW bus with some psychedelic scenery, and my home screen is… drumroll please, THE BEATLES WEARING FURRY COATS.

Image

Image

Yes, I know I have a TON of unread emails. HAHA

So that’s what I’ve been loving! Hope you enjoyed this!

xoxo,

Pres

alovelyambition

Everyday Winter Makeup

Hi guys!

ImageImage

I’m back today with my everyday makeup for this new year. I’ve been loving this look for work and everyday. It’s super simple, and using natural colors to make any eye color pop. As for the face, I’m using some new products that I am IN LOVE with!

Let’s jump in.


Okay, so, as always, I start out with my eyebrows. I’m just going to fill them in as usual with my Anastasia brow wiz.

ImageImage


Now I’m going to take the Bobbi Brown Cream Shadow in Sandy Gold to  prime my eyes. This is essentially the same as a MAC paint pot. It’s a cream-based primer with a gold sheen to it that adds a warmth to the shadows i’ll be adding later.

ImageImage


Now, surprise surprise, my NYX jumbo eye pencil in Milk. I’m going to blend this under my eyebrow and in my inner corner.ImageImage


Now I’m going to use my Too Faced “All of my Favorite Things Palette” that I got for Christmas. I’m going to use a fluffy angled brush and the color “Cream Colored Ponies” under my brow.

ImageImage


Now, with the same brush, I’m going to take “Snowflakes”, a shimmery warm white, and apply this in my inner corner.

ImageImage


Now I want to warm up the crease before adding my defining shade. I’m going to take “Chocolate Milk” and a fluffy blending brush and swirl this through the crease. This  is also going to make blending much easier.


Image

Image


Now I’m going to apply “Honey Honey” to my lid with a flat shader brush.


ImageImage


Now I want a dark but shimmery brown for the outer corner and crease. The dark brown will still give me the definition I want, but the shimmer will make it less harsh. I’m going to mis “Crisp Apple Strudel” and “Dark Chocolate” with a fluffy crease brush.


ImageImageImageImage


Then I just blended the outer edges of the color.


Now I’m going to line my eyes with the L’Oreal Super Slim Liquid Liner in Black.

Image


Now apply your favorite black mascara. I used the Sephora Outrageous Volume mascara.

Image

Now moving on to the skin.

I’m going to use the Kat Von D Lock It Tattoo Foundation in the lightest shade (Pale People Problems :/  )  and dot that all over my skin, then blend it in with the Real Techniques Angled Kabuki Brush. 

ImageImageImage

Image


This foundation has AMAZING coverage. I mean, it’s crazy. It’s also super long wearinng. But don’t worry, I’ll do a full review on it.


Now I’m using the Covergirl + Olay concealer for under my eyes.


Image

Image


Now I’m using the Clinique Transparency powder in the lightest shade, which, oddly enough, is number eight. What? 


ImageImage


For bronzer, I’m heading back to that Too Faced Palette to use the Chocolate Soleil Bronzer in the bottom half of the palette.

ImageImage


To contour my cheeks and nose, I’m using Hoolah Bronzer by benefit, which has an ashier tone.

Image

ImageImage


Now for blush, I’m taking Sin from my NARS One Night Stand blush Palette, a rose shade with cold flecks, and then I’m using the highlighter from the same palette.

ImageImageImageImage


Now I’m going to use the NYX butter gloss in Creme Brulee, a peachy nude. Then I’m adding a bit more mascara. And yes, I changed clothes. I don’t like to put my foundation on in the clothes I’ll be wearing for the day, just incase.

Image

Image


All done! I hope you enjoyed this post! Comment any requests, as always, and let me know if you liked it!

xoxo,
Pres

alovelyambition

ImageImageImageImage


Fall/Winter Foundation: Healthy, Glowing Skin.


LONG TIME NO SEE!

First off, my apologies. With just starting a job and school, it’s been a bit crazy. But I’m back!

Today I wanted to show you my skin routine for a flawless and glowing face. I like this look because it allows the few freckles that I have to show through, making it look natural. I use a shimmery highlighter to achieve the “glow”!

Let’s jump right in!

ImageImage


Let’s jump in.


I’m going to be using the Covergirl 3 in 1 foundation. I picked this up because I was running low on my Clinique foundation, but didn’t have time to run to the mall. I actually have been VERY impressed with it.

I’m going to dot this onto my skin and blend it with this Sigma Duo Fiber Brush.

Image

Image


Image


Image

Image

Add concealer to spots if you need it. For a drugstore concealer, I recommend the Covergirl + Olay concealer.


For powder, I’m going to use the Maybelline Dream Matte powder on a powder brush.

Image


Image


Image


I added some bronzer in the 3E technique as well.


For blush, I’m using the MAC Mineralize Skin Finish in “Scene to be Seen”, a glowy Rose color.

Image


Image


Now for highlighter, I’m using another MAC msf, this one in “Soft and Gentle”. A light and bright shimmery champagne.

I’m dusting this on my cheekbones, cupids bow, and down my nose with a small sigma contour brush.

Image


Image


Image


Image


Now we’re done!

Image


Let me know what your skin routine is for the winter! I’ll be back with a new post soon!

Thanks for reading!

xoxo,

Pres

alovelyambition


Brow Routine!

Hi guys!

Today I wanted to show you my quick and easy brow routine. This takes me about a minute in the morning and helps keep my brows looking polished. Eyebrows complete your look and ALWAYS require some attention. I’ll be using the Anastasia Brow Wiz in Ash Blonde, the Anastasia Brow Powder in blonde, and the Clear brow gel.

VIDEO: http://youtu.be/KwFy6vEA258

First, I comb my brows with the brush end of the pencil.

Now let’s talk about the key points of your eyebrow.

To find where the brow should start, line up the edge of the nose with the inner corner of the eye.

Image

For the arch of the brow, line up the nose with the pupil.

Image

For the end of the eyebrow, line up the nose with the outer corner.

Image

Now I’ just going to underline my brow.

Image

For my arch, I’m just going to extend the line from the tail of my brow upward, then connect it with the main part of my brow and fill it in.

ImageImageImage

Clean up any edges with the brush end of the pencil.

Image

Now I’m going to take the powder and the angled brush it came with and fill in any sparse areas for a softer look.

Image

Add some clear brow gel!

Image

Now we’re done!

Let me know if you try this out! Thanks for reading!

xoxo,

Pres

alovelyambition

Review: Disney Ariel Palette

Hello Lovelies! Today I thought I’d review the Disney Sephora Palette Volume THREE- Ariel. For $55, you get 20 of the best quality eyeshadows around, not to mention colors that, along with their names, evoke that childhood memory of wanting to grow a mermaid tail. I love this palette, so I thought I’d share it with you.

I’ve been so excited about this and am so glad to finally have my hands on it!!

Let’s jump right in.

THE BOX:

Okay, so the front of the box that it came in has Ariel’s name emerging from a shell as well as gorgeous silver designs.

Image

The back has each color displayed in the shape of Ariel’s hair!

Image

I love the color scheme, which is obviously inspired by her sea life.

Now on to the actual palette packaging.

Image

How pretty is that? Ariel’s silhouette with a nautical border. I love it.

Now on to the reason I got it. THE SHADOWS!!

The palette has 20 SUPER Velvety and pigmented eyeshadows that are absolutely amazing.

Image

Starting with the 1st row:

Image

IMG_9725

Blue Lagoon, Scuttle, Flounder, Sebastian, and Flotsam.

2nd row:

Image

IMG_9728

Sea Shells, Les Possessions, Caspian Sea, Your Voice, and Unfortunate Souls.

3rd Row:

Image

IMG_9729

Atlantica, Fins, Sick of Swimmin, Ursula, and Sha La La  (admit it, you want to sing along)

4th Row:

Image

IMG_9731

Triton, Wanderin’ Free, Jetsam, Sea Witch, and Treasured World.

Now I want to talk about the 4 shadows that stood out to me upon first look.

First is Blue Lagoon.

images-6Screen Shot 2013-09-02 at 4.55.46 PM

This is one of the prettiest blues I’ve ever seen. It’s so bright, yet wearable in the right way. I love the subtle silver glitter it has. It reminds me of Ariel and Eric’s romantic boat ride! Love it.

Next is Caspian Sea.

Screen Shot 2013-09-02 at 4.37.52 PMScreen Shot 2013-09-02 at 4.55.57 PM

This is the perfect teal. It is so pretty and velvety, I can’t wait to use it!

Next is Fins.

Screen Shot 2013-09-02 at 4.38.22 PMScreen Shot 2013-09-02 at 4.56.13 PM

This is just too pretty! I love the bright green with silver glitter. Definitely a winner.

Now for my favorite: SEA WITCH.

Screen Shot 2013-09-02 at 4.38.51 PMScreen Shot 2013-09-02 at 4.05.25 PM

Purple is my favorite color, so this is the best color for me. I love love love this.

And that is my review! I hope you enjoyed this post and let mw know if you have this palette and if you like it, or are tinking about getting one! As I said, they are LIMITED EDITION….. JUST A FEW WEEKS!!!! I think it is totally worth it, I love mine!

xoxo

Pres

alovelyambition

Celeb Saturday- Victoria’s Secret Model Makeup!

Hello Lovelies!

images-2IMG_9686images-1IMG_9684UnknownIMG_9685

I’m Back! With 3 hour Volleyball practices and games twice a week, plus tournament weekends, it’s been pretty hectic if you know what I’m saying.

Today’s Celebrity Saturday captures the true beauty of the makeup worn by the VS models. OBVIOUSLY, I’m not one of them… I mean, come on people. But I love their makeup. It represents makeup’s true purpose: To bring out your features. It’s so so wearable and simple. I’m using my Disney Sephora Ariel Palette (LOVE LOVE LOVE), but I’ll show you some dupes in case you don’t have this. Let’s jump right in!

CORRESPONDING VIDEO:Celeb Saturday Victoria’s Secret Model

I’m going to prime my eyes with the Lorac Eye Primer to start off.

Screen Shot 2013-08-30 at 10.56.26 AM

Now with MAC’s Big Bounce cream eyeshadow in Trophy, a light peachy-gold color, I’m going to pat this on my ;id, browbone, inner corner, and lower lashline.

Screen Shot 2013-08-30 at 10.56.33 AM

Screen Shot 2013-08-30 at 10.56.49 AM

To add some light to the inner corner, you guessed it, my trusty ‘ol NYX jumbo eyeshadow pencil in Milk.

Screen Shot 2013-08-30 at 10.56.57 AM

Screen Shot 2013-08-30 at 10.57.12 AM

The first color I’m going to take is the whiteish peachy gold color from the palette called Sea Shells and use this in my inner corner. An alternative is the lightest NYX Pearl Mania eyeshadow.

Screen Shot 2013-08-30 at 10.57.20 AM

Screen Shot 2013-08-30 at 10.57.35 AM

Screen Shot 2013-08-30 at 10.57.28 AM

Now to warm up the lid, I’m taking the lighter of the two peachy gold shades from the palette, Scuttle, and applying this on the inner half of my lid. You can use Loreal’s eyeshadow in Iced Latte.

Screen Shot 2013-08-30 at 10.58.41 AM

Screen Shot 2013-08-30 at 10.59.02 AM

Screen Shot 2013-08-30 at 10.58.51 AM

Now I’m going to take the darker peachy color, Wanderin’ Free, and pat this on the outer half of my lit. You can use MAC’s Jest eyeshadow.

Screen Shot 2013-08-30 at 10.59.09 AM

Screen Shot 2013-08-30 at 10.59.23 AM

Screen Shot 2013-08-30 at 10.59.15 AM

For a crease color, I’m going to BLEND Les Posessions into my crease. MAC’s Satin Taupe eyeshadow is perfect for this as well.

Screen Shot 2013-08-30 at 10.59.35 AM

Screen Shot 2013-08-30 at 11.00.03 AM

Screen Shot 2013-08-30 at 10.59.40 AM

Now I’m going to line my eyes, as well as tightline them for a fuller lash effect.

Screen Shot 2013-08-30 at 11.00.37 AM

Screen Shot 2013-08-30 at 11.00.58 AM

I also added a few individual lashes, because theirs are always AMAZING.

Screen Shot 2013-08-30 at 11.01.13 AM

Add mascara.

Screen Shot 2013-08-30 at 11.01.29 AM

The eyes are done!!

I highlided, bronzed, and contoured my face as well as adding blush. For a lip color I chose Clinique’s Think Bronze.

IMG_9684

I hope you all enjoy this look as much as I do, and if you try it out, let me know!!

Thank you so much for reading!!!!

xoxo

Pres

alovelyambition

Instagram: alovelyambition

Twitter: alovelyammbition

Email: alovelyambition@gmail.com

Celebrity Saturday- Rihanna!

Hello Lovelies!

Image

Image

Image

Image

ImageImage

Today I wanted to recreate Rihanna’s makeup. She is usually seen wearing a peachy bronze eye, red lip, and, of course, flawless skin. Rihanna, paired with her AMAZING voice, is an icon of beauty  and style to many.

CORRESPONDING VIDEO: http://youtu.be/A9q0hr-IpKQ

let’s jump right in!

To start, I’m going to prime my eyes with a translucent primer.

Image

Gently pat this until it is completely blended in.

Image

Now, as always, I’m going to use my NYX jumbo eyeshadow pencil in Milk and apply this under my brow and inner corner.

Image

Blend this out.

Image

Now, for a brow bone MATTE highlight, I’m going to apply Urban Decay’s Broken eyeshadow, just a matte creamy color.

Image

Image

Now for my inner corner, I’m going to use Urban Decay’s Zephyr eyeshadow.

Image

Image

To define my crease a bit, I’m going to take Urban Decay’s Beware eyeshadow and buff this through my crease.

Image

Image

Now I’m going to start with the peachy colors on my lid.

First, to blend the inner corner with the bright peachy-pink on my lid that we will be applying later, I’m going to pat MAC’s JEST eyeshadow, a light peachy nude, right where those two colors will meet.

Image

Image

Image

Now with my FAVORITE MAC eyeshadow, Expensive Pink, I’m going to pat this on the middle of my lid.

Image

Image

For the bronze that Rihanna usually sports, I’m going to take MAC’s Sable eyeshadow and pat this on my outer corner.

Image

Image

Blend the top of these colors.

Image

To further define my crease, I’m going to apply MAC’s Twinks eyeshadow throughout the crease.

ImageImage

Blend.

Image

Now with a tiny brush, I’m going to use Sable again on my lower lash line.

Image

To further define it, I’m going to smudge Urban Decay’s Demolition eyeshadow in between my lashes.

Image

I created a wing with liquid eyeliner, and am now going to line my upper lashline with Rimmel’s Gel eyeliner in Black.

Image

I added individual lashes to achieve Rihanna’s full lash look.

Image

Add mascara!

Image

For lips, I used NYX’s Eros Lipstick for the perfect Rihanna Red lip. Her favorite is MAC’s Ruby Woo, but the NYX color is a dupe.

Image

I was getting my school pictures made on the day that I did this look, so I switched to a peachy pink lip for that! To get flawless skin in my photos, however, I used the Make Up for Ever HD foundation.

Rihanna Wears a nude blush, But I need more color, so I opted for MAC’s Fever blush.

Voila!

Image

Image

There is your Rihanna look! I hope you try this out, and if you do, definitely let me know!

Have a lovely day!

xoxo,

Pres

alovelyambition

Instagram and Twitter: @alovelyambition

Email: alovelyambition@gmail.com

Silvery Eye Makeup!!

Hello Lovelies!

Today I decided to show you my silver eye makeup look. This is super-wearable and perfect for the upcoming seasons. This flatters any eye color and is super easy to accomplish! Let’s jump right in!

ImageImage

Image


Okay, So first I primed my eyes with the Fergie Eyeshadow Primer. Any translucent primer will do.

Image


Now I’m taking my NYX eyeshadow pencil in Milk and applying this in my inner corner and under my brow and blending that out with my finger.

ImageImage


Now I’m going to apply this matte cream color, Broken by Urban Decay, on my brow bone.

ImageImage


For my inner corner, I’m applying this shimmery white color, Zephyr by Urban Decay.

ImageImage


Now I’m going to take this light shimmery Silver from the Rimmel “Black Cab” Quad and apply that to the middle 2/4 of my eyelid.

Image

Image


Now, to build up the smokines on my outer corner, I’m going to pat Mac’s “Evening Grey” to the outer corner. 

Image


Now i’m going to apply a mid-tone, or blending, shade. This is going to make blending much easier. I’m going to buff L’Oreal’s Sultry Smoke, a matte grey, throughout my crease.

ImageImage


Now for the main color of the look. I’m going to take a dark silvery-grey, MAC’s Knight Divine, in my outer V and through my crease.

ImageImage


BLEND!!!!!!!

Image

For eyeliner, I’m going to create a wing with my L’oreal Super Slim Liquid eyeliner, then complete the line with Rimmel’s Gel eyeliner in Black.

Image


Image


Now I’m taking Urban Decay’s eyeliner in Perversion on the outer 1/4th of my lover lash line.

Image


Now I’m taking NYX Crystal Liner in Black and going over that line.

Image

Image


Now I’m taking the Silver version of the NYX liner and connecting that line to my inner corner.

Image


I added individual false lashes, which is optional.


Now add mascara!

Image


Now we’re done! I hope you try out this look, and if you do, let me know!

Instagram and Twitter: @presleyaleece

Email: alovelyambition@gmail.com

xoxo,

Pres

alovelyambition

Celebrity Saturday- Julianne Hough Copper Smokey Eye!

Hello lovelies!

I’m not sure about you, but I love Julianne Hough! Her makeup is always picture perfect as well!

ImageImageImageImage

I created a gorgeous copper-bronze smokey eye that captures Julianne’s look. It is super simple to accomplish! I used the Lorac Little Black Palette, but I’ll show you drugstore dupes for each color I use. I love this look, and I think it is SO flattering. Let’s jump right in!

CORRESPONDING VIDEO: http://youtu.be/lgP0mmHQnks

Okay, so First, I’m going to prime my eyes with the Lorac eyeshadow primer. Just a translucent primer.

Image

Next, I’m going to take my NYX eyeshadow base (NOT A PRIMER) in white, and apply this in my inner corner and under my brow.

Image

Just blend that out with your finger.

Next, I’m just going to use my face powder under my brow for a matte brow highlight.

ImageImage

For my inner corner, I’m going to use the warm champagne-gold in the Lorac Little Black Palette. A drugstore dupe is the Loreal Infalliable Eyeshadow in Iced Latte.

Image

Image

Here is the drugstore alternative: Image

Okay, next, I’m going to take the light peachy-bronze color and apply this to the middle third of my eye. A drugstore alternative is the Loreal Infalliable eyeshadow in Amber Rush.

Image

Image

Here is the drugstore dupe:Image

Now I’m going to build up the bronze smokiness with the dark coppery-bronze from the palette. From the drugstore, mix Loreal’s amber rush with Milani’s Java Bean to get the same look. also apply this color to the lower lashline.

Image

Image

Here are the drugstore alternatives: ImageImage

Blend any harsh edges.

Image

To darken and smoke out the crease, I’m going to apply the dark, warm, shimmery brown from the palette of my outer V and crease. A drugstore alternative is Milani’s Java Bean.

ImageImage

Here is the drugstore alternative: Image

Eyeliner time! I’m using Rimmel’s black gel eyeliner and creating a SMALL wing.

ImageImage

Add a dark brown liner in between your lashes on the lower lash line.

Image

You can add some false lashes if you want, or go ahead and apply some mascara.

Image

Done with the eyes!

Image

To finish off the rest of my face, I used the Make Up For Ever HD foundation to get the smooth, flawless complexion that Julianne always has.

Image

I added some bronzer to my face as well as the Lorac blush in Ruby Rouge.

Image

Image

And we’re finished! A Julianne Hough Makeup look ready for the Red Carpet. I hope you try this look out, let me know in the comments! Thank you so much for reading! Don’t forget to check out the video!!

twitter: @alovelyambition

instagram: @alovelyambition

Contact Me!: alovelyambition@gmail.com

xoxo,

Pres

alovelyambition

July Favorites!

Hello Lovelies!

Today I decided to share the products that have been my favorite throughout the month of july. July has been a busy month, making it easy for me to choose the products that have been my favorites. ALSO– I’ve started instagram and twitter accounts for my blog. Both are @alovelyambition  .

CORRESPONDING VIDEO:http://youtu.be/ZDdBL0QvCzE

First, I’ve been OBSESSED with the L’Oreal Magic Nude Liquid Powder Foundation.

Image

This stuff really is a liquid powder. It goes on like a liquid, then when rubbing it in, it transforms to a powder. It’s very light and natural looking, which makes it perfect for summer!   $12.99, Your Local Drugstore.

I’ve finally found my eyebrow holy grail products. The Anastasia brow wiz (pencil), powder, and gel.

ImageImageImage

The pencil- It’s hard texture allows for a soft and natural line when filling in the brows. The range of colors suit any hair color.

Powder- This brow powder is perfect for filling in bare spaces, with two colors to allow a natural look.

Gel- put this baby on your brows and they WILL NOT BUDGE. They don’t look “crunchy” either. SO SO AWESOME.

My blush favorite has been MAC’s blush in FEVER.

Image

This is a deep berry-wine red color that looks quite intimidating. When it is applied, however, it gives the natural “blushing” look. It is matte as well, which gives the most natural look. LOVE LOVE LOVE.

In my opinion, highlighter is essential for a summer glow. My favorite has been the Hourglass Ambient Lights Highlighting Face Powder in Luminous Light.

Image

I love this stuff. It is a pink-gold color with just enough shimmer to give you a natural summer glow. So So pretty.

EYESHADOWWW! Because I’ve been traveling around quite frequently, I’ve been using an Urban Decay Palette that allows you to pop your eyeshadows in the palette. My essential Colors:

Broken: Matte cream shade for browbone highlighting. I prefer a matte highlighter because shimmer on the browbone can be a bit too much sometimes.

Unknown-3

Zephyr: My go-to bright white inner corner color. All time favorite for me. images-3

Beware- Matte brown mid-tone or blending shade.

Unknown-4

Easy Baked- Beautiful gold for my lid color. Not too yellow, not too ashy. The perfect gold.

Unknown-5

Roach- Flattering red toned brown shimmery crease color. Another one of my all time favorites.

images-4

Now for eyeliner. I’ve been loving the Rimmel Gel Eyeliner in black.Unknown-6images-5

This is a rich, creamy, super pigmented black liner that isn’t as harsh as a liquid. This stuff is amazing.

The fragrance I have been loving CONSTANTLY and especially this month, is my go-to, Bath and Body Works Vanilla Bean Noel.

images-6

When Christmas comes around, I stock up on the entire line to last me a year. This is my absolute favorite smell, perfect for any time of year.

Last but not least, a product to save burns in uncomfortable places: Run Guard, or, as my cousin Alyssa calls it…. CHUB RUB.

Unknown-7

Especially at the beach, you put this in between your thighs to stop that uncomfortable rubbing! This is serious stuff… AND IT WORKS!!!

And those are my July favorites! Thank you SO SO SO much for reading. Comment and tell me if you have any of these products and love them as much as I do! Don’t forget to follow me on twitter and instagram (@alovelyambition) for updates!

xoxo,

Pres

alovelyambition

Contact Me!

alovelyambition@gmail.com

Twitter and Instagram: @alovelyambition

A Lovely Creation: DIY T-shirt!

Hello lovelies!

Today I decided to show you how I took an ordinary tshirt and turned it intoa unique creation.

ImageImage

This design is SO simple, and NO SEWING REQUIRED! I had a blast making this, so let’s jump right in.


CORRESPONDING VIDEO: http://youtu.be/Al7_wPxiYDM

SUPPLIES NEEDED:

1 t-shirt in any color (preferably V-neck)

scissors

pencil or chalk

Brads (yes, the office supply.)

Stick on rhinestones (optional)

ruler or book

Okay, to begin, I took a plain black V-neck t-shirt. Any color will do, I just chose black.

Image

I’m going to take my straight-edge object, I’m using a book, and my white colored pencil. I’m going to make a line connecting the bottom of the V, straight across to the arm seam. You want this line to be as straight as possible. I’m showing you one side, but just repeat the process for the opposite side.

Image

You just want to continue that line from arm seam to arm seam.

Image

Next, starting about an inch and a half from the end of the V, you want to make 10 vertical lines from the line we just drew, to the shoulder seam.

ImageImage

Now it’s cutting time. Take your scissors and cut ONLY THE VERTICAL LINES. This is going to give you 9 strips of fabric.

ImageImageImage

Now, starting from the bottom of the V counting outward, I’m going to cut the 5th and 8th pieces of fabric, making more room for the design.

Image

Now, I’ve rolled up a blue towel and placed it inside the shirt so I can see the design better.

Also, you should have some extra fabric beside the seam of the shirt. Go ahead and make that another strip.

Image

I’m now going to paper clip the design in the pieces of fabric.

Image

Here is the design with paper clips.

Image

Time to replace those paperclips with brads. When I place the brad, I’m actually going to twist the back, pushing the ends outward.

ImageImage

Image

Just repeat the process for all of the paperclips.

Image

Now I’m going to place a stick-on rhinestone on the top of each brad.

Image

Image

Repeat the process on the other side of the shirt.

TA-DA!!

Image

All done!

Image

I hop you try this design out and love it as much as I do!!

Thanks for reading!

xoxo,

Pres

alovelyambition